Beautiful painting of walls with water-based paint. Features of painting walls with water-based paint: description of the process with photos and videos
Any finishing work require thorough preparation and a good supply of time. If you decide to paint the walls of at least one room yourself, you need to put off all current affairs and problems for a day or two and feel free to start decorating the walls. The painting process is not complicated, but requires a certain skill in the work. Moreover, when general idea how to paint walls water-based paint, be prepared for the fact that results in practice may differ significantly from theory and advice.
How to paint walls
The lighter and thinner the paint layer on the wall, the more carefully you need to lay the paint on the surface. In theory, two main methods can be used for painting:
- With a spray gun. Operating at low air pressure, for example from a vacuum cleaner. In this way, wood is treated with an antiseptic, applied lime whitewash, but before starting work you will need a little practice;
- Roller and brushes. This tool can be used to paint everything from steamboats to ceilings, but first you need to decide which roller to paint the walls and practice using it on an inconspicuous surface, like behind a cabinet.
Important! When it comes to how to paint walls correctly, trust your hands and eyes more and do not blindly follow instructions and advice.
How to paint with water-based paint
Surely you have a regular one at home household vacuum cleaner. The first of these methods will allow you to cover the walls with water-based paint without streaks. The speed is about the same as when working with a roller, but working with a spray gun requires a steady hand and an accurate eye. If you have problems with at least one of these conditions, all that remains is to paint the walls with a roller.

We buy paint and a roller
In addition to a bucket of water-based paint, we will need:
- Masking tape;
- Hard and soft brushes with plastic bristles;
- Two or three large foam sponges, preferably hard and dense;
- A couple of sheets of sandpaper;
- Two rollers with bristles of medium hardness and length;
- Spatula;
- A roll of polyethylene film half a meter wide;
- Two replaceable handles for the roller, one meter and one and a half meters long;
- Paint tray;
- Acrylic primer at the rate of 200 ml per 1 m2 of wall.
Any painting is not complete without stains, blobs, and blots, so you will need a couple more dry, clean rags, as well as work clothes and comfortable shoes.

Preparing for painting
Before work, we will need to prepare the wall surface, prime it with an acrylic primer, and only start painting the next day. One pass of a room with an area of 20 m2 can be painted in about 6 hours of work, so you need to choose clothes for work that are comfortable and do not cause discomfort when moving.

When preparing the walls, we carefully inspect all cracks, chips, and defects in the plaster, and if necessary, repair them using a spatula and finishing putty. If the number of defects is significant, postpone the painting process for at least three days so that the repaired areas can dry thoroughly.
Before starting priming, use a brush and a damp sponge to remove dirt from the wall. While the wall dries, lay it on the floor under the wall. plastic film and fix it with tape. This will reduce contamination of the floor and shoes.

It is usually recommended to paint walls with water-based paint when closed windows and doors. In reality, after just an hour of applying liquid water-based paint to the walls, the atmosphere in the room becomes very stuffy and humid. If it's not on the street strong wind, you can open the window for ventilation when closed door. A slight draft will improve working conditions.
We wipe the repaired and cleaned areas of plaster again with a slightly moistened sponge. Despite the preliminary priming, which partially binds dust, you need to try to remove the maximum amount of dirt from the wall: lumps, dust, whitewash residues, glue. If there are areas painted with oil or alkyd paint, they must be cleaned until complete removal old covering.
To prime a wall for painting with water-based paint, pour the primer into a tray and carefully apply it vertically and horizontal stripes. On average, this work will take one and a half to two hours. After about an hour, when the water from the applied primer has been absorbed into the wall, the remains of the primer that has not been absorbed will appear on the surface. They can be removed using a wide spatula.

We wash the tray and prepare it for use with water-based paint. Before applying paint to the wall, it must be “lifted” by vigorous stirring, first with a spatula, after the mixture becomes more or less homogeneous, it is stirred for another 4-5 minutes with a nozzle installed in an electric drill with adjustable speed. While mixing, add a small amount of water, focusing on the consistency of the water-based paint. As a result, we should get a liquid that resembles very fatty and thick milk in shape and color.
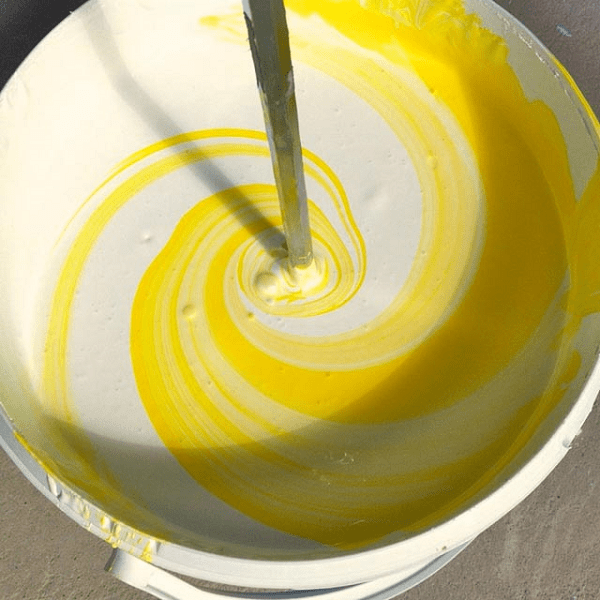
If necessary, you can tint the water-based paint, that is, add dye and mix. According to science, the process is performed as follows: a small amount (about 0.5 liters) of water-based paint is selected, and toner is added in small portions to obtain the desired color. After this, add the resulting mixture to the main container and mix thoroughly.
Paint the walls with water-based paint
We start painting from the corner to the right of the window, moving along the wall towards the door, and then from the door to the window, thereby describing the perimeter of the room. Often the walls around the window are painted in a lighter tone than the main surface. In order to apply a layer of water-based paint well and evenly in the corners, this part of the wall has to be painted with a brush, since the roller does not allow the corner to be worked evenly.

Pour the prepared water-based paint into the tray and roll it with a roller 5-6 times to saturate it with liquid. Before applying to the wall, lightly squeeze and begin painting. To paint walls with high quality, it is necessary to sequentially pass sections of the wall 3-4 roller lengths wide, evenly rolling the paint with vertical and horizontal movements along the entire height of the section, from ceiling to floor.
To avoid drips, before painting the wall, be sure to wring out the roller on the tray. Painting with a “dry” roller is a little more difficult and takes longer, but you will not have blots and smudges from excess water-based paint.
During work, approximately every 3 meters of the treated wall surface, before continuing to paint, it is advisable to rinse the roller under running water clean water. This procedure will free the working surface of the roller from dirt and dust collected on the wall.

Do not try to paint the walls with the maximum permissible layer at one time. It is considered more competent to paint the walls with water-based paint in at least two layers. If there are dark contrasting stains on the primed plaster that can show through the layer of water-based paint, it may be necessary to paint over and clean the stained areas several times before the main application.
How not to paint walls
Firstly, you should not use high temperatures to dry a painted surface. The acrylic base will be deformed, swell, and in order to paint the walls again, you will need to do a lot of work to remove the old paint and clean up defective areas.
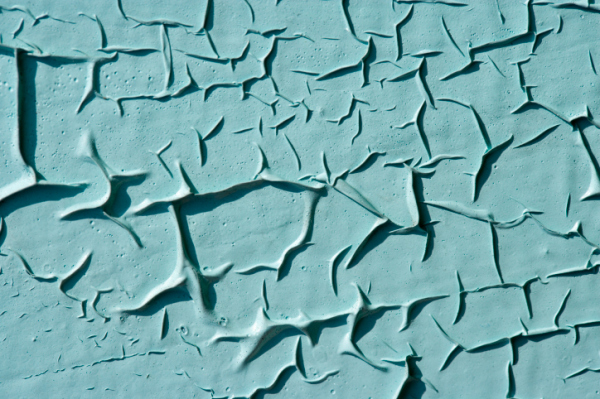
Secondly, you cannot dry walls painted with water-based paint when open windows, doors. This procedure speeds up drying, but the paint dries extremely unevenly, and due to dust settling on the wet surface, the wall can turn from evenly painted to spotty.
When choosing ceiling decoration Painting is often preferred. This is a simple process that you can do yourself. Ideal option can be called painting walls and ceilings with water-based paint. Due to its composition, the material is safe to use and can even be used in children's rooms. We will talk about the types of water-based emulsion and methods of coloring in this article.
Water-based paint for walls and ceilings
Painting compositions based on water emulsion are distinguished by purpose, cost and composition. Water-based paint for walls and ceilings can be:
- acrylic water emulsion. This type of coating can be used in any room. Water-based acrylic composition It has properties such as wear resistance and moisture resistance. This is the most popular type among water-based emulsions;
- water-based composition with additives from liquid glass . The coloring material is used for finishing plastered and concrete surfaces;
- polyvinyl acetate water emulsion considered the cheapest coloring materials. This variety can only be applied in dry rooms. Wet cleaning of the coating is excluded;
- silicone water-based finishing. The composition is used for plastered surfaces, without any preparatory work. Silicone paint composition can protect walls or ceilings from mold and other microorganisms. You can paint kitchen surfaces and use them in bathrooms, due to good vapor permeability;
- acrylic latex water emulsion refers to the most expensive finishing compositions. In the process of painting ceilings and walls, it gives a beautiful, smooth surface. At small cracks on the surface (up to 1 mm), makes defects invisible. The latex-coated ceiling can be washed using gentle detergents.
High-quality painting of walls and ceilings with a coloring composition depends on the competent choice of the coloring composition.
Choosing a water emulsion
To select a water-based composition, you need to read the product description. Thus, it is not difficult to calculate the consumption of water-based paint for the ceiling per 1 m2. For example, if one level of finish is to be applied, 200 ml of finishing material will be needed. Material consumption depends on the type of working surface and the absorption of the coloring composition.
It is important to pay attention to special water-based compositions for ceilings. The material has good adhesion and does not drip during painting.
Water emulsion can be:
- matte;
- glossy;
- semi-matte;
- semi-gloss.
Thus, a matte composition on the surface can visually increase the height of the ceiling, while simultaneously hiding small surface defects. But, caring for a matte ceiling is difficult.

Caring for a ceiling painted with glossy water-based paint is easier. But, on such a ceiling the most minor defects and irregularities will be noticeable.
The optimal choice is a semi-matte or semi-gloss water-based emulsion.
Purchase water-based finishing better in construction stores with a normal microclimate. At low temperatures the texture of the coloring composition is damaged and cannot be restored.
When choosing, you also need to pay attention to the following characteristics of the water-based composition:
- drying time of the facing composition. The standard time during which the paint dries is in a fairly long range - from 2.5 hours to a day. How quickly the paint dries depends on the temperature and humidity of the room, and the temperature and structure of the working surface;
- paint viscosity. This parameter indicates the degree of dilution coloring material water. If the coating is applied by roller or brush, the viscosity of the composition should be 45 or 50 Stokes. If a spray bottle is used, the viscosity can be no more than 20 to 25 Stokes;
- best before date usually 2 years from the date of manufacture if the product has been stored correctly. The water-based emulsion should not be stored at sub-zero temperatures, but the coloring composition should not be allowed to overheat.
When purchasing paint, you need to pay attention to the rooms in which the composition is intended to work. There are special water emulsions for rooms with high humidity, or for working in rooms with a dry microclimate.

If you need paint for the bathroom or kitchen, it is better to choose an emulsion containing antiseptic components. This composition can be applied without prior priming the surface.
Having chosen the best option, all that remains is to find out how to paint the ceilings with a paint emulsion with your own hands.
What to apply?
Before you start painting, you need to decide how to apply water-based paint to the ceiling. There are three options:
- brush;
- roller for painting;
- spray.
At home, we paint the ceiling with water-based paint without streaks, using a paint roller. If you use a brush, visible paint strokes will remain on the surface. The brush is used only for applying water emulsion in hard-to-reach places.

Not every roller is suitable for painting using water-based paint. You need to select a roller with medium length pile. A tool with a short fur coat absorbs too little coloring composition. As a result, you will have to dip the roller in paint frequently. A roller with a long coat, on the contrary, takes up an excessive amount of paint, which makes the tool heavier and inconvenient to work with.
When choosing a roller, you need to pay attention to how tightly the fur coat is held. To do this, you need to firmly squeeze the pile and release it. Roller pile good quality should not deform after compression. The pile should be inspected for visible seams that could leave streaks on the ceiling when painted. The pile should not leave marks on the ceiling during painting.
Sprayers for water-based materials are used in industrial scale, in large rooms.
How to whitewash a ceiling with water-based emulsion?
Once you have decided on the choice of paint, you can begin painting the surface. To whiten the ceiling with water-based emulsion, you must perform the following mandatory steps:
- remove old ceiling covering;
- prepare the ceiling surface for painting;
- if necessary, level the working surface and eliminate existing defects;
- painting the prepared ceiling surface.
Let's take a closer look at how to paint the ceiling with a coloring agent yourself step by step.
Getting rid of the old ceiling covering
If you do not remove the old coating, it will be impossible to apply a new one in an even layer, and in any case it will begin to crumble over time.
Work to remove the old coating is carried out wearing protective gloves and a respirator.
Delete old layer paint using a special remover as follows:
- before starting preparatory work, you need to open the windows;
- apply a layer of remover and wait until the old coating begins to bubble;
- when the entire coating is cracked, it is removed with a spatula using gentle movements;
- if the first time it is not possible to remove the entire old layer of paint, then you need to use the remover again;
- After removing the old coating, the entire ceiling is sanded with sandpaper.

If the ceiling has been whitewashed, then the whitewash must be removed before painting with water-based paint. Whitewash is easily removed if the surface is thoroughly moistened. You can use a roller for this purpose. When removing whitewash, you need to change the water several times. After saturating the ceiling with moisture, the whitewash can be easily removed.
Preparing the surface for painting
After removing the old coating from the ceiling, the entire surface is thoroughly washed to get rid of greasy stains and other contaminants. First the ceiling is washed detergent, diluted with water, then simply rinse with clean water.
It is possible that after washing old decoration, defects have formed on the ceiling surface. They need to be eliminated, but only after the ceiling surface has completely dried. Gaps and cracks are covered with a putty layer. First, the cracks are widened with a spatula, cleaned, and a putty level is applied.

When the plastered surface has dried, the treated areas are sanded with sandpaper. Dust must be removed with a wet sponge, then a primer coat must be applied. The primer is needed for better adhesion of the paint to the working coating, and as a protective layer against mold and other microorganisms. Thanks to the primer layer, the costs of water-based paint are significantly reduced.
Primer levels are applied using a roller. It is better to take a short-haired tool to avoid ceiling stains. The second primer level is applied only after the previous one has dried. The primer is applied in different directions.
Coloring
You can see how to paint the ceiling with water-based paint yourself in the video below. Before performing painting work, it is necessary to dilute the material, bringing the composition to the desired consistency.

Typically, the water emulsion has a thick consistency. With this composition you can create relief compositions, but for coloring it is better to dilute the emulsion. Water is added to the material in small portions so as not to spoil the quality of the emulsion.
You can create different color shades yourself by mixing materials different colors. For this purpose, any color you like is mixed with white paint and brought to the desired consistency. When adding color, you need to thoroughly mix the composition until smooth.
Painting the ceiling with water-based paint is carried out in the following order:
- dilute the paint with water. To apply the first layer of emulsion to the ceiling, more water is added;
- diluted water emulsion is poured into a special tray for painting work in a small amount;
- First, water-based paint is applied in the corners using a brush. Brushes are also used for painting along the walls;
- then the roller is lowered into a container with a dye composition and rolled several times for better absorption of the dye into the fur coat;
- you need to start painting with a roller from the window opening, making movements across natural light;
- after applying the finishing level with water-based paint, excess composition is removed with a dry roller;
- you need to wait until the first level of paint has completely dried, and then paint it a second time. A second layer is applied along the direction of natural light.
Important: The second layer of emulsion is applied with a clean, new roller. Only if you follow this rule will you be able to get a smooth, beautiful ceiling.

It happens that after the second layer of paint has dried, irregularities are discovered on the ceiling. In this case, the ceiling is sanded with fine-grained sandpaper.
Usually two layers of water-based paint are applied to the ceiling. But, if two layers are not enough, then you can paint it a third time.
Painting the ceiling with water-based emulsion using a sprayer
Familiarize yourself with the method of applying water-based paint using a spray gun. Actions are performed in the following sequence:
- When diluting the emulsion with water, you need to make sure that there are no lumps in the composition. Lumps may clog the sprayer;
- Before spraying paint onto the desired surface, try the action of the tool by directing the stream away from the ceiling. In the first seconds, the sprayer can throw out a saturated portion of paint;
- You can apply water-based emulsion only when you are sure that the stream is uniform;
- the coloring emulsion is applied at a distance of 30 to 50 cm;
- the approximate speed of paint spraying is 5 s per 1 m. Important: the jet is directed so that an angle of 90 degrees is maintained.

To uniformly coat the ceiling with a water-based paint composition, you need to mentally divide the working surface into squares. Each such square must be painted one at a time. The first layers are applied transversely, then longitudinally.
Working with a sprayer, make three levels of water emulsion. Each level is sprayed only when the previous one has dried.
When choosing a method of finishing with water-based emulsion on the ceiling, and during painting work, you must adhere to the following recommendations:
- If the ceiling was plastered in preparation for painting, then it is better to use a spray gun to apply the paint. This way it will be possible to avoid streaks on the ceiling surface;
- If the ceiling is plasterboard, then you need to dilute the paint with water very carefully. Paint liberally diluted with water can soak the drywall layer. As a result, additional repair work will be required;
- When applying the water-based emulsion, it is important to follow the direction of application of the composition indicated in the instructions. If you do not follow this rule, then individual areas will appear on the ceiling that differ in color and structure from the general coating;
- After completion of work, defects may appear on the ceiling. Don't panic and immediately repaint the ceiling. Allow time for the surface to dry completely. If, after the paint has dried, the defects still remain noticeable, then this layer of coating will have to be removed with sandpaper. Then a new layer of water-based emulsion is applied.
Water emulsion can be used to cover the ceiling in a children's room. The paint composition is absolutely safe and non-toxic.

Water-based emulsion is also used in emergency situations when urgent repairs are necessary. For example, you urgently need to paint the ceiling in a room where the strong smell of the paint composition is unacceptable. The water-based composition will be simply a salvation, because solvents are not needed to thin the paint.
Aqueous emulsions are popular due to the fact that additional expensive materials with tools. Another advantage of using emulsion is a fairly simple finishing method. Working with paint does not require any special skills. You can do the painting work yourself using the simplest painting tools. The main thing is to comply phased implementation staining.
Important: before painting work The old coating must be removed. The coating will also be removed if old paint or the whitewash does not fly around. Only on the prepared ceiling can a fresh water-based composition be applied.
Water-based paint has long been one of the most used materials for any repair. This is not surprising, since “water emulsion” compared to others finishing materials has a lot of advantages: it is completely harmless and has no pungent odor, dries very quickly, and by mixing different paints, you can get almost any color and shade. In addition, it is very economical, and the technology for painting surfaces with such paint is quite simple and does not require special tools and skills. Of course, it is still necessary to have certain knowledge. So how to properly paint walls with water-based paint?
Features of water-based paint
Water-based paints differ not only in color, but also in properties and chemical compositionDepending on the components included, water-based paints are divided into the following main groups: silicate, mineral, polyvinyl acetate, acrylic and silicone. Let's look at each of them in more detail.
Silicate paint
The composition of such paints includes fastening agents based on liquid glass. Silicate paint is one of the most durable: the painted surface can remain attractive appearance for ten or more years.
Silicate paint contains alkalis, so when working with it, it is imperative to observe safety regulations and strictly follow the manufacturer's instructions.
Mineral paint
This is a paint based on cement and slaked lime. Excellent for painting untreated concrete and brick surfaces. Work with mineral paint can be carried out even in rooms with high humidity levels.
Polyvinyl acetate paint
This emulsion can be diluted with water and worked with it in unventilated areas. Another advantage is that after drying, a film forms on its surface that is resistant not only to the penetration of moisture, but also to more aggressive liquids, such as oils. Therefore, this type of paint is often used in production premises.
 The most popular paint among water-based paints is acrylic.
 Probably the most popular of water-based paints. It is produced on the basis of acrylic and latex resins and is very different high quality and durability. However, it is worth noting that the cost of acrylic paints is the highest.
Silicone paint
This paint is based on a water dispersion of resins. The paint has an excellent moisture- and vapor-repellent effect and can be used to paint almost any surface, with the exception of reinforced concrete.
Silicone paint combines perfectly with any other types of paints, which is also an important advantage.
Preparatory work
When using water-based paints, preparatory work is very important stage, on which the quality of the final result will depend by almost 50%.
Required tools and materials
To prepare the surface of the walls and ceiling for painting, you will need the following materials and tools:
- dry or ready-made putty;
 Putty can be sold both dry and ready-made.
 If the walls only have minor defects, you can get by with finishing putty. Otherwise, a starting one will be required for preparatory work.
 Without this set of tools, it will not be possible to properly prepare walls for painting.
 - set of spatulas;
- container for preparing the solution;
- drill or screwdriver with drill function;
- construction mixer;
- level;
- primer;
- roller or brush for applying primer;
- plaster mesh or sandpaper;
- plastic film or wrapping paper;
- scotch.
Preparing the premises
Before starting preparatory work, the room in which painting will be done must be prepared in a certain way.
Ideally, you need to completely empty the room of furniture. But if this is not possible (for example, there is a closet in the room that needs to be dismantled), then you should carefully cover the remaining items with film or paper. It is also recommended to cover the floors of the room, not only near the wall that will be painted, but also in the place where the putty solution is prepared and the paint is mixed.
If possible, it is better to cover the floor completely.
Surface preparation
If the walls or ceiling have virtually no visual defects (this situation is most often found in “new buildings”), then as preparation it will be sufficient to thoroughly clean them of dust and dirt - for this purpose you can use a vacuum cleaner with a special attachment - and rinse with water. After the surface has completely dried, a layer of primer is applied to it, after which it has dried, you can proceed directly to painting.
If you are going to paint old walls that already had some kind of coating on them before, then the amount of preparatory work will be somewhat larger.
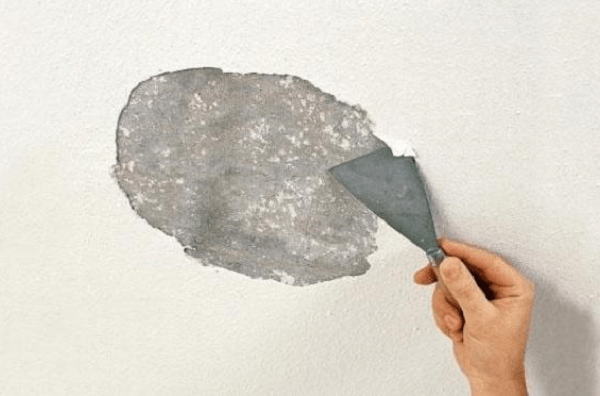
First of all, you need to completely remove the remains of the previous coating from the walls.
 Remove the old coating using a spatula
 After this, the remaining dust is removed and the wall is covered with a layer of primer for putty.
 Prime the walls with a roller
 If not the entire surface of the wall needs leveling, then to save material, only the “working areas” can be primed.
When the primer has dried, apply the first layer of putty.
 Level the wall using putty
 Depending on the condition of the walls, it can become either the finishing layer (and the only one) or the starting layer, which after processing will be covered with another layer of putty.
 Eliminate minor defects using a grout mesh
 And the final stage of preparing the walls for painting is to cover the putty surface with another layer of primer.
Considering that each layer needs to dry completely, full cycle wall preparation may take up to 72 hours.
Another option for preparing walls is to cover them with special paintable wallpaper. In this case, of course, there is no need to apply the final layer of primer.
Preparing the paint
If you are satisfied with the color of the purchased paint, then before applying it to the walls it will be enough to just mix it thoroughly, lifting all the clumps from the bottom of the container. This can be done construction mixer, but you can get by with any plastic or wooden slats.
If the paint is too thick, it can be thinned a little with water.
If you are going to create a combined color, then in this case the paint will have to be mixed, adhering to a certain technology.
 By mixing paints you can get almost any shade
 First, determine which paint will be the main one and add the rest of the colors to it. Secondly, keep in mind that the final color of the paint will “appear” only after it has been completely mixed, so do not rush to add one or another component if the solution seems not saturated enough for you. Thirdly, after each mixing of the paint with a mixer, be sure to wait until the foam completely disappears. And lastly, prepare enough paint at once to paint the entire surface. It will no longer be possible to reproduce the exact shade obtained!
Painting technologies
Let's consider the question of how to apply water-based paint. This can be done in three main ways: with a spray gun, a brush and a roller.
 Three Basic Painting Tools
  The easiest way to apply 'water emulsion' to walls
 One of the simplest and quick ways painting. For it you will need a roller with replaceable attachments (it is better to use a bristled one, not a foam one), a brush for painting hard-to-reach places and a paint ditch.
If you have to paint the ceiling or high walls, it is better to purchase a roller with a telescopic handle.
Pour some paint into the cuvette and wet the roller well. Excess paint is removed by rolling a roller along the corrugated edge of the cuvette. After this, from the corner of the room, begin to apply paint with a roller to the surface of the wall. This needs to be done from top to bottom. When the paint on the roller runs out, it must be re-wetted in the ditch. Each subsequent layer should slightly overlap the previous one.
 Each subsequent layer of paint should be perpendicular to the previous one
 If you are painting putty walls, you will need to apply three coats of paint. In this case, the first and third layers are applied vertically, and the second – horizontally. This way, you will be able to evenly cover the entire surface of the wall with paint and avoid streaks and tone changes. If you paint wallpaper, then two layers will be enough: the first horizontal and the second vertical.
Corners and hard-to-reach places are painted with a brush.
 The ‘classic’ brush is also suitable for applying ‘water emulsion’
 The brush can be used not only as an auxiliary element when working with a roller, but also as the main tool.
Pour the paint into a container (with this technology it is not necessary to use a ditch) and immerse a brush, the width of which should be at least 100 millimeters, into the paint for about a third of the length of the bristles. Excess paint can be removed by brushing along the edge of the container.
When removing paint residue, do not press too hard as this may cause spattering and remove too much paint. large quantity paints.
We start painting from top to bottom, in small strokes, periodically changing their direction. When applying each subsequent layer, the alternation of the direction of the strokes should be changed so that they overlap each other perpendicularly.
Try to apply a coat of paint to the entire wall in one go, as otherwise changes in tone may be noticeable.
 Using a spray gun, you can get an almost perfect surface
 The spray gun is classified as a professional painting tool. With its help, you can achieve almost perfect paint application, without streaks or drips.
There are several models of spray guns, but the principle of working with them is approximately the same.
Pour into the tank of the device required quantity paints. Make a “blank shot” on paper prepared in advance. This is done in order to clean the nozzle of excess paint that may remain on the wall in the form of drips. When the paint begins to spray evenly, begin painting the surface.
The spray gun should be held perpendicular to the wall to be painted at a distance of 30–50 centimeters. Move the spray gun with smooth rotational movements, evenly covering the wall with paint. After the first layer has dried, the procedure is repeated until a smooth, uniform color is formed.
Decorative painting
Using water-based paint, you can also create beautiful and unusual patterns and even real paintings on surfaces. To do this, you can use the following technologies:
 Using a figured roller you can apply both abstract textures and patterns.
 There are various rollers that allow you to get interesting textured painting and even apply original patterns to walls. Working with them is practically no different from working with a regular roller. Naturally, decorative painting begin only after the base layer of paint has completely dried.
Painting with masking tape
 Using tape you can create the right geometric patterns
 If you want to apply the correct geometric patterns to the walls, then you can use special masking tape for this. It is glued to the drawing applied to the wall and after that the required area is painted over. Thanks to the tape, the paint does not fall beyond the boundaries of the pattern, forming an even straight line at the joints.
Painting with stencil
You can make a stencil yourself, but it’s better to use ready-made forms with drawings that are sold in construction supermarkets. The procedure for using stencils and the required paint colors for each layer can be found in the instructions included with them. Paint is applied to the stencil using a foam swab.
The swab should not be pressed very hard against the surface, as otherwise paint drips may get under the stencil.
Video: an unusual method of painting with a texture roller
Applying water-based paint to problem surfaces
We have dealt with painting prepared surfaces, but there are situations when the smooth surface of the wall, which does not require leveling, is already covered with whitewash, paint or wallpaper. We will consider further what to do in such situations.
Wallpaper
Despite the fact that there is wallpaper that can be painted, it is strictly not recommended to apply water-based emulsion to ordinary, even perfectly glued wallpaper. Plain paper will definitely get wet from the paint, which will lead to wrinkling of the surface and the formation of “pellets”. Thus, old wallpaper must be removed from the wall. After this, the surface is prepared for painting using the technology described above.
Whitewash
No matter how smooth the wall may look with whitewash (no matter chalk or lime), it will have to be washed off before painting. This is due to the fact that it may begin to crack and bubble, and even if this does not happen, then after a year or two it will begin to peel off the walls along with the paint. So if you don’t want to repaint the walls once a year, then it’s better to wash off the whitewash and prepare the walls.
Drywall
Plasterboard walls are smooth and do not seem to require additional putty. This is true if you are going to cover them with wallpaper. But if you want to paint drywall with water-based paint, then a layer of finishing putty will have to be applied to the entire surface.
The fact is that putty at joints and more dark color drywall will give a different shade to the “water emulsion”. And even painting 2-3 layers will not fix this.
Oil paint
The only coating that can not be washed off is oil paint, of course, provided that it itself has not begun to lag behind the walls. It is enough to clean such a surface with fine sandpaper, wash it thoroughly and cover it with a layer of primer. After which you can safely apply “water emulsion” to it.
As you can see, painting a surface with water-based paint is not as difficult as it might seem at first glance. It is quite possible to do this work with your own hands, and even the first experience of such work can give excellent results. Good luck with your renovation!
If you have to paint walls with water-based paint, the design, photos, ideas and videos from our article will help you understand the intricacies of this process and do everything yourself. On the one hand, everything is simpler than it seems, but only if you are well prepared.
Choosing a water-based emulsion for walls
The composition of water-based paints varies. Some are intended only for indoor use, and even then they are unstable, and walls painted with them quickly lose their attractive appearance. Others are intended for outdoor use and, after painting, walls can maintain the desired quality for years. In this regard, the choice of colors is determined by what is expected of it.

Water is used as the basis for any water-based emulsion. The substance consists of polymer or mineral particles. When dyeing, water evaporates, and these particles are able to form a film. Similar coloring compositions can be as follows:
- Mineral water emulsion . Their manufacturing technology requires the presence of lime or white cement. A good property is excellent adhesion to almost any surface. But the fact that they burn out quickly can be considered a disadvantage. They are easily damaged, and when touched they can be wiped off. Their price is low, but they are still not very popular.
- Silicate paint . The composition of such paints is characterized by the presence of liquid glass. It is this that gives such compositions special resistance to external factors. At the same time, the wall acquires excellent vapor permeability and lasts for almost 10 years after painting.
- Acrylic based paint . The paint lies smoothly on the surface and is even capable of healing small cracks. It will hide such flaws if the wall preparation is not done well enough. If the paint does not contain additives, it is highly hygroscopic. By the way, because of this, you can only work with it in dry rooms. If latex is added to such paint, it acquires water-repellent properties. This makes it possible to use it in rooms with excess moisture. Its disadvantage is the low ability to transmit steam. In this case, the surface may become covered with condensation. The price for such paints is average and today they are considered to be the best of the entire range of products of this type.
- Silicone water emulsion . Such paints are new and similar products have appeared on the market quite recently. When painting, a fairly dense film is created. She has the ability to tighten deep cracks. On a positive note is that such paints are capable of transmitting steam. The disadvantages include their high cost.
Choosing the right composition is only half the battle. We still need to decide on the manufacturer. There are several options here. It is better to give preference famous brands. It's better to pay more than to repaint it later.
When making your choice, you should pay attention to indicators related to the volume and consumption of paint. The dimensional value of the flow rate is g/m2. It can differ significantly for different paints. For example, expensive paints have low consumption. By comparing the volume of the room with the volume and consumption of paint, it is not difficult to calculate how much of it will be needed.
Preparing the walls
Before starting work, the walls must be prepared. It is advisable to achieve a perfectly flat wall surface. The surface must be puttied or covered with wallpaper intended for painting. If the wall was previously painted oil paint or has whitewash, they cannot be coated with water-based emulsion. The surface is first cleaned.
Removing paint
To remove the old water-based emulsion, the wall should be wetted with hot water. This can be done using a roller. After 5 minutes, similar actions must be repeated. After the second pass, the coating usually begins to swell, after which it can be easily removed with a spatula. Some difficult areas are wetted again.
We fill in defects and putty
When working with water-based emulsions, you must immediately get rid of the idea that such paint will hide defects; on the contrary, it will only emphasize them. The only exception is silicone emulsion. It will still be able to hide small flaws on the surface of the walls. But it is better to prepare the wall as it should be.
First, the recesses and cracks are puttied. After this they are primed. Before puttying, the crack is artificially expanded and everything that can fall off in the future is removed. Then everything must be thoroughly cleaned and all irregularities smoothed out.
Padding
The choice of primer depends on what kind of paint will be used in the future. If acrylic paint is used, then you need to use an acrylic primer. The primer is applied with a roller.
Priming will ensure that the paint adheres better. In addition, the consumption of paint itself is reduced. The primer closes the pores, resulting in a reduced absorbent surface area.
Technology and rules of painting
IN basic version The color of the emulsion is white. It can be easily changed by adding a certain color. Currently, more than 200 shades can be obtained this way.
Tinting can be done directly in the store, where it will be done in a special machine, or you can buy the necessary pigment and do it yourself. The difference is that self-cooking is approximate and the color is determined “by eye”, and in the machine this is done using a special program.
The process of mixing paint with pigment is carried out in one go. In the future, preparing the same shade will be problematic, even for a car. Therefore, it is necessary to prepare the composition with some reserve.

If you choose the color yourself, then first the paint is diluted a little with water. Usually it initially has a thick consistency. Then color is gradually added to it in a thin stream. This can be done manually using a wooden spatula, but it is better to do it using a drill with a special attachment.
The tool should operate at very low speeds. Mix everything thoroughly until the desired shade is obtained. You can’t start painting right away. You have to wait a little - the foam should settle.
What is the best roller to use?
Rollers differ in the material used to make them.

- Foam rubber . The price for such products is insignificant. Their disadvantage is that they can absorb too much paint. As a result, bubbles may form on the walls. The wall will be rough after painting. It is better if there is a roller of the highest density. True, finding such a product on sale is not at all easy.
- Velours . Rare item. Velor has a slight ability to absorb, so when painting a wall it will have to be dipped into paint a little more often than rollers made from other materials. But the paint goes on very smoothly.
- Pile . Such a roller will the best option. The length of the pile affects the thickness of the paint layer. Often rollers are made from natural fur. Such products have a significant service life. A fluffy roller is best suited when working with wallpaper to be painted. But it is better not to use furry products, there is too much splashing.
Painting process
Before painting, the baseboards must be removed. If this is not the case, then masking tape should be placed on them. This fully applies to window sills and platbands. Masking tape will also be needed to mark the boundaries of painting on the wall. If the ceiling is already painted, then it would be a good idea to stick tape on it as well. Otherwise, it can simply get dirty.
There is one caveat here. The tape must be removed immediately after painting. Otherwise, the paint on it may dry out. If this happens, it will be very difficult to tear it off.
Paint is poured into a paint tray. The roller is equipped with a handle of sufficient length. This is necessary so that it is possible to paint right up to the ceiling. What to attach to the roller, everyone will decide for themselves. A wooden stick or plastic tube can serve as this.
To begin the painting process, select one of the corners. You will have to go through the corner itself not with a roller, but with a brush. Select one of the corners under the ceiling base. Then the roller is dipped into the paint composition, wrung out on the pallet platform and smoothly moved up and down the wall. The upper limit of painting will be the ceiling. At the same time, several step into the already painted areas. This technique eliminates the possibility of the formation of boundaries between the painted areas.
The time it takes for water-based paint to “set” is 10 - 15 minutes. Therefore, all work is carried out very quickly.
They begin to paint the second corner when there remains a distance the width of a roller to it. If painting the adjacent wall will be carried out immediately, then you can paint this corner as well.
If the walls were previously puttied, then the paint is applied in three layers. Each subsequent layer is started only when the previous layer is completely dry.

The drying time of the paint is usually indicated on the can and is usually from 2 to 4 hours. But if water-based emulsion is intended to be applied to wallpaper for painting, then one layer is sufficient.
Now you know how to paint walls with water-based paint. Design, photos, ideas and videos should help you decide on all the questions in order to do everything yourself, but if you have any doubts, feel free to ask in the comments.
Since water-based paint became widely available, painting walls has transformed from exhausting, unpleasant work into an easy and economical finishing method. A huge selection of manufacturers, affordable prices, the ability to choose the right color yourself, as well as the presence of textured rollers, will allow you to paint your home even for a person who has never held a brush in his hand. Moreover, after applying the water-based emulsion, the walls and ceiling acquire an attractive aesthetic appearance, which gives your apartment or house uniqueness and zest.
Since the original water-based paint is white, if necessary, you can order coloring services at any hardware store absolutely free. An employee will select the desired shade using the computer, and all you have to do is buy paint and a bottle of color. Diluting paint at home is quite easy. You need to select a small enamel container (most often a regular bowl is used for these purposes), pour a little paint into it, add color (you will get about 100 ml of solution), and then gradually add it to the main container with water emulsion, continuously stirring the paint with a mixer until obtain the desired shade.

Before you start painting directly, you need to properly prepare the walls.
It is necessary to thoroughly remove the old coating. If paint has already been applied to the wall, try to remove it with a sharp spatula, or at least make sure that it is firmly in place. A thick layer of deep penetrating primer is then applied to the wall and allowed to dry completely. This process will take you about 6 hours.

After priming, starting putty is applied to the wall to smooth out rough differences and defects. To prepare it correctly, you must follow the manufacturer's instructions, but usually the bulk solution is slowly diluted with water until you obtain a mixture with a consistency similar to paste or sour cream. After the starting putty has dried (about a day), the finishing putty is applied to the wall. Try not to make strong streaks and not exceed the thickness of the putty layer of 1-2 mm.

After 24 hours, which is the amount of time it takes for the putty to dry, all small irregularities and stains must be removed with abrasive paper.
At the end, a layer of primer mixture is again applied to the treated wall, and after it dries (5-6 hours), it is ready for painting.
Painting the walls
For painting you will need painting tool– roller, brush or sponge. A roller is used when painting large, flat areas; a brush is usually used to paint joints or areas adjacent to various subjects(plinth, radiator, etc.), and the sponge is used to add a decorative texture. Most often they are painted with a medium-length nap roller. You will also need a tray in which it is convenient to wet the roller and remove excess paint. Also, do not forget to pre-glue the baseboards, doors, windows and ceiling joints(if you are not going to paint the ceiling) with masking tape, since the water-based emulsion is quite difficult to remove after drying.

The paint itself is diluted with water to a milky consistency. Be sure to wait until the foam that forms when stirring with a mixer disappears. After this, you need to pour a small amount of paint into the tray and roll the roller in it so that its pile is completely saturated with it and does not leave streaks. You can roll the roller on a piece of old unwanted wallpaper or on a wooden sheet. Another important tip: before you start painting, if you are painting only a putty wall, you need to apply up to 3 layers of paint, but if the wall has wallpaper, you can get by with two layers. Just be careful when painting wallpaper, try not to let direct sunlight fall on it and protect yourself from drafts.

It is advisable to start painting from the least noticeable corner. First, paint the corner itself and 3 cm from it with a brush, since the roller may not completely cover this surface.
Then start painting the walls with a roller in wide strips up to 60-70 cm, directed towards the floor. Try to ensure that the joints of all subsequent strips do not touch, but slightly overlap each other. Usually the first and third layers are applied vertically, and the second horizontally. Each time you lower the roller into the paint container, do not forget to remove the excess. This way you will protect yourself from accidental splashes and unsightly streaks on the wall.

Try to paint at least 1 square meter at a time. surfaces. In general, it is better not to stop until at least one coat of paint has been applied. Otherwise, the painted part will begin to dry out and changes in shade will be noticeable.
To make the work easier, it is advisable to purchase a stepladder, because carelessly painting the joints with the ceiling can ruin all your efforts, but this is not a required attribute. Also make sure that the surface to be painted is well and evenly illuminated. In the evening, you can use a portable cartridge with an electric lamp, which does not heat up too much and is convenient to use.
Don't rush - it will take you about 4 hours for the first layer to dry completely, and almost 5-6 hours for the rest. Never use heating devices to speed up the drying process - the structure of the paint deteriorates sharply and it begins to warp and fall off!
Several ways to paint walls

If the walls of your home are covered with decorative plaster or other textured materials, to paint them you need to choose a roller with stiff bristles with medium or long pile so that it can paint the various recesses well. After applying the paint, very carefully use a sponge to finish painting all protruding surfaces. This method adds visual volume and achieves an incredibly beautiful effect.
You can add texture to the paint itself, because no matter how hard you try, after painting there are always small pimples left on the wall. By experimenting with the thickness of the paint, you can achieve a blurred design and its texture. Nowadays there are even special rollers on sale, with a ready-made pattern or flaps of leather.
You just need to immediately foresee that when painting walls with texture, the consumption of coloring material increases significantly.

Painting kitchen walls with water-based paint also has a number of features that are worth paying attention to. work surface It’s better not to try to paint over it, as no paint will withstand the impact high temperature and a couple. After applying the water-based emulsion, it is advisable to cover the rest of the surface with a special varnish, also on water based. Then your kitchen will remain in its original form for a long time, and the walls will be easy to clean with a regular damp cloth.
If you want to paint the walls in the bathroom, you need to immediately check the condition of your forced ventilation, since in its absence, the water-based emulsion will begin to fall off after a certain period of time. When painting, the bathtub must be reliably protected from the slightest draft, as well as from exposure to moisture and steam.
Of course, it’s better to see how a specialist does it once, so the video tutorial below will help you avoid gross mistakes, as well as compare your result with the work of professional painters.