Drainage of rainwater from the territory. Discharge of surface and ground waters
Experienced builders and suburban residents are well aware that "excess" water on the site is bad. Excess water leads to flooding of the basement and basement floor, leaching of the base, flooding of beds, waterlogging of the territory, etc. As a result, in spring, autumn and even summer, one cannot walk through a summer cottage without rubber boots.
In this article, we will consider:
- How to equip water drainage at the site.
- How to make a budget storm sewer with your own hands.
- Drainage device. How to make inexpensive drainage and drainage of a wetland.
What kind of water interferes with the life of the developer and suburban homeowner
A separate book can be written about the types of surface and ground water, as well as drainage and storm sewer systems. Therefore, we will leave beyond the scope of this article a detailed listing of the types and causes of the occurrence of groundwater, and concentrate on practice. But without a minimum of theoretical knowledge, to take up the independent arrangement of drainage and storm sewers - to throw money down the drain.
The fact is that even an improperly made drainage system functions for the first few years... Then, due to clogging (silting) of a pipe wrapped in geotextiles, which was placed in clay, loamy, etc. soil, drainage stops working. And the money for the arrangement of the drainage has already been spent and, most importantly, the construction of the drainage is associated with a large volume of earthworks with the involvement of equipment.

Therefore, it is difficult and costly to simply dig up and move the drainage pipe 3-5 years after its laying. The site has already been inhabited, landscaping has been done, a blind area has been equipped, a gazebo, a bathhouse, etc. have been installed.

We'll have to puzzle over how to redo the drainage so as not to turn the entire area around.

Hence - drainage construction should always be based on geological survey data(which will help to find a water-resistant layer in the form of clay at a depth of 1.5-2 m), hydrogeological surveys and clear knowledge of what kind of water leads to flooding of a house or waterlogging of a site.

Surface waters are seasonal in nature, associated with a period of snow melting and an abundance of rainfall. Groundwater is divided into three main groups:
- Capillary water.
- Ground water.
- Verkhovodka.
Moreover, if it is not taken away in time, surface water turns into underground water during infiltration (absorption) into the ground.
The volume of surface water usually exceeds the volume of groundwater.
Output: surface runoff must be removed by storm (rain) sewerage, rather than trying to do superficial drainage!

Storm sewage is a system consisting of trays, pipes or ditches, dug in the ground, leading out water from the gutters outside the site + competent organization of the relief on the backyard territory. This will avoid stagnant zones in the area (lenses, pools), where water will accumulate, which simply has nowhere to go, and further waterlogging.
The main mistakes that are made when installing the drainage yourself:
- Failure to comply with the correct slope of the laid drainage pipes. If we take the average, then the slope is maintained in the range from 0.005 to 0.007, i.e. 5-7 mm per 1 running meter of the drainage pipe.

- Using a drain pipe in geotextile winding on the "wrong" soil. To avoid siltation, a pipe in geotextiles is used on soils consisting of clean medium and coarse-grained sands.

- Using cheaper limestone crushed stone instead of granite, which is washed out over time with water.
- Saving on high-quality geotextiles, which must have certain hydraulic properties that affect the quality of drainage. This is an effective pore size of 175 microns, i.e. 0.175 mm, as well as transverse Kf, which should be at least 300 m / day (with a single pressure gradient).

Inexpensive storm sewer with your own hands
The first thing that comes to mind in order to equip a budget option for a storm sewer on a site is to lay special trays.

Trays can be made of concrete or plastic, but the price bites. This forces the users of our portal to look for cheaper options for arranging storm sewers and drainage systems from the site.

Denis1235 FORUMHOUSE member
I need to make an inexpensive downpour, about 48 m long, along the edge of the fence to drain melt water that comes from a neighbor. The water must be drained into a ditch. I thought about how to make a water drain. At first it occurred to me to buy and install special trays, but then “extra” gratings would remain from them, and I don't need a special aesthetics for a shower. I decided to buy asbestos-cement pipes and cut them lengthwise with a grinder, thereby obtaining a homemade tray.

Despite the budget of this idea, the need to cut the asbestos-cement pipes on their own did not attract the user. The second option is the ability to buy gutters (plastic or metal) and lay them on a prepared base in a layer of concrete about 100 mm.
Portal users dissuaded Denis1235 from this idea in favor of the first option, which is more durable.
Clinging to the idea of an inexpensive downpour, but not wanting to get involved with cutting pipes yourself, Denis1235 I found a plant that produces asbestos-cement pipes, where they will be immediately cut into pieces 2 m long (so that the 4-meter pipe does not crack during transportation) and ready-made trays will be brought to the site. It remains only to develop a scheme for stacking trays.
The result is the following "pie":
- Ground base in the form of a bed.
- A layer of sand or ASG with a thickness of about 5 cm.
- Concrete about 7 cm.
- Asbestos-cement pipe tray.

When arranging such a shower, do not forget to lay a metal mesh (for reinforcement) at the joints and leave a deformation gap (3-5 mm) between the trays.

Denis1235
As a result, I made a budget shower at the dacha. It took: 2 days for digging a trench, two more days for concreting and installation of the track. I spent 10 thousand rubles on trays.

Practice has shown that the track “wintered” well, did not crack and intercepts water from a neighbor, leaving the site dry. Also interesting is the option of rain (storm) sewage of the portal user with the nickname yury_by.

yury_by FORUMHOUSE Member
Because the crisis does not think to end, then I wondered how to arrange a storm sewer to divert rainwater from the house. I would like to solve the problem, and save money, and do everything efficiently.
After thinking, the user decided to make a storm drain for water drainage based on flexible double-walled corrugated pipes (they cost 2 times cheaper than "red" sewer pipes), which are used for laying power cables underground. But since the depth of the drainage route is planned to be only 200-300 mm with a pipe diameter of 110 mm, yury_by I was afraid that the corrugated pipe could break in winter when water gets between the two layers.

Eventually yury_by decided to take a budget "gray" pipe, which is used in the arrangement of the internal sewage system. Although he had fears that pipes that were not as rigid as the "red" ones would break in the ground, practice showed that nothing happened to them.

yury_by
If you step on the "gray" pipe, it turns into an oval, but in the place where I buried it, there are no significant loads. Only the lawn is laid and there is foot traffic. Having laid the pipe in a trench and sprinkled it with soil, I made sure that they keep their shape, and the downpour works.

The user liked the option of installing an inexpensive rainstorm based on "gray" sewer pipes so much that he decided to repeat it. All the nuances of the process are clearly demonstrated by the following photos.
Digging a hole to collect water.

Align the base to the level.
We install a concrete ring.

The next step is to fill the bottom of the well with gravel of fraction 5-20.

We cast a homemade well cover from concrete.


We paint the hatch cover.


We make a tie-in into the well of the drainage plastic "gray" sewer pipe, maintaining the slope of the route at 1 cm per 1 running meter.

We pour the pipe with a mixture of sand and water so that there are no voids between the walls of the trench and the pipe.

To prevent the pipe from floating, it can be pressed with a brick or a board.
We put the lid on, mount the hatch and fill everything with soil.

This completes the production of a budget shower.
Construction of inexpensive drainage and drainage of the wetland
Not everyone gets the "right" plots. In SNT or in new grooves, the land can be very swampy, or the developer has a peat bog. To build on such land a normal house for permanent residence, and not an easy summer cottage, is both difficult and expensive. There are two ways out of this situation - to sell / exchange the land or to drain and put the land in order.
In order not to engage in various expensive alterations in the future, users of our portal offer budget options for drainage and drainage of the territory based on car tires. This option allows you to save your family budget.

Yuri Podymakhin FORUMHOUSE participant
Peat soil is characterized by a high level of groundwater. On my site, the water is almost level with the surface, and after the rain it does not go into the ground. To drain the upper water, it must be thrown off the site. I did not spend money on the purchase of special pipes for drainage, but made drainage from car tires.

The system is mounted as follows - a ditch is dug, tires are placed in it, the tires are covered with polyethylene on top so that the ground does not fall inside from above. Polyethylene can also be additionally pressed with pieces of slate "unnecessary" in the household. This will increase the overall rigidity of the structure. Water enters the "tire" pipeline and is then discharged outside the site.


But there are also more “difficult” places where much more remains to be done.


Seryoga567 Member of FORUMHOUSE
I have a plot in SNT, with a total area of 8 acres. There is a building on the site, which I plan to complete and expand. The place is very low. Because drainage grooves for drainage in SNT they are in a deplorable state, where they are buried, littered or clogged, then the water does not go anywhere. The GWL is so high that you can draw water from the well with a bucket holding it by the handle. In the spring, the water at the dacha lasts a long time, the site actually turns into a swamp and, if it dries up, it is only in the summer in the very heat. Nobody wants to put the drainage ditches in order, so everyone swims. So I decided that it was useless to fight the neighbors. We need to raise our site and find a way to dispose of all the "unnecessary" water from the site.
The planning of plots for building and other needs must be carried out taking into account the effective removal of atmospheric precipitation using a drainage system, storm channels and drainage systems. Stagnant rainwater or melt water will contribute to deterioration of the coating and other negative consequences.
Why are surface waters dangerous?
Surface waters are formed from atmospheric precipitation: snow, rain, hail, etc. This moisture can cause trouble on the site (construction, summer cottage), starting from the elementary stagnation of water with an unpleasant odor and ending with the violation of the integrity of the foundations of nearby buildings. The troubles do not end there, also dampness can penetrate into buildings and provoke the spread of fungus, an increase in humidity. There is also a danger for sidewalks and road surfaces: cracking, severe icing, subsidence of the canvas. The root system of plants from excess precipitation can rot, the fertile layer will be washed out, and a violation of the thermal regime will create conditions for the expansion of moss and mold.
In order to avoid all these negative phenomena, an excellent surface water drainage system is needed.
This system is of two types:
- point;
- linear.
Also, the taps are also divided into open and closed. The second option is more used to drain precipitation of entire city blocks. Spot is the simplest, it is most often used with a small amount of moisture that falls out, which is collected in local modules (for example, water flowing down from roofs). The linear system is more complex and consists of many elements: gutters, flumes, ditches, wells, etc. Moisture is quickly collected from a large area and immediately directed to the central drainage collector.
Materials (edit)
The materials used are concrete, plastic and earth embankments, ditches and trenches as a temporary solution to the problem of precipitation. Elements of the surface water drainage system are installed at an angle, which contributes to the rapid collection and discharge of unnecessary moisture. If there is increased humidity on the site through underground waters, then the drainage system is designed in an integrated manner, taking into account atmospheric phenomena and the influence of underground sources. Often, with water, sand, dirt, debris can get into drainage channels and trays, and therefore special traps are installed. 
These devices do not allow the system to clog up and stop performing its direct functions. When drawing up a general design for the removal of surface water, a number of factors must be taken into account: the amount of precipitation, the territory of the site, the presence of groundwater, the level of humidity, and the slope.
A clean and dry yard after rain, no puddles on the lawn and washed out beds, healthy plants and perfectly flat paths are the result of competent planning and installation of surface drainage. It is difficult to achieve such a result on your own without impressive costs, but it is realistic if you do storm drainage with your own hands to drain the surface and remove rainwater. In combination with a storm drain (a system for draining water from the roof), the drainage network will also reduce the amount of moisture penetrating into the deep layers of the soil - the load on the deep foundation drainage network will decrease.
It is worth planning the layout of the drainage networks and storm water pipes even before the start of construction. Foundation protection in the form of a wall system is easier to install if the foundation pit is not backfilled. While construction is underway and there is equipment on the site, it is advisable to order trenching so as not to dig manually and not deliver dirt on the ennobled area. Protection against melt and rain water is:

Stormwater and drainage around the perimeter of the house
- Surface linear storm drainage - collection and drainage of rainwater from the soil surface.
- Storm sewage - drainage of water flowing down through drainpipes.
- Spot drainage - drainage of local areas with problematic natural outflow.

Surface moisture removal scheme: drainage system
Storm sewer network
The storm sewer network is equipped with an outlet to a common highway, if there is a collector or a city storm pipe nearby. In the case when the branches of the city network are located at a great distance, the output of the local drainage system and storm sewer is organized in 2 ways: to the filtration field (covered with rubble to drain moisture into the ground), or to the receiving tank (drainage well, reservoir, roadside ditch) ... Discharge from a private storm drain into the public sewer system is prohibited.
System elements:
- Gutters that are installed along the edge of the roof slopes.
- Downpipes.
- Receiving tanks.

Receiving tank with outlet
- External sewer pipes that are connected to water intake tanks.
The containers are mounted under the outlet of the drainpipe, the branch pipe is connected to the sewer pipe. Pipes are driven in at an angle to the point of discharge.
Drainage: features of a surface storm system
The system for draining the surface of the site consists of point and linear branch branches connected into one network with an outlet to a water intake. Storm drainage at the site is arranged in the form of open channels dug at a slope to the place of discharge. The markings are carried out only after studying the direction of the natural outflow during heavy rain. Drainage lines must be formed:

Drainage network: point catchments and storm trenches
- Along the perimeter of the site.
- On slopes and on sites in natural depressions.

Slope drainage branches
- Around the tracks.
Storm drainage around the house is a line of trenches laid along the blind area along the entire perimeter of buildings. To drain the tiled courtyard, channels are formed at the entrance to the garage, near the porch, steps.

Point drainage bends are dug in in places where there is no need to lay drainage channels: under watering taps, near the outlet of drainpipes (in areas where there is no storm sewer). Drainage from point drainage wells is discharged into a discharge pipe of a common surface network.
Integration: is it possible to combine storm water drainage with a drainage network

Two separate networks: drainage and storm drain
The optimal drainage scheme for a plot with a house is separate drainage and stormwater networks around the house. It is undesirable to connect linear canals with sewerage: during heavy rainfall or rapid snow melting, one pipe may not cope and overflow will occur through the water intakes.
It is advisable to connect stormwater and drainage in one trench only in one case: if the trench is dug out to drain from the point drainage and sewer rather than perforated pipes are used. Pipes are laid in parallel along the bottom of the concreted trench. It is impossible to lay a sealed sewer pipe in a canal with a drainage backfill: the diameter of the pipe will reduce the useful volume of the ditch and create difficulties when cleaning the trench.

General discharge of point drainage and storm water into the filtration tunnel
Instead of trying to connect stormwater and linear drainage in one pipe, it is better to make a common receiver, especially if you cannot make a tie-in into the city highway. Rainwater can be used to irrigate or fill artificial reservoirs. Plastic tanks are installed as a receiver, or wells are made without a bottom - to drain the incoming liquid into the ground.
How to make storm drainage of a site and around a country house
Storm drainage is a surface system that does not require extensive earthworks and digging deep trenches, so you can make a simple wiring with your own hands. Before starting work, the places of obligatory arrangement of lines and drainage points are determined, the trajectory of the diversion is planned. It is possible to find all places where the natural outflow is not enough during heavy rainfall and after the beginning of snow melting. It also requires the installation of a branched linear storm drainage area with clayey, moisture-saturated soil that does not absorb water from the surface.
For preliminary calculations of the amount of necessary materials, it is worth drawing a diagram of the channels on the site plan.

Storm drainage installation plan
Materials: what is needed for the installation of a storm drainage network
List of materials that are needed for the independent installation of storm drainage of the site and installation of the system around the perimeter of the house:
- Trays (gutters) for installation around the foundation. Manufacturing materials - plastic, polymer concrete mixture, concrete. Plastic channels are installed in areas where there is minimal physical impact on the gratings: along the edges of the lawn, in flower beds. Concrete gutters are strong and durable. Such a tray can withstand a load of up to 25 tons. They are installed in places of high loads: in yards where there is constant traffic, on access roads. Protective grilles are also chosen: metal and cast iron - for areas with intense stress, decorative plastic - for lawns, gardens.

- Connecting elements, spacers, bases. Auxiliary materials that the manufacturer recommends to use when assembling channels. Be sure to install spacers inside the plastic trays.
- Sand catchers. Separately, they buy products for installation in a linear system and for installation in storm water inlets.

On the walls - preparation for the pipe branch
- Storm water inlets. They mainly use ready-made plastic containers. The outer walls are equipped with a preparation for connection with a bend. Plastic receptacles are easily stacked on top of each other - you can assemble a container of any height.

Containers with basket and attachments
- Geotextile. Cloth for drainage fill canals not equipped with gutters.

Synthetic water-permeable fabric
- Crushed stone, sand. Crushed stone fraction - medium and large.
- Mortar for pouring the base under gutters and water intakes.
- Drainage wells. Finished large diameter plastic or corrugated pipe.

Factory PVC drainage wells
- Pipes for outdoor sewerage with fittings.
- Construction tool. You will need rough boards for formwork in the channels, pegs and fishing line for marking, shovels, picks, a building level.
Installation of point water intakes
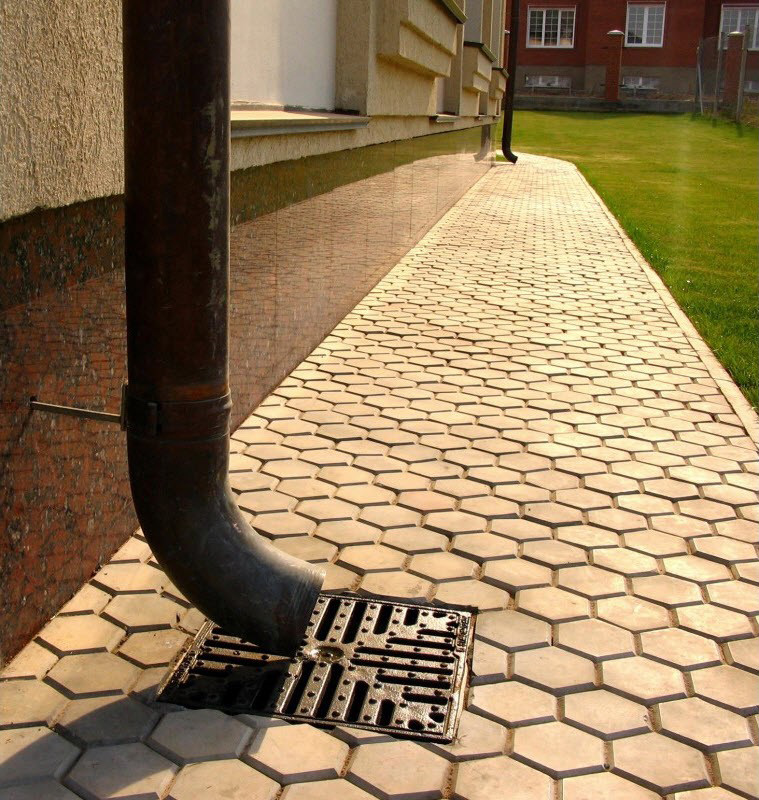
Point water intakes are stormwater and drainage elements installed under the outlet of the gutters. It is necessary to plan the installation so that the flow from the drain falls exactly in the center of the grate.

The edge of the well must be flush with the decorative cover
The dimensions of the pit for installing the container are determined by the height of the receiver, adding up to 30 - 40 cm for bedding and the base. There should be a gap of up to 5 cm around the perimeter on each side. Dig a recess, align the walls and bottom. Be sure to check the horizontality of the bottom and the angle so that the container does not move during installation.

Level check with level
A dense ten-centimeter layer of compacted sand is formed at the bottom. A layer of crushed stone up to 25 cm high is laid on a sand cushion. It is advisable to fill the bottom with concrete mortar. The poured base is left for several days until it hardens completely, or the container is fixed in a fresh solution (if necessary, fixed fixation).

A storm water inlet is installed on a concrete base so that the container lid is level with the blind area. If the installation is carried out before the decorative coating is laid, then the free edge of the well is left above the ground to the height of the tile or stone.

Correct mounting of the receiver
Side gaps are covered with crushed stone or poured with concrete. Before backfill, a pipe outlet is connected to the outlet. Install internal parts: basket, partitions, fix the lid.
Arrangement of an open stormwater system around the foundation
Drainage of storm water around the perimeter of the building can be planned in the form of a closed ring at the collection point, without revision wells. Collapsible sand catchers are provided for cleaning. Linear system design rules:
- The distance from the edge of the foundation should be at least 50 cm. Optimally, plan the canals along the edge of the paths or blind area.

Trays - along the edge of the blind area with a margin of height for paving slabs
- The depth of the channels is determined by the height of the tray with a decorative cover, with the addition of the height of the fill layer - up to 40 cm.
- Width - up to 50 cm.
To prevent the installed gutters from shifting and deforming over time, several rules must be followed during excavation work. The bottom and walls must be flat and solid. At the bottom, be sure to make a standard sand pillow and crushed stone bedding.

Plastic tray installed on the factory base
To prevent the tray (especially the plastic one) from deforming, it is better to make a concrete base for the installation. The thickness of the concrete layer is 5 cm.

Laying the gutter on the mortar
Gutters are installed in the prepared trenches. The structures are interconnected with special locks. The extreme points (at the beginning and at the end of the line) are closed with plastic or metal plugs. If plastic gutters are used, factory spacers are installed inside.

Drainage trap
The gaps between the trays and the walls of the trench are covered with rubble, or concreted. On long sections, sand traps are installed - in-depth trays with a mechanical filter. At the installation sites, outlet pipes are connected to the sand traps. Trenches for discharge pipes are dug at an angle.
Budget storm drainage of the site: we build open canals
It is possible to drain rainwater from garden paths, flower beds and along the fence in an economical open way. Instead of ready-made trays, storm drainage drainage channels are equipped. Trenches are being dug along the planned lines. Depth - from 50 cm, width - from 50 - 60 cm.

Backfill trench instead of gutters
The branch is formed with a slope towards the receiving tank. Walls - at an angle to the bottom to reduce the pressure of the flowing water. Backfilling with sand is performed at the bottom. Check the correctness of the slope. One meter - up to 3 cm of height difference.

Crushed stone pipe
Geotextiles are laid on the sand layer. The edges are left free. Over the entire width of the trench, crushed stone is covered with a layer of up to 30 cm. A system with a perforated drainage pipe inside the crushed stone will be more durable. Wrap the edges of the canvas with an overlap.

Dry stream with decorative backfill - beautiful drainage line
From above, the drainage clip is covered with decorative material: river pebbles, multi-colored chips, stone. Dry streams are an aesthetic and economical solution.
Drainage well and drainage outlet
The drainage well is the connection point of the system. With a moderate amount of water and good water-absorbing characteristics of the soil, the drainage tank is installed on a crushed stone pillow. Through a well without a bottom, water penetrates into the ground.

Drainage well with filling bottom
If the device of a filter well is impossible, then liquid is drained from the drainage tank into a common storm main or taken out of the site - into a natural reservoir, a ditch. The outlet from the well can be connected to a pond or a receiving tank dug in the area.
Video: installation of storm water around the house
Stormwater and linear open drainage are only the surface part of the foundation protection. Along the perimeter of buildings at different depths, it is necessary to create 3 - 4 types of drainage systems. The choice of the method of organization and technical parameters of the networks depends on the composition of the soil, the depth of the foundation. It is not worthwhile to make deep drainage networks on your own. Calculations should be carried out by specialists, and it is better to install trench branches immediately after pouring the foundation. Even before the start of construction, a deep seam drainage system is being equipped. The accuracy of the calculations determines not only the ability of the system to drain large quantities of water, but also the durability of the foundation.
An integral part of a private house or summer cottage is a storm sewer, which provides an aesthetic appearance of the residential building and the area adjacent to it. As well as preventing premature destruction of the foundations of buildings and the roots of plants growing on the site. To an inexperienced person in the field of "drainage", this moment may seem like a dark forest. In this article, we will analyze everything point by point: the removal of surface, storm and melt water, from buildings and a site.
To create a storm sewer, or a surface water drainage system, basic knowledge in construction and data on the landscaped area itself are required. The storm sewage system is gravity, i.e. tilted, and includes the following elements:
- Roof drainage;
- Drainage drainage system;
- Collector or drainage point.
Roof drainage receives atmospheric precipitation at roof level by means of trays, gutters, funnels and sends them to the surface drainage system.
Design of a surface water drainage system
To design you need to know:
- the average amount of precipitation (both in the form of rain, and in the form of snow, melt water), you can find out this in SNiP 2.04.03-85;
- roof area;
- the presence of other communications and facilities in the developed area.
For the design, it is necessary to decide in what places the drainpipes will be located and how many there will be. A diagram is drawn up, which shows the height differences of the surface of the site, the structure on it. The diagram indicates the location of all elements of the storm sewer, including pipes, manholes and water discharge points. The design also calculates the amount of required materials and their costs.
Roof drainage
The material of the roof drain is varied: steel, copper, polymer coated steel, aluminum, etc. Plastic is especially popular. It is economical, resistant to damage, is a sound-insulating material, sealed, lightweight both in weight and in installation. For the correct design of the roof drain, you will need:
- Metal bracket;
- Hairpin with a special nut;
- Adjustable mount;
- Chute bracket;
- Tip;
- Coupling;
- Knee;
- Funnel plug;
- Gutter plug;
- Corner element;
- Funnel;
- Gutter connector;
- Downspout gutter;
- Downpipe.
The number and type of each element depends on the perimeter of the roof and the amount of pumped liquid, because too powerful drainage system is irrational in terms of financial costs, and a weak one will not cope with the task. It is necessary to find the best option. The figure shows the required dimensions, typical for central Russia.

Installation of a water drainage system from the roof of the house
Installation is carried out after the development of the project of the entire drainage system, familiarization with the instructions attached by the supplier store (each system has its own design features that must be taken into account). General installation sequence and work performed:
- Installation begins with fastening the bracket from the side of the rafter wall or frontal board, taking into account the slope of the gutters.
- Then the gutters themselves are laid using special plates and fastened to each other by cold welding or rubber seals. Cold welding is preferred for gutter joining due to its resistance to deformation.
- An additional bracket is installed in corner and funnel connections.
- The pipes are being installed, observing a distance of 3-4 cm from the wall. The brackets are mounted vertically at a distance of 1.5-2 m. The drain itself should be located half a meter from the ground.
Pro Tips:
- The gutters are started from the funnel so that the edges of the gutter are below the edge of the roof.
- If you use a pipe for collecting from three directions of gutters (if the roof is of a non-standard shape), it is necessary to provide tees instead of standard funnels.
- The distance between the brackets should be no more than 0.50-0.60 m.
- It is recommended to mark the slope of the gutters in advance. For example, a rope stretched from the starting point to the ending point can serve as a reference point.
- Plastic ebbs are mounted at a temperature of + 5 °, otherwise the material will crack when cutting. Ebb from other materials can be mounted at any ambient temperature.
Construction of a surface water drainage system
Surface water drainage system or surface drainage consists of point drainage systems and lined canals.
Point drainage systems are small wells locally connected to the roof drain. The trays are laid below the freezing level of the pipes. The installation of such a drain is similar to the installation of a roof drain. A trench is being prepared (lower than the freezing depth of pipes, you can find out everything in the same SNIP), with a slope towards the collector. Sand is filled in with a layer of 20 cm. Pipes are laid with fittings. If the sealing is observed, the pipes are filled up.

Linear ducts are of two types - open or closed, equipped with gratings or nets to retain large debris. The grilles should be predominantly made of metal, because withstand heavy loads (especially in places at the entrance to the garage).


Professional advice. For the efficiency of surface water collection, an integrated storm and point drainage device is required. In case of heavy precipitation, the bulk of the water will be removed by surface drainage.
You can see how the process of installing a surface water drainage system looks like in the video:
Deep drainage system provided if the terrain where the site is located is prone to prolonged rains. Such a system will protect the site from erosion, protect trees from premature death (due to root rot), and protect the foundation from the harmful effects of water.
Groundwater drainage system
Groundwater drainage differs from the systems described above in that it is laid at a greater depth and in the case of groundwater close to the surface of the earth, with which a basement or underground garage can be flooded. Drainage is done in combination with downpour, and the downpour pipes are laid higher than the drainage. It is necessary to understand the difference between rainfall and drainage. Storm rainfall for drainage of rain, melt water and floods, and deep drainage for drainage of groundwater and possible flooding. Surface and deep drainage are connected using special nodal connections to accumulate excess water in one place and then release it, recycle or reuse it. Drainages are mounted parallel to each other.
This is important: in case of heavy rainfall, water in large quantities passes through the storm sewer in a short time. When such a flow of water enters the groundwater drainage system, this water enters the ground from the pipes, thereby not draining it, but flooding it, that is, it begins to perform the opposite function. Therefore, the surface water drainage system should be connected to the groundwater drainage system not earlier than the places where the pipes for water drainage pass and not drainage, if you look along the direction of water flow into the system. Drainage of the soil is carried out at the places where the perforated pipes are laid. Water drainage is carried out by sealed pipes.
According to the method of groundwater withdrawal, they are divided: vertical, horizontal and combined drainage. Vertical drainage consists of vertical ribbed wells, lowered into a layer of groundwater. They are equipped with pumps and filters, respectively, for the purification and pumping of groundwater outside the territory. Such a scheme is quite complicated both in installation and in operation.
Horizontal drainage consists of perforated pipes laid at the optimum pumping outlet depth in excavated ditches spilled with gravel. Ditches are dug throughout the site in the form of a herringbone.
The drainage device, regardless of the type of site, begins with the arrangement of a drainage well in the farthest part of the site, away from the house. You can use ready-made plastic wells.
Inspection wells are arranged in the places of corner joints to facilitate the maintenance of communications.
The depth of the drainage is selected based on its tasks: if the goal is to collect groundwater to protect the basement, then the depth should correspond to the level of the basement floor; if the goal is to drain abundant waters descending into the ground, the depth corresponds to the depth of the foundation.
The pipes are wrapped with a special material () to prevent sand and gravel from entering the pipes, with which the pipe is covered with a layer of 20-30 cm. After that, the pipe can be covered with ordinary soil. Unlike vertical drainage, the water collected through the holes in the pipes is discharged by gravity at a slope, and not by pumps.
Horizontal drainage is more popular than vertical or even combined because of its cost-effectiveness and ease of installation.
You can read more about the structure of the groundwater drainage system in the article:
Collected water drainage
excess water is removed outside the site, into a ditch, a reservoir. If this is not possible, then a well or reservoir is arranged within the site, from where the water can be reused.
Advice:
It is recommended that the drainage be laid in ditches with V-shaped walls with a wall slope of 30 ° in the cross-section of the ditch. Width 50 cm. Recommended slope of the ditch1-3 cm per meter. Wells can be equipped with any material that does not corrode.
Service of drainage systems
Maintenance of the above systems is not difficult if they are properly designed and constructed. Main points in service:
- Once every ten years, use a pump to thoroughly flush the pipes to prevent deposits on their walls.
- Regular visual inspection of wells, collectors and cleaning if necessary.
The shelf life of a properly calculated, laid, maintained drainage system is on average fifty, or even much more years.
Pro Tips:
- Be sure to check that the pipes are laid with a slope; the slope should be away from the house.
- If it is impossible to install a gravity drainage system, a pressure outlet equipped with a pump is arranged.
- Do not forget about the optimal design and the correspondence between price and quality.Very often you want more, better, but the budget does not always allow you to carry out your plans. That's why it is recommended to design, correlate the project with prices, purchase and carry out installation in accordance with the recommendations given here.