Dimensions of a hole dug for humus with your own hands. Secrets of Clean Fertilizers
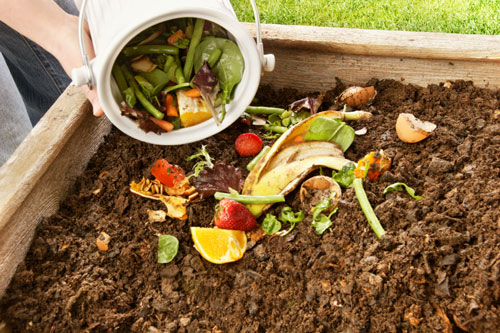
One of the available and nutritious fertilizers that replenish the deficiency of valuable microelements and restore soil structure is compost. It can be purchased ready-made or prepared directly on the site yourself by equipping a pit in a convenient way. We will talk further about how to make a garden compost pit with your own hands and options for making it.
Every farm has organic waste:
- vegetable and fruit peelings;
- dry grass;
- pruned branches;
- tops of garden crops;
- paper, scraps of fabric (natural);
- bird droppings and manure, etc.
By filling a specially equipped place with them, after some time you can obtain a nutritious mixture for the garden. After adding organic matter, the soil is not only enriched with valuable substances, but also improves the microbiological environment and becomes loose, to which almost all crops grown in the country react positively.
For any summer resident, compost is considered the first assistant. Firstly, there is no need to store and remove household and vegetable waste from the yard. Secondly, there is no need to spend money on purchasing ready-made organic fertilizer.
The presence of a compost pit makes it easier to dispose of tops after harvesting the beds. Previously, plant waste was simply burned. Now many people prepare nutrient mixtures from it, which they scatter throughout the garden in the spring.
The fermentation process takes about 8 months, so it is recommended to equip 2-3 compost pits on the site at once.
A compost pit helps get rid of plant debris and helps process it into fertilizer.
Advantages of a compost pit in the country
A compost pit at the dacha solves the following problems:
- provides partial recycling of organic waste;
- when applied to the soil, fertilizer retains moisture, thereby creating favorable conditions for vegetation;
- if you do the laying in the hole according to the rules, then the plants and soil will not be infected various diseases, unlike purchased nutritional mixtures;
- setting up a pit is quite simple, because all the materials are at hand;
- if you adhere to the technology of making a compost pit, bad smell will not spread throughout the area.
There are many ways to organize a place for compost production. As an option, you can make it yourself or purchase a special composter. The main advantage of a container for organic matter is a more aesthetic appearance, which is lacking in a regular pit.
In addition, odor problems disappear even after initial stage fermentation of embedded layers. The mobile and compact design can be periodically moved to another corner of the yard, the surfaces can be painted with bright colors, further decorating the area. Making a composter bin is very easy. necessary materials there will always be some at the dacha.

It could be like wooden boards, and slate. The main thing during assembly is to comply with the requirements for the composter.
What's the best way to build compost?
Many people wonder how best to arrange a place for composting. On the one hand, knocking down a simple structure from scrap materials is not difficult.
But even this primitive process has some features, if ignored, you may not get fertilizer high quality. And sometimes it’s difficult to call a homemade mixture nutritious. On the other hand, you can avoid mistakes when designing and assembling the structure if you purchase a ready-made composter. However, this solution also has a second side to the coin - an additional expense item.
 If you don't want to dig a hole, you can build a composter
 Therefore, we can definitely say that any method of arranging a composter facility has advantages and disadvantages. In addition, there are a lot various technologies for construction. For example, as an option, Finnish. When a pit is built instead wooden box.
You can evaluate the pros and cons of pits and composters using this table.
| composter pit | |||
| Advantages | Flaws | Advantages | Flaws |
| easy installation | When constructing a pit, you must strictly follow the rules for laying layers | compact design does not spoil the appearance of the yard | high cost |
| possibility to use different materials | the decomposition process occurs only in the warm season | can be moved to any corner of the site (mobility) | you need a careful approach to choosing a composter (the functionality and wear resistance of the material are taken into account) |
| minimal installation costs (or lack thereof) | unhindered penetration of rodents and other pests | convenient design allowing access to all parts of the filler | |
| no special requirements for choosing a location (only the presence of shading) | dissemination of an unpleasant odor throughout the area | no unpleasant odor | |
| drying out of the filling in the pit is prevented | fragility | the presence of insulation ensures a continuous process of decomposition of components | |
How to make a compost pit with your own hands
A compost pit can be constructed by digging a pit buried 80-1.2 m into the ground. This method is simple, but has more disadvantages. It is inconvenient to maintain the pit; you will need to periodically stir the filler, and this will be difficult to do. It is a known fact that the bottom layer decomposes faster in a pit. It is very difficult to get it from the bottom, so more often limiters with a height of about 50-80 cm are installed above the surface of the earth. Boards, chain-link mesh, slate, shields and other materials can serve as sides. And in this case you will have to go deep only 30-60 cm.
When planning the site, you should take into account that the height of the pit should be within 1-1.2 m, and the width of the sides should not be more than 1.5 m. If we take large parameters as a basis, the nutrient mixture will not ripen due to lack of oxygen and air circulation problems.
 The compost pit can be simply dug or concreted
 The sequence of making a compost pit buried one third into the ground:
- Clear the space for the object and mark the tops of the sides with pegs.
- Dig a pit with a depth of 40 cm according to the planned dimensions.
- Knock down a box from 4 bars and boards, leaving gaps (2 cm) between the boards to ensure air circulation. Supports should protrude 50-70 cm along the bottom of the structure (they are immersed in the ground during installation).
- Install the box in the prepared pit.
- Cover the bottom of the recess with spruce branches, straw or small branches with a layer of 10 cm.
- Further layers should alternate between dry and wet fillings. To speed up the decomposition process, it is recommended to add nitrogen additives to each layer (manure, green grass, bird droppings, etc.).
- Cover the top part fertile soil(thickness 15-20 cm).
- To preserve heat, it is recommended to cover the box with film. It needs to be opened periodically for ventilation.
- As a catalyst, you can pour a hot solution of manure or bird droppings over the components.
- The contents of the pit need to be mixed 1-2 times a month. If the heat is stable, the ripening compost is watered.
The fertilizer in the compost pit matures for about 6-8 months. The bottom layer is used first. You can speed up the process by using special additives that intensively decompose the bookmark.
Technology, how to make a composter at the dacha
Can be used to make a homemade composter plastic barrel. The advantage of the device is that the ripening time of the fertilizer is reduced to 4-8 weeks.
To build the structure you will need the following materials:
- polymer barrel with a lid with a capacity of 150-200 ml;
- boards;
- nails;
- loops;
- latches (4 pcs.);
- bolts with washers and nuts;
- a galvanized pipe or a thick metal rod (you will need to twist the container on this element, so it must be durable).

Composter installation sequence:
- Knock the frame off the boards(the design consists of side X-shaped elements connected on the two lower sides by horizontals, dimensions are taken taking into account the height of the barrel). The thickness of the tree must be taken taking into account the weight of the full container.
- Cover the barrel with a lid and drill a through hole on the bottom and top. The diameter of the hole must correspond to the parameters of the pipe or rod. The axle will subsequently rest on the frame.
- Cut a door on the side of the container and fix it on the loop. Screw the latches on three sides. Make a handle using available materials.
- Make through holes across the entire surface of the barrel to ensure air circulation.
- In several places drive long nails, which will serve as dividers. Instead of nails, you can use studs and tighten them with bolts.
- Thread the axle through the central hole(pipe) and fix the protruding ends to the frame.
The ability to rotate the structure makes it easy and simple to mix the filler, which must be done once every 5-7 days.
What not to put in a pit or composter
The term organic waste does not mean all the accumulated garbage, but certain components that, together and in the correct proportion, enter into the fermentation process, being transformed by microorganisms into a nutritious product for the soil and plants.
Compost made from prohibited ingredients will pose a danger to garden beds.
 You should absolutely not throw rotten vegetables and fruits, as well as diseased grass, into the composter.
 What should not be put in the compost bin:
- weed - it contains toxins and poisons, as well as seeds that when favorable conditions will sprout;
- citrus peel – contents essential oils in cleanings, drives away worms and other underground inhabitants involved in the fermentation process;
- tops of disease-affected crops - spores and pathogenic bacteria do not die during the decomposition of plant residues, therefore wrong compost promotes infection of soil and plants after application to the site;
- small potatoes - there will be no harm from them to the soil and crops, but they will sprout on a heap;
- vegetable and fruit residues that have undergone heat treatment - the vitamin composition of such components is very poor;
- fallen apples or plums affected by diseases;
- spoiled bakery products - when spoiled, the bread becomes covered with mold or fungus, and later spores infect young shoots;
- insects collected from garden beds - their larvae have good vitality and will begin to actively develop after entering the soil;
- bones (fish and other domestic animals) - they take a long time to rot, so in a few years the area will simply be clogged.
The rules for making compost are simple; they must be taken into account when organizing a heap or composter for fertilizer. It is worth remembering that the goal is to obtain a nutritional mixture that promotes rapid growth seedlings and abundant fruiting.
Compost can significantly improve the soil, regardless of its type. If it is clayey, it will become more crumbly, but if it is sandy, it will retain moisture better. But the price for it is quite high, and there will also be costs for delivering compost to the site, so people began to make compost pits themselves in order to fertilize the soil, but at the same time save money. A large amount of organic waste accumulates in any home, so why throw it away if you can build a pit, and this waste will benefit the soil. In this article we will look at how to make a compost pit with your own hands at the dacha and how to operate it correctly.
- The size of the pit should be based on the approximate amount of garbage that can accumulate in a year, and then will rot for at least one year.
- The process of removing humus and mixing it should not be complicated, so the height of the walls has its limitations.
- The pit can be made either open or closed, one or two sections.

- The compost should not contain weeds or their seeds.
- The contents of the compost pit should be freely accessible for worms.
- It is necessary to equip a convenient approach so that there are no difficulties with the removal of humus.
- Iron can be added to the bottom, which will also benefit the compost over time.
- The smell from a closed compost pit should not leak outside.
- The compost pit should not be located in direct sun.
Compost pit technology
How to make a simple compost bin

The design of a compost pit depends on its future purpose; if it is equipped simply for the disposal of organic waste, then it can be made according to the simplest scheme.
- A hole is dug about 40-60 cm deep and 60-70 cm wide;
- a layer of dry grass and straw is placed at the bottom;
- After each waste disposal, a layer of grass is again laid on the garbage. This is necessary so that there are no flies and there is no unpleasant odor;
- This type of pit should be made somewhere in a remote part of the site, but not near the neighbors’ fences.
Do-it-yourself concreted compost pit

- This is a more labor-intensive construction. It consists of two equal compartments, one of which is intended for old compost, and the second is used for regular replenishment. This design has a lid that lifts up when necessary to collect fertilizer or throw away waste.
- To ensure high-quality compost, it is better not to use weeds for its preparation; they can leave behind harmful seeds in the soil.
- It is necessary to provide access to a closed composter for earthworms, otherwise the compost will take much longer to mature.
- In addition, it must be equipped in such a way that it looks like a decoration on the site and has a neat appearance. But ventilation must be present, so plant climbing plants not recommended with dense foliage.
Stages of work

The process of constructing such a compost pit is quite labor-intensive.
- Must be completely leveled and removed top layer soil;
- then a hole is dug, about 60-80cm deep. The optimal length is 3m and width is 2m;
- then formwork is constructed and the walls are poured cement mortar or concrete, the thickness of which should be approximately ten centimeters.
Tip: for proper construction of a compost pit closed type it is necessary to prepare a concrete solution, following all the rules. It seems that there is nothing complicated about this, but in practice it often turns out the opposite. To avoid problems and not have to spend a lot of time correcting errors later, it is better to do everything correctly right away.
A concreted compost pit will have all the necessary properties for timely processing of compost if the proportions of all the components from which the concrete for its base is made are accurately observed.
To create the solution, you will need:
- river sand,
- Gravel,
- Cement,
- Water.
Sequence of actions:
- First, you need to pour gravel into a twenty-liter bucket and shake it very well;
- After this, water is slowly added using a measuring cup. If this bucket contains ten liters of water, therefore, the gravel component is 50%, and the required ratio is two to one. This means that another 10 liters of river sand should be added to a twenty-liter bucket of gravel;

- such a solution should contain as little water as possible to avoid the appearance of bubbles in the future. If the composition has a high water content, then after it dries, a large number of voids are formed.
Advice: one more important point The main thing in preparing a mixture for a pit is that you need to mix the solution very thoroughly. This is probably even more important than precise observance of all proportions, so it is recommended to do this with a concrete mixer rather than manually.
A closed compost pit can have one section, but it is better to immediately make it with two sections. In the second case, it is more convenient to use, especially if it is decided not to use drugs to increase the rate of compost maturation.
If the decay process takes place naturally, it will take about two years. Then it is very convenient to use each section separately. The first year you can use one, and when the second year begins, throw the waste into the second part. While the compost in one reaches the desired state, another is used.
Building a tall compost heap with your own hands

Wooden compost heap It’s easy to build even without experience in construction. At the same time, it can be made in such a way that it will not interfere with either the summer residents themselves or their neighbors.
- Stands should be installed at the corners of the pit. The base for them is made of pipes, and the part that is above the surface of the ground can be made of timber with a cross-section of 10 cm;
- One edge of each bar is sharpened to fit the size of the pipes. It is first recommended to soak all wooden parts of the structure in a special solution so that they do not succumb to the processes of decomposition and rotting;
- Next, the bars are driven into the pipe scraps and transverse boards are placed on their above-ground part, which will serve as the walls of the pit;

- It is better to fasten the boards using self-tapping screws or metal corners, which will provide more reliable grip;
- finished walls are covered with paint, preferably acrylic.
Some of the nuances in this work must be taken into account:
- the diameter of the pipes must match the size of the bars;
- the height of the walls usually does not exceed a meter, this is due to the fact that large and tall buildings as a result, they turn out to be inconvenient to use, since it complicates the process of digging and extracting compost;
- the simplest version of a removable cover is an ordinary sheet of plywood that is attached to back wall hinged designs. The compost ripens best when the lid is closed, but you still need to open it sometimes to ventilate the fertilizer.
What is compostable and what should not be put in a pit?
So that the fertilizer can ripen in a timely manner and at the same time not lose its beneficial properties for the soil, you should know exactly what is suitable for the compost pit.
You can put:
- raw vegetables, fruits, berries, cereals, straw, grass, hay, ash, foliage, pine needles, bark, branches, plant roots, sawdust, shredded paper, herbivorous animal manure.
You cannot put:
- bones, excrement of carnivorous domestic animals, potato and tomato tops, any greens after treatment with pesticides, weed seeds, any synthetic waste, as well as tops of infected plants.
The right compost pit

For compost to form successfully, it requires certain conditions:
- moisture;
- warm;
- oxygen.
To create a greenhouse effect, still unripe compost must be watered (especially in hot and dry summers), and, if necessary, covered with film. A good reaction also requires oxygen; its access is ensured by loosening the waste with a pitchfork.
If it is not possible to arrange a pit, water it, and so on, then you can simply put organic waste in one place, where compost will form over time. This is, of course, not the most best way from an aesthetic point of view, but it has a right to exist.
- In order for such a heap to be equal in functionality to a compost pit, it is necessary to add special drugs.
- You will also need to periodically cover it with dark material to speed up the compost maturation process. In a covered pit, the compost will be processed within 3-4 months, but if you keep it open, the process will take about six months to a year.
- You cannot put polyethylene at the base of the heap, which will block free access to water and oxygen. If the ground under the compost is covered with synthetic material, then the moisture from the pile will evaporate very quickly and will not be able to rise from the ground.
- When adding contents to a compost pile, it is recommended to alternate between manure, grass, waste and soil whenever possible. During extreme heat, you need to water the pile so that required quantity moisture and composting processes were not disrupted.
- It is convenient to make two piles side by side or one large one, but on two sides; this is a simplified version of a two-section box. When the compost is ready on one side and can be regularly spread on the beds, waste is thrown onto the other side of the pile.
- When the compost heap reaches about one meter in height, it is advisable to use fertilizers. To do this, make several deep holes and pour the solution into them. In the warm season, you can replace them with Californian worms.

Correct location of the compost pit
Before you set up a compost pit in your dacha, you need to choose the right site for it:
- The pit should be located at a distance of at least twenty-five meters from sources of drinking water (wells, boreholes, etc.);
- If the site is located on a slope, then the pit is equipped below the source of drinking water, this is necessary so that rotting waste through the soil cannot get into clean water;
- It is necessary to take into account the most frequent direction of the wind so as not to cause significant inconvenience to neighbors, especially if the pit is not covered with a lid and emits strong unpleasant odors;
- There should always be free access to the pit, which will ensure convenient removal of garbage using buckets or removal of humus using a wheelbarrow.

- The compost pit is made as far as possible from residential buildings. It should be in partial shade, since under the sun's rays all processes occurring in it will slow down.
- The area for the location of such a pit must be level.
- You should not allow water to stagnate in it - this will interfere with the access of oxygen.
Plastic compost bins

- This method is good for those who can allocate funds for its purchase and want the appearance of their site to be more presentable. It can be installed absolutely anywhere. But you will have to take into account the presence of an unpleasant odor, because you will need to regularly open the lid to ventilate the contents of the container.
- Constant access of oxygen to the compost is ensured by special holes, also necessary to prevent excess moisture from stagnating.
- The peculiarity of using a plastic container for a compost heap is that it is necessary to use special preparations to speed up the composting process. Drug replacements can be provided earthworms, if they are specially planted in this container.
To save money and benefit the site, a compost pit is great solution for fertilizer. It is very simple to set up and operate it; you just need to know a few rules. But at the same time, you will always have ready-made fertilizer for the soil on your site.
Photo of compost pit


(20
ratings, average: 4,15
out of 5)
 Even an inexperienced gardener knows the benefits of compost, which is used to nourish the soil. It can not only fertilize the soil, but also improve its looseness and structure. Since the main components of compost are waste, nutritious fertilizer is obtained from almost nothing. In terms of cost, it is the most affordable. However, it is not enough to simply dump plant debris in one pile. To obtain valuable material, compost at the dacha must be made correctly with your own hands.
What does a compost heap consist of?
When forming a compost pit at your dacha with your own hands, you need to know that you cannot throw everything into it. The main products for composting are:
- weeds;
- lightly crushed roots, branches and tree bark;
- leaves;
- straw, mown grass, hay;
- raw berries, fruits, vegetables and peelings from them;
- coffee, cereals, tea;
- needles;
- wood ash;
- second-year manure of herbivores;
- unpainted wood waste;
- shredded paper bags, cardboard, napkins.
The following should not be placed in a compost heap:

To make compost with your own hands correctly, you should add brown mass with poor fiber and green, nitrogen-rich waste. , in a ratio of 5:1. This will speed up the development of bacteria and the maturation of the compost. Waste will also rot quickly if it is pre-shredded.
How to make a compost heap with your own hands? There is nothing complicated about it. You can understand that the balance has been maintained and the compost is correct by its condition. If it's moist, steams a little, feels warm, and smells green, it has the right ratio of ingredients. If the compost heap has no visible evaporation, it needs more green matter. If there is an unpleasant odor, brown components are added.
A proper composting pile consists of alternating layers of brown and green litter, as well as coarser and finer components. The finally formed compost is covered with a five-centimeter layer of soil and perforated film or old straw.
How to make compost at your dacha yourself?
 First of all, you should choose a suitable location for the compost pit. It should be hidden from prying eyes and protected from the scorching sun and winds. All leftovers and waste are placed in special compost bins, which are best made from a wooden frame.
Digs before laying organic matter compost pit 20 cm deep, the bottom of which is covered with a layer of peat or film. This will retain moisture and nutrients.
Compost heap care
The quality of compost and the period of its formation depend on proper care:
- Humidity is of great importance, so the dry pile is moistened. To do this, carefully water it from a watering can, but so that it is damp, not wet. Too much humidity impairs the work of bacteria;
- The compost must be turned thoroughly every month. This will enrich the organic matter with oxygen, make it loose and contribute not to rotting, but to the burning of waste. As a last resort, you can not dig up the pile, but pierce it with a pitchfork;
- To make the compost ripen faster, more nitrogen is added to it, which is contained in slurry and green parts of the plant.
Usually organic residues are completely overheated in a year and a half. You can tell when the compost is ready by smell and visually. You should get a dark brown crumbly mass with the smell of forest soil.
How to make a compost bin with your own hands?
A composter at the dacha or in the garden can be made in the form of a 2 or 3 section box. It is recommended to use a composter with three sections, each of which will be intended for its own purposes:
- for waste disposal;
- for ripening compost;
- for ready-made fertilizer.
 Compost bin can be stationary or mobile(on wheels). To quickly ripen and obtain high-quality humus, the height of the box should be at least 1 meter, and each of its sections should be approximately a meter and a half in size.
Before starting work, all wooden parts are processed special composition, which will protect the structure from moisture and insects.
Steps for making a compost bin with your own hands:
- 8 wooden blocks are buried in the ground;
- partitions are installed, for which boards are attached to the bars at a certain distance from each other;
- two compartments in the front part are sheathed only to the middle. Doors will be installed on top. Only one board is nailed to the remaining compartment from below;
- the end parts and the rear wall are sheathed;
- a large door is attached to the front wall of one compartment, and small doors to the other two;
- the finished wooden structure is coated with paint twice;
- Latch bolts and handles are attached to the box.
Once at the bottom of the compost bin drainage will be laid(dry tree branches, etc.), you can put waste in it.
How to properly make a compost pit at your dacha?
A compost pit will not spoil the appearance of the site, but the waste in it will rot for quite a long time. Since oxygen is needed for fertilizer to ripen, the compost pit must be properly equipped.
How to make your own compost bin with wood trim?
This option involves making a wooden box and placing it in a hole.
Manufacturing procedure:

After one half of the compost pit is filled, the raw materials are moved to the other half for oxygenation.
They take an active part in the formation of humus earthworms. To ensure that they get into the composter, the bottom and sides of the structure are not covered with anything.
Slate compost pit
A strong and reliable structure can be obtained if you build it from slate. It is produced in several stages:
- a site is selected and the dimensions of the pit are determined;
- A small depression is dug, and supports are dug into the corners. You can use pipes or boards;
- slate sheets are installed along the edges of the pit;
- The space is divided into two or three parts using slate leaves.
Concrete compost pit
The walls of the structure can be concreted, as a result of which such a pit will last for decades. To make it you will need:

When making a composter for a summer house or garden you can use barrels. These could be concrete rings or wooden products that are buried in the ground. The bottom of the structure is covered with drainage, and a cover with holes is installed on top to provide ventilation.
Compost pit using Finnish technology
The main requirement for a Finnish design is size. The height and sides of the box should be one meter each. If the structure is smaller, the contents in it will quickly dry out and turn into dust. In large-sized structures, organics will burn from high temperature.
Materials for manufacturing
It is better to build a compost pit from wood. Slate would not be a very good option. In a structure made from it, waste will be converted into fertilizer for a long time.
A cheap and convenient pit will be made from wooden pallets. They can be found or purchased inexpensively.
Prepared wooden elements are treated with an antiseptic that can protect them from the ground. After such treatment, the structure will last for several years and will not require any repairs.
To make the structure look decent, you need to buy paint.
Making a compost pit:

One meter by meter box will contain enough compost to fertilize the soil. on a plot of 5–7 acres.
Compost pit-dry toilet
 Compost bin Finnish technology can be purchased in the store. This is a dry closet that can turn waste into compost. It consists of two containers, each of which has a volume of 80 liters.
After visiting the toilet, you will need to pour into a container special mixture from sawdust and peat, then turn the handle. It is located on the body and is designed to evenly distribute the contents of the container.
With this composter you can also recycle food, placing them in a container and sprinkling them with a dry mixture.
As soon as the first container is full, it is moved away and a second container is installed in its place. In the first container, the compost is ready for use. However, in such a dry closet it turns out to be too concentrated, so it should be diluted with earth, sand or peat.
Every gardener knows how important it is to fertilize the soil in the garden and in the garden in a timely and efficient manner in order to get a good harvest as a result. You can purchase ready-made compost, spending quite large sums on it, almost equal to the cost of the harvest itself, or you can make it yourself without much effort.
A do-it-yourself compost pit, options for which will be discussed in this publication, will help not only to produce high-quality fertilizers, saving on their purchase, but also to functionally use food waste plant origin. There are several approaches to its creation, but first, a few words about the purpose and importance of this agricultural structure.
Purpose and general principles of creating a compost pit
Why are compost pits made?
On every plot of land At least some cultivated plants must be planted, and without feeding they will eventually lose their vitality, wither and die as the soil around them is depleted.

Therefore, whether it is a tree, shrub or annual vegetable crops, the soil for them must be periodically fertilized. Today at specialized stores there is a large number of fertilizers produced at on different basis, but not all of them are equally beneficial for plants and unsafe for humans. Some manufacturers produce compost, however, and they are not always conscientious. To speed up the maturation of humus, some of these “agrochemists” use not biological, but chemicals, quickly decomposing various organic substances, and to check how the processing took place to an ignorant person who does not have special knowledge– is simply impossible. Therefore, if you come across such a product, you may not only not achieve an increase in the yield of your garden or garden, but, on the contrary, spoil the soil to such an extent that it will take many years to restore it.
That is why the best option seems to be manufacturing organic fertilizers independently, especially since almost all the necessary components can always be found literally under your feet or in the kitchen after cooking.
Any area is periodically tidied up, and during the cleaning process heaps of grass and fallen leaves are collected, mixed with fallen fruits, as well as branches after trimming trees and bushes - all this is perfect for making compost.
If the loaded compost pit is left undisturbed, the compost will mature quite quickly. long time. And provided that special biological solutions containing live bacteria are added to it, fertilizer can be obtained in 3-4 months. However, in order for the “ripening” process inside compost pits and containers to proceed evenly, the mass must be periodically mixed and drugs added to it that accelerate the processes of natural decomposition of organic matter.
Requirements for setting up a compost pit
In order for a compost pit to function properly, its design must provide all the necessary conditions for the development and active activity of bacteria that will process plant waste.

The conditions necessary for the normal functioning of bacteria include the following factors:
- Availability of free access of oxygen to the container (pit), so that the plant waste placed in it does not rot, emitting unpleasant odors, but is broken down under the influence of earthworms and beneficial bacteria.
- Special temperature regime
- Constant high humidity.
High-quality fertilizer can only be obtained if all these conditions are met, and for this you need to properly build or assemble from finished materials compost container.
The requirements that must be met when constructing this useful structure can be listed as follows:
- The container must have holes in its walls for free access of air, which means that the best option would be to install it above the soil level.
- To make it easier to remove finished compost from the container, it is best to make the front or side wall in the form of a door, or assemble it from removable boards.
- If the compost pit is installed in a pit dug in the ground, then it should not be buried more than 500 mm. The mass placed in such a pit must be mixed quite often, adding a solution with live bacteria to it.
- A mobile compost container looks like a very attractive option - if it has at least some aesthetic appearance, it can be installed anywhere on the site. The only thing that needs to be taken into account is that it should not be constantly in the sun. Therefore, it is best to find a place for the container in partial shade under trees. In addition, if desired, it can be decorated with a removable

- The size of the compost container or pit depends on how much fertilizer is expected to be produced for the needs of the site. But it is best that its dimensions do not exceed 1000×2000 mm. If the area is large and you need a lot of humus, then it is recommended to make several small containers with an approximate size of 800x1000 mm.
- You should not make the container box too high - it should have a height that will allow you to easily loosen the mass, and this must be done quite often. Therefore, it is most reasonable to provide the height depending on the growth of the gardener.
- Whatever material the compost container is made of, its bottom should not be covered - it always remains earthen. Thus, the box will maintain moisture, which will come from the soil. In addition, free movement will be ensured for earthworms, which also take an active part in the production of humus.
What kind of waste can be put in a compost container?
Compost will be of high quality and beneficial for plants only if it is made from environmentally friendly plant products. Therefore, you need to know what can be placed in a container and what absolutely cannot.

- Tree branches (but they are placed only on the bottom of the composter - this will be a kind of drainage layer).
- Fallen leaves, pine needles, roots, bark and shredded tree branches.
- Mown or weeded grass.
- Peelings of vegetables, fruits and berries, as well as spoiled fruits.
- Chicken droppings, aged two-year rotted manure.
- Ash and charcoal left over from burning wood.
- Sawdust, straw, hay, shavings and other small wood waste.
- Remains of tea and coffee brewing.
- Paper bags, corrugated cardboard, used napkins and paper (of course, if there is no printing ink or office glue on the waste paper).
- Sometimes the lower branch drainage layer is sprinkled with lime to quickly split the wood.
All plant waste, for example, layers of freshly cut grass, must be sprinkled with a layer of garden soil, since without it decomposition will be slower.
It is also very important to know what should never be put into compost, otherwise it may not help, but harm the plants.
Prices for garden containers
garden container
So, you cannot put inorganic substances into the container that do not decompose or, when decomposing, release toxic substances, dangerous not only for plants, but also for humans. In addition, there are other substances and products that are contraindicated to be placed in compost pits. These include:
- Plastic bags, products made of plastic, rubber, metal and synthetics.
- Plants treated with chemicals.
- Tops from potatoes and tomatoes - they can be infected with late blight.
- Bones from fruit trees and animal bones.
- Pet feces may contain helminths and their eggs.
- Pet hair, as it will take a long time to decompose.
- It is important to ensure that no glass gets into the compost, since when processing the beds it can seriously injure your hand.
- It is not recommended to place thick branches in the upper layers - they will take too long to decompose.
What types of compost pits are there and how to make them yourself?
Compost pits or containers are made from different materials- it can be wood, metal, smooth or wave slate, metal mesh and polyethylene film or geotextiles, polyethylene black bags and more. The design of containers can also be different, but they must function according to the same principle. Next, we will consider the designs of various compost pits, from complex to the most simple options, so the reader will have the opportunity to choose the most suitable one for a particular case.
The first option is a ready-made plastic container
To begin with, it is worth considering ready-made option composters, which can be purchased in specialized stores. These are plastic containers made taking into account all the necessary conditions for the production of humus.

Containers of various volumes and shapes have quite affordable prices, which start from 1,300 rubles, and if there is no opportunity or desire to make a compost pit yourself, then the best solution would be to purchase this agricultural structure ready-made.
Containers are quite compact products with a neat and stylish appearance that will not spoil landscape design plot. Moreover, most often the plastic of such composters is painted green, which helps the container visually “get lost” against the background of the vegetation of the area.
The containers are sold unassembled, so they can easily be delivered to the installation site, even by public transport. They come with assembly instructions, and it will not be difficult to assemble such a container yourself, since this does not require any tools.

To make it easier to remove finished humus from the composter, the design includes a side door that simplifies its operation.
Composters are made of frost-resistant UV-stabilized plastic, which perfectly withstands the effects of ultraviolet radiation, precipitation, wind and temperature changes. The advantage of this design compared to the “classic” one compost pit installed in the ground is that it will not become a source of unpleasant odor, since the aeration system provided in the container does not allow waste to rot.
The second option is a homemade wooden compost container
This version of a compost pit will not be so easy to make with your own hands for those land owners who do not have carpentry tools or do not know how to work with them. However, knowing the dimensions of the blanks, they can be ordered from a carpentry shop, and assembling the box yourself should not be a problem, since this process does not require special tools. If the “carpentry tool arsenal” is available, and there is at least a little experience working with it, then the manufacturing process will be simple and quick.
So, for a wooden compost container you will need 24 boards 1500 mm long, 25 mm thick and 150 mm wide.
The tools you will need are a circular saw or jigsaw, a regular or electric plane, clamps, a tape measure and a simple pencil.
| Illustration | |
|---|---|
 | The first step is to make parts for the container. For this purpose, it is advisable to use high-quality durable wood that will be resistant to external natural influences, such as moisture, wind, temperature changes and ultraviolet rays. This is due to the fact that the container will be located constantly on the street. And in addition, the wood will be exposed not only from the outside, but also biologically - from the inside, since decomposition processes will actively occur there plant waste. |
 | The boards are sawn and planed on all sides so that they look fairly neat. This is especially important if the container is located on an area that is clearly visible - probably no one would want the box to spoil the landscape design. |
 | After the boards are prepared, they are folded together and tightly tightened with clamps on both sides. Next, 100 mm is measured from each edge, then another 25 mm is set aside and marked with a pencil - this will be the width of the groove to be cut. The groove depth should also be 25 mm. |
 | Then, cuts are made on the marked boards. To do this, manually circular saw The cutting depth is set, and in the area marked on the boards many cuts are made at a distance of 1÷2 mm from one another. When the wood is broken into small pieces, it can be easily removed from the boards with the same saw. |
 | When the grooves are ready on one side, the boards are turned to the opposite side. Markings are also made on it - first 100 and then 25 mm are laid off from the edge. After which the process of cutting the grooves is repeated. The grooves on one and the other side along the width of the boards should be exactly opposite each other - as shown in this illustration. |
 | The next step is to take two boards with grooves, fold them and fasten them together with clamps. A line is drawn dividing the boards exactly in half - in this case it is 75 mm from the edge, and the boards are sawn along this marking. These parts will be used to install the lower and upper, that is, the last row of the structure. |
 | Next, all surfaces of the finished boards, including cut grooves, must be treated with one of the antiseptic solutions. This product will prevent putrefactive processes and extend the life of the wood. The antiseptic is applied with a wide brush. It is important to ensure that there are no untreated areas left, otherwise the wood may begin to decompose from them under the influence of processes occurring inside the container and external natural factors. |
 | After the wood has completely dried, you can proceed to assembling the structure. The container should be installed on bricks, since there must be space below for air to enter. The bricks are placed on the site where the compost bin will be permanently installed. The installation site should be relatively flat so that there is no distortion of the container walls during its assembly. |
 | Assembly begins with two boards that have a groove on only one side being installed on edges of securely laid bricks. They are positioned so that the groove points upward. |
 | Next, perpendicular to them, boards with two oppositely placed grooves are installed, that is, on each side. The bottom groove of the top board should fit into the groove of the bottom board standing on the bricks. This is clearly shown in the illustration. |
 | The next step is to install boards located parallel to the lower structural elements. The entire box is assembled using the same system, all the way to the top. The work goes quite quickly - if necessary, the board installed on top is knocked down by hand or, carefully, with a hammer. |
 | The last to be installed are two boards that have grooves on only one side - they are, naturally, mounted with the cutouts facing down. The result is a “well” with the necessary distances between the boards, through which oxygen will flow into the compost. |
 | It is not enough to make and install such a box - it is also very important to fill it correctly. The bottom layer of filler is branches (in this design it will be located between the bricks installed under the container). And the thickness of such a layer should reach half the width of the bottom wide board, which has grooves on both sides. The branches need to be laid quite tightly, as they will act as drainage. Lime 70÷80 mm is poured on top of the branches, and then waste, then a layer of soil (its thickness should be about 100 mm). Next again comes waste, ash and soil. Then, waste, manure, soil and more waste. In this case, ash, manure and lime can be periodically swapped. It should be noted that this is only one of the filling options, since each gardener invents his own “recipes” and uses different components to make compost. |
This design is good for everyone, except that getting ready compost out of it will not be very convenient. The most commonly chosen option is a compost bin with installed door or with removable boards.

In this design, I would like to consider the front side of the container, which is equipped with removable boards installed at an angle to additional corner vertical posts.

To fix them at an angle, complex grooves are cut at an angle on one side of the boards that form the side walls of the container. To make them the same, the boards are folded together in pairs, fastened with clamps, and then the marked part of the groove is selected with a jigsaw.

The result of the work done will be the container shown in the illustration below. It clearly shows the boards installed at an angle and two added vertical posts holding the side walls on the “facade” side.

One more circumstance must be taken into account. This means that wood that has not been treated with an antiseptic and unpainted can swell under the influence of moisture, and when exposed to the sun, begin to dry out, causing cracks. In this case, it will be very difficult to remove the boards from the grooves. Therefore, I make the grooves in such a way that initially the boards come out very freely, and before assembling the structure, it is recommended to process and paint its elements. Besides this, wooden structure It is best to install under the roof or under the canopy of trees.
The container can be one- or two-section, open or closed. It is better, of course, to build a two-section version, or to place two composters side by side, since they can be used in turn - using ready-made humus from one container while it matures in another. Having emptied the first composter, they move on to using compost from another, and the first one is filled with waste again.
If the site area allows the container to be located away from residential buildings, then it can be made open. If the composter is installed near the house or recreation areas, it is recommended to equip it with a lid.
The third option is making a compost bin
This method of making a container for compost production is so simple that any gardener can do it independently, since the process does not require any special effort or the ability to work with complex tools.

To make this version of the container you will need the following materials:
- Metal welded mesh with cells 40x40 or 50x50 mm - length 3000 mm, width from 700 to 1000 mm - this will be the height of the basket. The width of the material is chosen at the request of the master. You can choose a regular steel mesh, but it is better if it has a polymer anti-corrosion coating.
- Thick polyethylene film or black geotextile, 3500 mm long and 750÷1050 mm wide (depending on the planned height of the future basket).
- Stationery clips – 8÷10 pieces.
- Flexible and strong knitting wire for fastening the mesh.
The tools you will need to prepare are regular scissors and metal scissors, pliers and a tape measure.
| Illustration | Brief description of the operations performed |
|---|---|
 | The metal mesh is unrolled and leveled. A strip 3000 mm long is measured and cut from it. |
 | Then the cut strip is rolled into a cylinder so that the edges overlap by approximately 200 mm. This connection point along the entire height of the cylinder must be carefully tied with wire or plastic clamps - puffs. |
 | Next, polyethylene film or geotextile is spread, the fabric of the required size is measured and cut. (The work will go faster if you have such an assistant))). |
 | The next step is to roll up the cut film or geotextile and install it inside the basket. Then, the material is distributed along the walls. |
 | The top edge of the film is folded over the edge of the mesh outward and hooked to the walls of the basket using office clips. They will securely fix the canvas and will not allow it to come off even when mixing the compost. |
 | That's it - the compost bin is ready. It is not heavy at all, so it can be easily moved to any area of the site. |
 | Next, the resulting container is filled with various waste of plant origin, which is stacked in layers. The first, the most bottom layer, there are branches that are sprinkled with soil, then any grass, fallen leaves, waste from cleaning vegetables from the kitchen, etc. Then comes another layer of soil, and then plant waste. After filling the basket, its contents must be poured with water so that it reaches the bottom of the container. After which a special environmentally friendly product is diluted and infused, containing bacteria that promote the rapid decomposition of plant products, which will significantly accelerate the maturation of the compost. Taking compost out of the basket is quite simple - you just need to lift one edge of the container, scoop out the finished compost with a shovel, put it in a garden cart and take it to the area to be fertilized. |
Here it is necessary to clarify the point that if polyethylene film is used for the inner covering of the basket, then holes must be cut in it to allow oxygen to enter the processed mass. If you decide to use geotextiles for the compost bin, you won’t have to cut it, since it is a “breathable” material, that is, it allows air to pass through well, and also retains moisture and prevents its rapid evaporation.
The fourth option is a concrete compost pit
The construction of a concrete structure is quite labor-intensive work. In addition, if the pit is located below the top level of the ground, it is not entirely convenient for removing the finished product. In addition, construction will cost much more than arrangement wooden version or making a basket. However, if you want to work with concrete and build a permanent structure, then you need to know how the work on its construction and maintenance is carried out.
Prices for geotextiles
geotextiles

You can build a pit with one or two compartments. If the second option is chosen, then one compartment is intended for mature humus, and the second for constant replenishment.
Since oxygen can only enter such a pit through the top, the lid for it must be made of mesh.
The bottom of the pit is not concreted or waterproofed, since it must remain earthen so that earthworms have access to plant waste, and also to ensure that the mass is moistened by soil moisture.
In such a space that does not have aeration, the waste placed in it may begin to rot, so you will have to loosen it quite often, providing access to air.
Construction work concrete structure consist of the following steps:
- The first step following the marking is to dig a pit in the selected location. It can be of any size in length and width, ranging from 1000 mm or more. Here it is necessary to take into account that interior space the pits will be reduced due to the construction of side walls. The depth of the pit can vary from 500 to 800 mm, but the deeper the pit, the more difficult it will be to get ready-made humus from there and the more difficult it will be to regularly loosen the mass.
- The next step is to install formwork made of boards or thick plywood along the walls, to the entire height of the pit. It is mounted at a distance of 100÷150 mm from the ground surfaces - this space will be the thickness of the walls.

Before covering the formwork frame with boards or plywood, a reinforcing mesh is installed between it and the ground walls. After this, the formwork sheathing is secured to the frame.
- Next, sand, gravel and cement are mixed in a ratio of 2:4:1. This process is best carried out in a concrete mixer or in a large container, for example, a bathtub or a spacious garden wheelbarrow, since it is advisable to pour the solution into the formwork at one time.
- The next step is to pour the solution into the formwork and “bayonet it”, that is, repeatedly pierce it with a pipe or a piece of reinforcement reaching to the bottom - this process is carried out so that air pockets do not form in the concrete. After the formwork is filled, the poured concrete is left to dry and gain strength. It is advisable to carry out stripping no earlier than after 10-12 days.
- After the mortar has hardened, the walls of the pit must be raised above the ground using brickwork, or again by building formwork on top finished walls, strengthening the foundation pit, reinforce it and fill it with concrete. The height of the side framing the edges of the pit should be 150÷200 mm.
- The walls of the pit can also be reinforced with brickwork, but a strip base will need to be poured under it along the perimeter of the bottom of the pit with concrete.
If it is decided to decorate the walls with brickwork, then it should not be made solid. It is best if there are holes in it that will allow ground moisture and earthworms to penetrate into the pit.

In such a pit (without air access to its lower part), the waste processing process until the humus is completely ripe will last about two years. And to speed it up, you will need to pour a special solution into the plant mass containing live bacteria designed for such conditions.
Fifth option - slate composter
Building a compost pit from slate is quite simple and affordable way, especially in the case when the farm still has old, seemingly unnecessary roofing material.

It doesn't matter if the sheets have minor damage, since the flow of air into the plant mass will only be a benefit, especially since slate containers are most often made open. The slate will only serve as walls, preventing the contents from spilling outside the area organized for the composter. To create such a box you need to do the following:
- As in previous cases, you first need to decide on the size and design of the container, that is, how many sections it will have. Optimal size the sides of each section of the two-section version are 800×1000 or 1000×1000 mm. The height of all walls, except the front one, should be 700÷1000 mm, depending on the expected amount of waste. The front wall can have a height of 300÷500 mm, which will be convenient for loading waste and sampling finished humus.
- Having chosen a site for installing the box and marking it, the top layer of soil is removed from it by 200÷250 mm for free penetration of soil moisture and earthworms into the mass.
- To secure the slate sheets in a vertical position, wooden or metal posts are installed around the perimeter of the site. They may be required from four to six, depending on the design of the composter.
- Then slate is attached to the vertical posts. It is desirable that a gap of 20÷25 mm remains between the lower edge of the sheets and the soil surface, which will allow oxygen to freely flow into the lower layers of the plant mass.
For faster processing, it is recommended to moisten the stacked waste by adding composting agents with live bacteria to the water.
The sixth option is a compost pit in the ground
This is probably the most common method of arranging a compost pit, which is often chosen by less experienced gardeners. As you can see from the information presented above, this is far from the most good option composter, since the plant waste in it will begin to rot rather than decompose.
Prices for metal mesh
metal mesh

Such a pit is best used simply for dumping organic waste that is not intended for the production of humus. If a pit is built specifically for this purpose, then it is best to locate it away from residential buildings, since rotting garbage attracts a large number of flies that will try to visit not only the garbage pit, but also the premises of the house.
If this option still turns out to be attractive as a compost pit, then the plant waste piled in it will have to be loosened very often to ensure the aeration necessary for proper processing.
It is not difficult to equip such a pit - to do this, dig a pit 400÷600 mm deep away from the house. The size of its sides may vary, but best option- this is 600×600 or 700×700 mm. The large size of an unsupported pit can lead to erosion processes in the soil around it, that is, it will begin to crumble and expand. If you need a larger hole, then its walls need to be reinforced with at least slate, placing it to the full depth.
It is recommended to sprinkle kitchen waste, such as vegetable and fruit peelings, dumped into a pit with grass and a small amount of soil - this will partially help hide the unpleasant odor that attracts flies.
It would be useful to add special substances to such a composter, however, it is necessary to choose environmentally friendly preparations, since the chemicals can spread with rain and ground moisture into the garden beds or get under the roots of trees.
The seventh option is composting waste directly on the ground
Another method of preparing fertilizers, which is often used in rural areas, is storing plant residues in the form of a stack. It is available to any owner and simplest method compost production. However, it has some inconveniences, since loosening the mass folded in a stack, as well as getting ready-made compost from under the upper fresh layers, is quite inconvenient.

If you still decide to opt for this option, then before laying the waste it is recommended to lay a layer of branches on the ground, which will allow oxygen to freely penetrate into the lower layers of the stack. In this option, the compost will reach full maturity after one and a half to two years.
If it is not possible to build a composter and even carry out the labor-intensive work of erecting and loosening stacks of plant waste, then there is another the simplest way for the production of compost. It can be called “female”, since all this is done without any special physical effort.

In this case, the waste is also placed directly on top of the soil. The best place for this there will be partial shade, which can always be found under the trees of the garden. You can organize such a composter directly on a temporarily unused garden bed, covering the plant waste with any dark material. This compost pile does not need to be high, so it can be easily loosened with a fork. If there is a lot of waste collected, then several piles are organized in different parts of the garden. With this approach, the finished humus will not have to be transported from one corner of the garden to another, since it will be produced in the area that needs to be fertilized.
Find out how to do with step by step instructions, V new article on our portal.

However, in this case, there is no way to do without bioactivators. Work on compost production takes place in the following order:
- A pile of plant waste no more than 500 mm high is placed on the soil. Each layer is sprinkled with garden soil.
- Then, all waste is watered, since all layers must be wet.
- Next, according to the attached instructions, the bioactivator is diluted, infused, and the entire heap is watered with this solution.
- The wet biomass is covered with dark material, but in such a way that the lower part of the heap is slightly open for free access of oxygen. If there is no dark film or, then an old oilcloth that does not let through sunlight. The corners of the covering material are pressed against the ground by heavy objects, such as stones or bricks.
- The finished structure is left to reheat. Well, you need to loosen it about once every two weeks.
- According to experienced summer residents who use this method of producing humus, its full ripening occurs within 5–6 months.
Biological products for making compost
Now a few words should be said about the preparations that are used to prepare compost.
Today in specialized stores you can find a large number of different products that help reduce the decomposition period of biological waste.

When bioactivators are used to make compost, it matures much faster than when plant waste decomposes under natural conditions. And this is especially important when the site needs to be fertilized annually, since it is constantly used for growing crops.
Bioactive agents containing , help not only fast production humus, but also the destruction of harmful microorganisms, the elimination of unpleasant odors, as well as the enrichment of the soil minerals. The preparation of solutions from concentrates is carried out according to the instructions provided by the manufacturer on the packaging. However, experienced gardeners advise adding a little sugar or old jam to them after diluting bioactivators. This will help give a kind of “acceleration” to the initial activation of living bacteria that are in a “dormant” state before breeding. After dilution, the solution should sit a little. It’s interesting - if you mix it in a bucket, you can even visually observe how the activation process goes.
The table below presents several preparations that can be found in stores that sell products for treating and fertilizing garden plots.
| Names of bioactivators | Weight or volume of packaging (grams or milliliters) | Average price in rubles (summer 2017) |
|---|---|---|
| "Compostar" | 50 | 200 |
| "Compost" (compost in 15 days) | 100 | 360 |
| "Baikal EM-1" | 40 | 380 |
| "Compostello" | 70 | 200 |
| "Happy Summer Resident" | 45 | 120 |
| "Bioforce Compost" | 250 | 580 |
| "Sanex EcoCompost" | 100 | 300 |
| "Doctor Robik 209" | 60 | 180 |
| "ETISSO Kompost vital" | 1000 | 670 |
| "Sanex Ecocompost" | 1000 | 280 |
| "Compost 25" | 1000 | 300 |
If the above-mentioned products are not found in the nearest store, the seller will definitely offer other options for bioactivators. Before purchasing the selected drug, you should carefully study its characteristics, manufacturer’s recommendations for use and instructions for preparing the working solution.
In conclusion, I would like to say that based on the information presented above about the existing options for arranging a composter for processing plant waste, it is quite possible to make a choice suitable option. It depends on financial capabilities and practical experience working with various materials and tools. And the presence of a compost pit in a garden plot, in any incarnation, is always a big plus.
And for complete information, watch a very informative video that contains recommendations on self-production compost from plant waste.
Video: Tips for a gardener on making quality compost
The compost pit is the most simple design, which will allow you to prepare fertilizers from compost in the country.
They enrich the soil, allowing for a larger harvest. But to prepare fertilizer, you need a place for its production - a hole/box.
Making a compost bin is much more difficult than digging a hole. A DIY compost pit can be prepared in just one day, but lasts for years.
Humus as a result of composting is a very valuable mineral fertilizer.
Basic rules and nuances
Although setting up a pit is extremely simple, this process has a lot of nuances that must be observed both during construction and during operation of the pit in order to obtain fertilizer:
- The size of the pit is selected taking into account the garbage that will accumulate over 2 years + the garbage that will constantly rot in the country;
- If the pit structure is closed, then the compost smell should not penetrate outside;
- The process of lifting compost humus from the pit should be simple;
- The pit can be covered or open;
- The pit can be built with a lid for constant air access;
- It is better to dig a hole in the area behind the yard so that it does not spoil the landscape;
- If the pit is concreted, then you need to put earthworms in the compost so that they accelerate its “ripening”;
- The pit must be arranged so that straight lines do not fall on it. sun rays, otherwise the compost will dry out;
- Sheets of metal or slate cannot be laid at the bottom of the pit, but the walls can even be made from tires;
- If you pour soapy water into a hole, you moisten the compost and enrich it with phosphorus, sulfur and ammonia, from which bacteria extract compost nitrogen;
- The distance from the pit to the well should be as large as possible. This way you will protect groundwater;
- To make fertilizer from compost, it takes from several months (with the participation of special additives) to 2 years! So it’s better to make either two pits, or one into 2 sections;
- A hole near fruit trees in the countryside means their certain death;
- A concrete pit is preferable to a simply dug one;
- If you don’t know how to mix concrete, you can easily put a brick wall on the sides of the compost pit.
- Minimum dimensions of a compost pit: 1.5 x 3 meters, depth - up to 1 meter;
- The compost will need to be constantly shoveled/sorted with a pitchfork, so the hole should not be very deep;
- It is advisable to arrange two pits: the compost matures slowly, while one pit is being prepared for the coming season, you are preparing a second compost for the season in a year;
- Please note that if the pit is open and the wind blows, the compost smell will “kill” any appetite, both at your dacha and among your neighbors;
- Always be careful about the ingredients you add to your compost. Not all of them are useful for crafting! They will be discussed separately at the end of the article.

Features of the pit design
The design of a compost pit has its own nuances that must be taken into account when creating it. Compost loves good moisture and looseness to enrich it with oxygen, which is extremely important not just for rotting, but for the decomposition of organic matter into minerals.
You need to regularly water the compost heap and cover it with a lid or cover it with film to create a greenhouse effect in the pit and compost.
Use a fork to loosen the compost, or alternate brown and green materials when filling the hole (they will be discussed separately).
The design of the compost pit may be different, but if we take into account the standard 6 acres and calculate the approximate need for organic matter for the soil, we will get the following dimensions: width up to 1.5 m, length - 2 m, and height - maximum 1.5 m.
We will not consider options for a compost bin, for which such a height is always justified, but we will find out why such a depth is needed.
If we do not use special microorganisms when preparing compost, then “on our own” the organic matter on the site will decompose in about 2 years.

For this reason, it is illogical to make a small compost pit, and just one. Two sections – minimum!
In one pit, the laying of the year before last is already “reaching”, and in the other, compost is being prepared for next year. You can also use barrels instead of the second pit.
Important to note! Many people think that they dug a hole and they’re done. How to loosen compost?!
In the dimensions indicated above, the height of 1.5 meters is measured as follows: 0.5 m of the pit itself and 1 meter of the fence that will hold the compost.
This forces us to build a fence, but such a hole is considered the most effective.
In any case, you can dig a large hole and prepare compost in it, but think about how you can make the work of loosening easier for yourself.
You can build a fence from wooden pallets or tires.
Pit manufacturing options
This section provides examples of technologies on how to properly make a compost pit in a suburban area.

Method 1 - a pile of compost, without a pit and a box:
- Choose a secluded place in the far corner of the yard in the country, where there are no plants;
- As soon as organic waste appears, immediately put it in compost;
- Alternate the bookmarks in layers: add waste from the kitchen, immediately add grass/manure, etc. on top;
- As soon as the compost pile grows a full meter in height, make several holes directly in it and fill in the compost preparation;
- Cover the compost with film on all sides so that there is constant high temperature and humidity;
- Water the compost once a week with water and after 3 months the humus will be ready!
- Do not lay any film, slate, tires, pallets, or especially metal under the compost! Moisture from the soil will not be able to rise, and humus will not be washed out, unlike other mineral fertilizers;
- If it often rains in your area, then cover the pile with film, and to prevent “leaks”, sprinkle a small layer of peat under the bottom of the compost;
- Once a month, worms can be added to the growing compost pile to loosen it and enrich it with oxygen.
Method 2 - simple pit:
- We choose a place in the far corner where there are no trees/shrubs;
- We dig a hole 50 cm deep and 1 m wide;
- Place straw, dry grass, small branches, and bark on the bottom;
- After throwing away household waste, immediately cover it with a layer of grass to prevent flies;
- Each piece of waste must be covered with grass - this is how we alternate brown and green materials.
- Don’t throw everything you don’t need into the compost – it’s still not a cesspool;
- If the pit is not in the shade, then the compost needs to be watered regularly;
- If the pit is in the shade, then for ripening you need to constantly cover the compost with film.
A “sandbox” is the same compost pit, only surrounded by wood (optionally, with slate, rubber tires, metal sheets).

Method 3 - sandbox:
- We remove the turf along the entire perimeter of the future compost pit to a shallow depth (30-40 cm);
- If the sides are wooden, then we hammer/bury pegs along the edges of the exposed area;
- We nail boards to the supporting pegs, leaving 2 cm of clearance between them;
- This creates a structure midway between a pit and a box. The advantage of this design is that it is easy to turn over the contents, since they are at a shallow depth;
- If desired, you can use several wooden pallets as a ready-made replacement for stakes.
- Cut down plant residues without compacting them, otherwise you will end up with silage.
- Instead of wooden stakes and boards, you can use vertically driven sheets of slate.
- In hot weather, you need to constantly water the compost. Cover the top of the pile with a lid/sheet of plywood/film.
Method 4 - concrete pit.
Such a compost pit always consists of at least 3 compartments: one for old compost, and the second for constant replenishment.
The pit is equipped with a lid for collecting fertilizer and tedding.
The construction process is as follows:
- We measure out an area in the far corner of the site measuring 2x3 m and make markings;
- On the marked area we remove the turf evenly, but do not throw it away - it will come in handy;
- We dig a hole 0.8 m deep;
- We build formwork and pour concrete (10 cm thick).
How to prepare the solution:
- Pour gravel into two 10-liter buckets and shake well;
- Add water using a measuring cup. If 5 liters of water enter the bucket, then the gravel voidness is exactly 50% (a ratio of 2 to 1 is required);
- Add 10 liters of river sand.
Stir the solution.
Attention! If there is more water than required, the concrete will contain bubbles. Pledge good concrete– the ability to mix thoroughly!
The concrete will dry in 2-3 days and you can start pouring compost components into the finished pit.
Instead of concrete, you can use barrels buried directly in the ground, as a result of which they will be both a hole and protection at the same time, as well as brickwork or a stack of tires (the sides need to be sawed off).
There is another popular option - creating a compost bin using Finnish technology, but it requires much more time and effort.
How to prepare compost?
First, you need to know what you can and cannot put in your compost pile.
- Fruits, vegetables, cereals, berries in any form;
- Ash, leaves, straw, grass, branches, bark;
- I love any pine needles;
- Shredded paper, napkins, cardboard;
- Sawdust, wood shavings and dust;
- Manure, bird droppings.
- Any bones;
- Excrement of carnivorous animals (cats, dogs);
- Tomato and potato tops;
- Inorganics: plastic, rubber, iron, synthetics;
- Any organic matter that has been treated with insecticides or herbicides.
The balance of the mixture in the composter is the key to successful ripening, so you need to correctly combine green material (bird droppings, fruits, vegetables, peelings, coffee grounds and tea leaves, fresh weeds) and brown (fallen leaves, sawdust, straw, hay, bark, domestic wool). animals).