Examples of exterior decoration of the veranda of a wooden house. Sheathing the outer part of the veranda and the inner
Finishing the terrace outside and inside plays an important role in shaping our feelings from the time spent there. The same applies to verandas - both closed and open. That is why it is worth approaching work on such premises as prepared as possible, having a clear idea of \u200b\u200bthe desired end result.
Below we will tell you what materials can be used to decorate terraces and verandas, and also describe the technology for performing the most common operations.
Choosing materials
natural wood
One of the key issues that we will face when planning finishing works, will become the choice of material. And here, of course, natural wood would be the best option.

Both soft and hard rocks are used for flooring, wall cladding and fencing.
Soft wood is less durable and strong, but at the same time it is easier to process. And the price is more attractive.
Soft breeds include the following:
- Pine. The most common wood, which is used almost everywhere. To compensate for the shortcomings of this tree, the boards are made with special grooves that provide water flow.
- Spruce. It is advisable to use lumber that has undergone special heat treatment. In this case, the finish will be more durable.
- Larch. Great for porches and covered terraces. For laying larch boards in open spaces, it must be impregnated with protective mixtures based on beeswax.
As for hard rocks, their advantages include stability and durability. But such a finish will cost much more.
Note!
For processing this type of wood, sometimes you need to use special tools.
They differ increased strength and better "keep" sharpening.

Among solid wood worth highlighting:
- Oak. Ideal for both indoor and outdoor patios. It has an attractive texture and color. It is cut with great difficulty, but it is practically not subject to abrasion. Oak boards are best used for flooring.
- White fir. Widely used in decoration. It has water-repellent characteristics, therefore it can be used on terraces without a roof.
- Bamboo. Can be used to install support pillars, as well as for the design of fences. In addition, bamboo mats are often used to decorate walls.
Other finishing methods
However, wood is not the only material, which can be used to decorate open and semi-open spaces.
Also used for this purpose:
- Plastic panels. Naturally, we are talking not about cheap white plastic, but about high-quality imitation natural wood. Similar panels are used for interior and exterior wall decoration. (See also the article.)
- Wood plastic composite. modern material, which can be used both for laying floors and for decorating vertical surfaces. Composite modules are easy to install and provide high-quality thermal insulation.
Advice!
In order for the wood-plastic composite not to discolor, it should be processed special formulations with UV filter.

- Natural and artificial stone. Used for wall cladding. Can be used in combination with other materials, such as decorative plaster.
- Floor tiles. It is laid in open spaces, providing maximum effective protection from moisture. Also floor tiles veneer those parts open terraces on which a brazier or stove is installed.
Choosing how to decorate the terrace inside and out, you should not be limited only to the options listed above. In fact, there are many finishing technologies, and you are sure to find one that you like.

Work performance technology
Flooring
It is worth starting the design of a terrace or veranda with manufacturing wooden flooring. In our article, we will dwell on the design in detail, describing the process of laying the foundation itself in just a few words.
So:

- On the ground we apply markings for construction.
- According to the markup, fill strip base. The height of the foundation should correspond to the level of the future terrace.
- We lay wooden beams 100x100 mm on the warping - logs. To prevent rotting, we put roofing material or a rubber gasket under each beam.
Advice!
If the area of \u200b\u200bthe terrace is large, then under the logs with a step of about 70 cm we lay support posts made of concrete or brick.
It is also possible to install an adjustable system on screw supports (see picture).
- We align the logs in such a way that after laying the boards the floor is at the design level. We use wooden wedges for leveling.
- We lay the floorboard on the logs. Best Option will be larch or oak board about 35 mm thick and 150-200 mm wide.
- Terrace boards are fixed on the logs with nails or long self-tapping screws. When joining individual parts, we leave gaps of 0.5-1 mm for ventilation and rainwater outlet.
- We trim the ends of the boards on the edge of the terrace with a jigsaw. Along the perimeter, you can install a special oblique bar for draining water.
- At the end we stuff a board shield that covers the underground space.

In some cases, instead of a quality board, a cheap unedged board or plywood boards are used. At the same time, after laying the flooring, the floor is lined with ceramic tiles, which are fixed with glue.
Wall and ceiling cladding
The decoration of the walls of the terrace usually provides for the design of the outer part of the walls of the house, to which the site adjoins.
If there is a need to build a separate wall, then we draw it up using the same technology to ensure the unity of style:

- On the base we fix the frame of wooden beams.
- If there is a need, then between the bars we lay heat-insulating mats based on mineral wool. This is usually done for exterior walls that enclose a terrace or veranda from outside space.
- On top of the frame we fill the lining from the lining. To fasten the boards, we use either small nails or clip-clips.
Advice!
The best choice would be to use class A and B lining from solid pine, larch or spruce.
After sheathing, all walls should be opened with varnish to protect against moisture and decay.
- In some cases, the frame is sheathed with plywood shields. Then we line the lower part of the wall and separate sections with natural and artificial stone, and plaster and paint all other areas.
Such interior finishes must be protected from the weather. To do this, we varnish the wooden parts, and cover the plaster with special compounds that prevent wetting.
Installation of enclosing structures
Enclosing structures are an important element of a terrace or veranda. They can be represented either by a railing or a capital fence with installed windows.

In any case, the instructions for their construction will be as follows:
- Between the corner posts with a step of about 1.5 meters we install supports for the railing.
- We lay railings from a bar with a section of at least 60x60 cm on support posts.
- In the lower part we mount the filling. To do this, you can use either carved wooden balusters or lattice shields.
- If you plan to install windows, then upper part leave the railing straight. In other cases, a semicircular overlay can be fixed on top.
- We install window structures on the railing and level them. We fix the lower part of the frame with anchors.
- From above, we fix the windows in the floor beams with anchors or mounting plates. We attach the side elements to the supporting pillars.
- All gaps are filled mounting foam. After polymerization, we cut off the foam and sheathe the cracks with either wood or plastic panels.

Note!
It is necessary to sheathe both the inside and the outside, since the polyurethane foam crumbles over time under the influence of UV rays.
Furniture and accessories
Not the last role in the design of terraces and verandas is played by various accessories:
- For most outdoor areas, it would be appropriate to install a barbecue or barbecue. Naturally, the floor in the chosen place must be lined with non-combustible material, and either an exhaust hood or at least an exhaust hole with a chimney should be equipped in the roof.
Note!
If it is planned to install a stationary furnace, then we build the foundation for it separately.
Its power must be sufficient to withstand the mass of brick or masonry.

- In a closed veranda, instead of a stove, you can build a fireplace. It is better to lay it in the wall adjacent to the house: this way we can heat two rooms at the same time.
- Terrace furniture can be purchased, or you can make your own. Homemade tables, benches and chairs made of natural wood look organically in most interiors.
Conclusion
Beautiful finish covered veranda or terraces should be made comprehensively. You need to work on the floor, and on the walls, and on individual accessories. The work will be laborious, and the costs will be considerable, but the result is worth it. More details on the design technologies are shown in the video in this article.
The content of the article:
Finishing the veranda is a set of measures aimed at its improvement. A veranda is called an extension adjacent to the wall of the house. It refers to the type of summer unheated premises and can be indoors or open version execution. Depending on the type of extension, the interior decoration of its walls is carried out. In addition, the configuration of the veranda and its exterior design should fit well into the exterior of the entire building. With simple skills construction works, you can finish the walls of the veranda with your own hands.
The choice of material for finishing the walls of the veranda
The materials chosen for finishing the walls of the veranda must meet practical and aesthetic requirements. A feature of their choice is the lack of heating in the closed annex and the serious impact of climatic conditions on the structure of the open veranda. Therefore, the material used for decor should not only be visually attractive and consistent with the design, but also withstand exposure to the sun, high humidity and temperature fluctuations.
Sheathing the walls of the veranda can be done by many finishing materials, which are used for indoor and outdoor work:
- . It belongs to the classics of the genre, as it is the most popular material for wall cladding due to its environmental friendliness, excellent appearance and pleasant aroma exhaled natural wood.
- Plasterboard sheets (GKL). For verandas, their moisture-resistant version is suitable. Such products differ from conventional plasterboards in their in green. The material is environmentally friendly, easy to install and easy to process in numerous ways. It can take almost any shape, and this is important when decorating walls. Such cladding is used in closed verandas.
- . This material imitates natural wood. It is quite durable, but wet environments are not for it. Therefore, MDF can be used for sheathing the walls of a closed veranda.
- PVC panels. It is a durable and inexpensive moisture resistant material. It is represented by a rich assortment of various shades and colors, can have a different texture, is very easy to use and not particularly whimsical to care for. Suitable for wall cladding of extensions of any type.
- Siding panels. They are practical and affordable. They often imitate wood and come in a variety of colors. The material does not rot, is resistant to temperature changes and fire, is easy to clean and durable. Most often used for exterior wall decoration on the veranda.
Preparatory work before finishing the walls on the veranda

If the veranda has glazing, it is better to finish its walls after installing thermal insulation under the windows. In this case, the room can be used almost until the onset of frost.
For insulation of a closed veranda, you can use mineral wool or foam. To begin with, waterproofing should be fixed on the walls, as it can be taken waterproof polyethylene film. It is overlapped by 150-200 mm, the joints of the sheets must be glued with metallized tape.
After that, it is necessary to install a crate on the walls. The material for it can be wooden beam pre-treated with an antiseptic. The cross section of the timber should be selected according to the thickness of the insulation, and the size of the cell of the crate should correspond to the width of the insulation.
Then the insulation, in particular mineral wool, should be packed in a waterproof material and laid in the cells of the crate. Wrapping the insulation will protect it from moisture and keep it functional for many years.
After that, a foil membrane should be fixed on top of the insulation on the crate and its joints should be glued with adhesive tape. In the process of insulation, it plays the role of a heat-reflecting screen. On this, the thermal insulation of the walls can be completed.
Technology for finishing the walls of the veranda
Having chosen how to sheathe the walls on the veranda, you can start finishing them. Below we will consider several of its options.
Finishing the walls of the veranda with PVC panels

This method of decoration is inexpensive, but it can make an ordinary room cozy and interesting. The panels are not afraid of high humidity and sudden changes in its temperature - they are not able to cause deformations of this material. Panel installation is easy and hassle-free.
The disadvantage of the material can be called its fragility, although at the present time it is possible to purchase "armored" panels, the cost of which will be twice as much as usual. Therefore, after installing such a cladding, you should carefully move chairs towards it or lean against the wall. To minimize the risks, there is such a construction trick: the first plank of the panel lathing is mounted at the level of the knees, the second - the pelvis, and the third - the shoulder.
Frame for plastic panels it is made of wooden slats or a profile that is used when installing gypsum boards. Reiki can have a section of 30x10 or 30x20 mm, before use they should be treated with an antiseptic.
The fastening of the laths of the crate should be carried out in a perpendicular direction relative to the installation of the panels. For example, if the plastic on the wall needs to be placed vertically, then the rails for its fastening should be stuffed horizontally on the wall, the step between them should not exceed 50 cm.
After making the crate in the corner of the room, you need to fix the mounting corner with screws or nails or starting profile. The corner will allow you to dock the panels with each other. The starting profile is installed if the adjacent wall will be sheathed with other material. On the ceiling, you need to install a mounting plate for the plinth.
The first panel is inserted into the guide profile with a spike towards the mounting side. Then it needs to be fixed on the crate using a self-tapping screw with a press washer. Then the spike of the next PVC panel must be firmly inserted into the groove of the previous one and fixed. All other trim panels are mounted in the same way.
Due to the fact that plastic has thermal expansion, a gap of 20-30 mm should be left at the bottom and top of the wall to compensate for it, masking it with a plinth.
Important! Panels with a pattern when sheathing walls are installed from left to right. Plain panels can be mounted starting from either side.
Finishing the walls of the veranda with MDF panels
This material is quite popular among adherents self-finishing. MDF panels are stronger than plastic, but not resistant to moisture. Therefore, they should only be used on closed verandas.
The installation process of MDF panels is similar to the previous one. Only in this case, their fastening is carried out using special metal devices - clamps, which are fixed on the material with small nails or a construction stapler. This must be done through the guide, it will prevent damage to the edge of the panel.
Finishing the walls of the veranda clapboard

Lining is called a wooden board up to 22 mm thick, which has special grooves, with the help of which the installation and joining of the cladding elements is carried out. If the material is treated with an antiseptic, its service life can be extended up to 20 years.
According to the production method, the sheathing board can be solid or spliced. In the latter case, pieces of high-quality wood are interconnected in a special way. Such products do not have flaws in the form of knots or cracks, but are not suitable for sheathing the walls of an open veranda.
The reason for this is the formation of cracks at high humidity in the joints of the board, which spoil appearance finished cladding. The most expensive lining is almost always spliced. It has an “extra” class, and products of classes A, B and C are made from solid wood.
Before finishing the walls on the veranda with a sheathing board, the material must be left to adapt in a closed room for several days, and then the lining should be processed protective composition. Mounting the board on the walls of the veranda is similar to installing PVC and MDF panels.
There are several ways to attach it:
- The simplest of them is fasteners using galvanized nails. In this case, they are driven in along the center of the planks, and the caps are sunk into the wood with a punch.
- Fixing the sheathing board with self-tapping screws is more laborious, but at the same time, the attachment points are not visible. A hole is drilled in the board from the side of its spike, having a depth of about 10 mm. The diameters of the drill and the caps of the fasteners must match each other. Then the bar is screwed to the lath of the crate, and the screw is recessed into the hole and closed with a dowel on top. The place of fastening is then polished.
- The board can be attached to the crate using mounting brackets. For this, a pneumatic or mechanical construction stapler is used.
- Another way is fasteners. wood paneling kleimers. At the same time, it is first attached to the rear wall of the mounting groove of the first bar. Then it is nailed to the wall and only then the kleimer is fixed. The same kleimer is installed on the second board, its spike is inserted into the groove of the previous plank and the kleimer is fixed on the crate rail. With the help of such fasteners, only internal wall cladding is performed.
Before painting the walls on the veranda, it is recommended to apply the selected varnish to a sample of the material and allow it to dry. It happens that after drying, the shade of the coating changes, and it is quite difficult to remove a layer of varnish that does not correspond to the plan. Therefore, it would be better to buy a small container with a paint composition for testing, and if it suits, purchase the rest.
If there is a need to leave the planking wood in its original form, a colorless glaze containing an ultraviolet filter can be applied to it. It will help prevent fading of the walls of the veranda from exposure to the sun.
Exterior decoration of the walls of the veranda

It can be done with lining or siding. Wooden cladding in this regard is somewhat capricious. Despite the treatment of its elements with various antiseptics, when exposed to precipitation, sunlight and seasonal temperature changes, the skin may lose its original appearance if it is not taken care of.
Therefore, every year it will be necessary to carry out various measures to preserve it: impregnation, staining, etc. But if the choice has already been made in the direction of using wood, it is important to remember that the horizontal fastening of the outer sheathing boards should be done upward with a spike, fixing them in 2 rows on each side of the lock connection.
The exterior decoration of the walls of the veranda with siding is more good option. This cladding got its name in the 19th century. Planed and painted boards were fastened at an angle to the plane of the wall so that each subsequent horizontal element slightly hung over the previous one. This position of the boards allowed the water to roll down the cladding without delay. Nowadays, siding performs two functions - protective and aesthetic.
Most often, vinyl siding is used for exterior wall cladding. Its popularity is due to ease of installation, practicality and affordable price. Externally, the material looks like an ordinary board, which is used for facade cladding.
However, vinyl will not lose its appearance even after a couple of decades, despite seasonal temperature fluctuations, bitter frosts and heavy rains. In addition, dirt does not stick to this material and maintenance is minimal - only wash off the dust from the lining of garden hose. Due to the huge number of shades, siding can be matched to any exterior of the house, it will perfectly fit into the overall ensemble everywhere.
Installation of vinyl siding panels is carried out in the following order:
- First you need to make and install a crate for facing the walls of the veranda. This will require unedged board 30 mm thick or wooden beam with dimensions cross section 40x50 mm. It must be fixed in a vertical position with a step of 400-500 mm over the entire surface of the walls. Around the windows, at the corners of the veranda, along the upper and lower edges of the future sheathing, additional wooden bars.
- From below, along the perimeter of the walls in a strictly horizontal position, it is necessary to fix the starting profile to the crate using self-tapping screws.
- After that you need to install corner profiles around openings, as well as in all corners of the building. The lower edge of the corner profile should be 5-6 mm below the level of the starting bar.
- Then you should cut the panels. Vinyl is easily cut with scissors, hacksaw or electric jigsaw. Due to the fact that vinyl panels have thermal expansion, each of them must be made shorter than the wall by 5-7 mm.
- After that, the prepared panel must be slightly bent in the center, and its edges should be brought into the grooves of the profiles located at the corners of the wall. Then the panel should be aligned and its lower edge should be brought into the starting profile. The upper edge must be fixed with screws to the crate through special holes.
- Tight pressing of the screw heads to the panel material is unacceptable. oval shape mounting holes is specially designed for free movement of material relative to the screw part of the fastener with changes in air temperature. There should be a distance of 1.5 mm between the screw head and the crate.
- The next panel must also be inserted into the corner profiles, snapped into the groove of the previous element and fixed to the wall sheathing.
- Before installation last panel it is necessary to install the finishing profile according to the level on the crate. The panel is then cut to the required width and snapped into the previous skin by simply inserting the free edge of the product into the finishing profile. This is where the wall cladding of the veranda with siding ends.
People who plan to equip their house with a veranda or terrace often have a question: what material to use for sheathing the structure? Given that the veranda is a fairly open space, during the construction of which insulation and waterproofing are not used, the issue can be considered relevant. The material used for sheathing must be reliable, durable and safe.
Lining is an eco-friendly material used for interior decoration, which is why it is very popular today.
All these requirements are met by lining - modern construction material made from cut boards. Usually the thickness of the lining does not exceed 22 mm, but there is also a non-standard material that has a greater thickness. As a rule, lining boards are used for interior decoration, but in some cases they can also be used outside. For example, when finishing the veranda.
Preparing for cladding work
When planning the work, first of all, it is necessary to determine the method of attaching the lining elements to the structure. Today there are several of them:

Kleimers do not need to be driven into the lining elements, which eliminates the possibility of damage and cracking of the boards.
- Kleimers are the most convenient and neat way in which the decoration of the veranda will be as successful as possible. This is explained by the absence of the need to drive foreign parts into the lining elements, which completely eliminates the possibility of cracking and damage to the boards.
- paperclips construction stapler — fast way, which allows the sheathing to be carried out quite accurately, but there are damage to the boards, which significantly reduces their durability.
- Nails or screws are the fastest way to fasten the sheathing, but at the same time they also have the most damaging properties for lining. In addition, the risk of damage to the material is quite high.
If the master has great experience work with lining, you can use nails. In this case, the finishing process will take place as quickly as possible, and a stuffed hand will eliminate shortcomings. In all other cases, it is recommended to use a less traumatic material method.
When the method of sheathing the veranda is determined, it is necessary to prepare the right materials and tools. V this case you will need:
- lining;
- screwdriver;
- fine-toothed saw;
- perforator or drill;
- building level;
- beam;
- fasteners for lining (kleimers, nails, screws);
- yardstick;
- antiseptic compounds for processing lining;
- stain, varnish or paint.

Covering the lining with an antiseptic is necessary so that it does not rot.
When choosing lining for lining the veranda, you need to pay attention to its length. So, if during the finishing work in the room it is desirable to acquire the maximum long boards, then finishing the veranda requires the purchase of a shorter material. This is explained by the presence of a large number of window openings in this room. Short material is easier to adjust to the required size.
In addition, it is necessary to take into account the type of wood from which the lining is made. Here, the most successful choice would be boards made of pine, larch or aspen. They are suitable for both a cold terrace and a heated room.
Back to index
Carrying out the sheathing of the room with lining boards
As a rule, few of the owners build an insulated veranda, usually it is an open space intended for use in summer time of the year. And this means that moist air from the street can freely penetrate the veranda. Therefore, all material used for decoration must be treated with antiseptic solutions that exclude the occurrence of mold and decay. This will significantly extend its service life.
In the event that the climate in the region where it is located Vacation home, is characterized by high humidity, it is more practical to use not wooden, but plastic lining or metallic profile. This will slightly increase the cost of finishing work, but will also give the structure durability.
Back to index
Features of the inner lining
The need to install the crate depends on the design of the veranda. So, if the room is built of even and smooth boards, the crate is not needed: the lining boards can be mounted directly on the tree. If the structure is an open frame made of timber, it is necessary to create a base to which the lining will be attached.

For the crate, bars with a section of 20x40 mm are selected. The bars are then attached to wooden frame. The bars, which will be the basis of the crate, are installed in the corners of the structure. Their verticality is checked with a plumb line. Then the bars are mounted horizontally under the ceiling and along the floor line.
Subsequent actions depend on the method of fastening the lining boards. So, if the lining is nailed horizontally, the lathing bars are fastened vertically along the walls in increments of 50 cm. When the lining boards are arranged vertically, the crate elements are nailed horizontally in increments of 50 cm.
The first element of the lining is nailed with a comb into one of the corners of the room. If clamps are used as fasteners, either special nails or screws can serve as fasteners for them. Kleimers are put on the bottom bar of the groove of the lining element and nailed to the crate. The next element of the lining, inserted into the groove with a comb, closes the attachment point.
In a similar way, the interior decoration of the veranda is made. After that, you need to move on to the exterior.
The terrace is part country house. The extension can be open and closed. The classic image of the veranda in the minds of most people is a wooden building.
Currently, the decoration of the terrace is carried out using a variety of materials: natural and synthetic. But it is the tree that gives the veranda a unique look, creates a comfortable atmosphere.
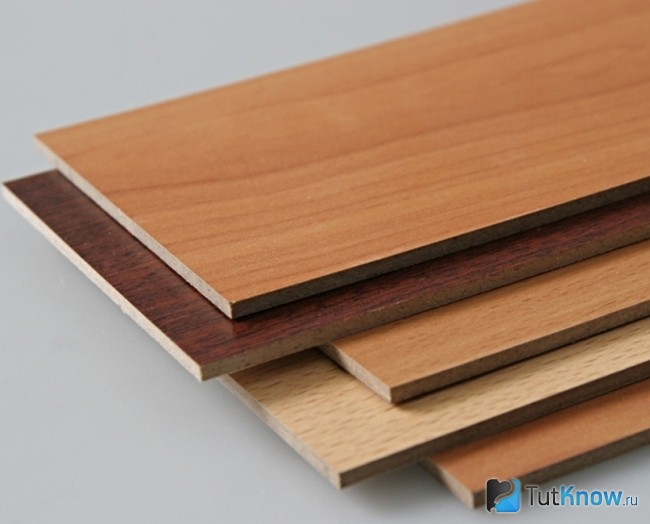
Variety of wood cladding
Modern manufacturers offer a large number of wood materials for decking. This different types raw materials: coniferous and deciduous breeds.
A variety of ways of processing and decorating wood give the output finished goods: beam, deck board, lining, Block House, planken, decking (terrace board), thermopine.
Important! Each of the products is used for covering certain surfaces of the terrace. Some are suitable for walls and ceilings, some are ideal for flooring.
- It is more convenient to use for finishing the terrace timber imitation, since the material is made of a much smaller thickness than a beam intended for the construction of a log house or the construction of a frame. Outwardly, a complete association with a timber building is created. It is used for external and internal covering of a terrace.
- deck boards- the classic version of the wooden floor. They are processed in such a way as to provide the material with resistance to humidity, seasonal temperature changes. For finishing the terrace - one of the most suitable options.
- clapboard- one of the most accessible and well-known materials. It is made with special grooves on the side faces, which simplifies its installation and docking. The veranda is sheathed with a vgonka inside completely, excluding only the floors. It is also suitable for outdoor decoration. It must be borne in mind that the grooves allow water to linger, which leads to warping of the elements.
- Block house will create a complete imitation of a log building. This solution applies to facade cladding. Sometimes they use Block House in the interior decoration of the walls of the terrace.
- planken – innovative material from wood. Installation of boards is carried out with an overlap, thanks to beveled edges. This connection creates a reliable wall covering. Water simply flows down on a flat surface, not lingering in tight seams. It is advantageous to use planken in the exterior decoration of closed verandas, inside open terraces. The service life of the planken is much higher than that of the lining.
- Terrace board or decking produced by special technology. During heat treatment, excess moisture is removed from solid wood. The result is a board that retains its original characteristics under external influences of water, ultraviolet, low and high temperatures. The terrace board can be laid not only on the floor of the veranda, but it is paved garden paths. During operation, you can do without additional coatings paints and varnishes, products will not change their characteristics.
- Heat treatment of pine steam, at temperatures above its combustion, rids the wood of resin. As a result, soft rock acquires unique strength and hardness. Thermopine can also be used as a floorboard, unlike products made from ordinary solid wood.
Tree species suitable for arranging verandas
Wood of any species has a number of general qualities, for which natural material is valued, has not lost its popularity for centuries:
- environmental friendliness, environment natural finish easy to breathe, it is recommended for people with breathing problems, allergies;
- unique pattern of wood, often they seek to preserve it by covering the surface wooden products transparent varnishes;
- respond well to artificial aging techniques;
- conifers emit phytoncides, which are known
medicinal properties.
The cost of wooden products is determined based on the quality of the source material. Products are made from processed edged boards. The following types of wood are distinguished:
- class A - one knot is allowed within 1.5 m of length and up to 2 through cracks;
- class B - up to 4 knots and no more than 2 through cracks are allowed per 1.5 m;
- class C - the number of knots and through cracks is not regulated here, the maximum knot diameter is 25 mm.
Important! When choosing boards or other wood products as a terrace finish, you should be guided by the natural characteristics that this or that breed possesses.
The most common types of wood are:
- Pine- one of the softest and cheapest conifers. Works well, easy to glue. The main disadvantage is a short service life, about 10 years.
- Larch more precious than pine. Possesses high rates of hardness, moisture resistance, is practically not subject to warping. The service life of hardwood materials reaches 100 years.
- Cedar belongs to soft conifers. It is resistant to decay and wormholes. Great for carving. Cedar will last up to 20 years. At the same time, the price is accessible to a wide range of consumers.
- Oak- a deciduous tree, a record holder in terms of life in nature and in products, will please more than one generation - more than 100 years. Does not rot, resists insects well, has the highest hardness.
Despite the viscosity of wood, oak is used for carving. Balusters, racks for fencing will become a real decoration of the terrace.
Special processing methods greatly improve natural characteristics wood, make the natural pattern more vivid. At the same time, prices are rising finished materials. But during operation, owners can appreciate the benefits of investing in more technologically advanced products.

Proper care will extend the life of wooden elements
Wood raw materials in their original form are not used in products and as a finish. Before making materials from natural material, it is subjected to chamber drying, removing excess moisture.
Often at the production stage, products are treated with special compositions of antiseptics and flame retardants. These products give wood additional qualities or enhance existing natural characteristics:
- decay resistance;
- fire resistance;
- resistance to mold and fungus;
- resistance to insects and small rodents.
Immediately after finishing work, wooden elements are covered with protective varnishes, oils, and other compounds. During operation, it is required to regularly maintain the integrity of the outer layer of the finish. The need for constant care is due to the fact that the terrace is under the influence of weather factors all year round.
Premium class finishing compounds make it possible to carry out repair activities not every year, but at the intervals proposed by the manufacturer. protective equipment not only protect wood from external factors, but also give surfaces decorative qualities. Some compounds tint the wood finish, some only slightly tint.
With the help of simple regular measures, a worthy view of the wooden finish of the terrace is ensured. You can also achieve an extension of the life of the wood.
Almost all wood products are repairable. This means that the failure of one element does not lead to the dismantling of the entire coating, it is enough to replace only the damaged product. The exception is lining.
It is worth noting that wood trim good in mono. But the combination of wood with other natural and artificial materials: stone, glass, metal, plastic, ceramics.
Alternative design options
The tree has been successfully used for interior design terraces and in exterior decoration, fences, supports are made from it. In a word, with the help of wood, you can finish the entire veranda.
Among other materials, there are products for universal use, and there are products that have a clear distinction in use. Suitable for multi-purpose applications:
- Plastic panels, they are lined with vertical surfaces inside, the ceiling, columns can be finished. Vinyl siding is installed outside. Products have varied design in color, they can imitate wood, other natural materials.
- Decorative plaster used inside and outside, it is necessary to pay attention to the composition of the mixture. Gypsum-based material is only suitable for enclosed spaces. Cement-based - universal products.
- A rock- in practice, more and more preference is given to an artificial analogue of natural raw materials. decorative brick is also a variety artificial stone. Outside, the lower part of the terrace wall is often laid out, inside the walls are fragmented, and the columns are lined.
For interior design verandas are used:
- drywall suitable for cladding wall and ceiling surfaces, subsequent decoration is required;
- MDF sheets have a decorative outer layer, which is made in a wide color scheme, imitates wood, leather, stone.
In the exterior decoration of terraces, polycarbonate is used - multilayer transparent plastic. It can be used as a wall fence and as a roof. Polycarbonate sheets are easy to cut, freely take a curved shape.
The floor on the terrace can be decorated:
- ceramic tiles;
- porcelain stoneware tiles;
- wood-plastic composite.

Work performance technology
It is important not to neglect the rules for the installation of certain materials, the sequence of work. Compliance with technology guarantees a long service life of the finish.
The first stage of arranging the veranda is flooring:
- first, logs are laid, they rest on the walls of the foundation of the terrace and on brick or concrete columns in increments of 70 cm;
- waterproofing is necessarily arranged under the logs to prevent rotting of the tree;
- mounted on top of the lag batten, products are nailed or fastened with long self-tapping screws.
To finish the walls, a crate is first installed. It is usually mounted from aluminum profile or from wooden slats. Such a frame is necessary for drywall sheets, MDF panels, vinyl siding, plastic panels, wooden cladding.
The space between the crate and the wall is filled with the following layers:
- vapor barrier film;
- insulation;
- windproof membrane.
The design of outdoor terraces is closely related to the exterior of the house. Often just decorated outer wall building adjacent to the site.
The foundation protruding above the ground can be finished with the same materials as the basement of the house. Natural or artificial stone will be appropriate here.
The ceiling of the veranda can remain without additional finishing. This option is possible if the beams are made of good quality timber, the flooring under the roof is made of flat boards or chipboard boards. In this case, the ceiling is simply treated with paints and varnishes.
The second option for finishing the ceiling is to sew it up with plasterboard or clapboard. received flat surface decorate in a convenient way.
A key role in the design of the terrace belongs to the fences. Often they are made entirely of wood. The design options here are endless.
Various combinations are also possible:
- wood and polycarbonate;
- metal racks and wooden filling;
- forged elements in combination with metal or wood.
At the request of the owners, a stove, barbecue or barbecue is installed on the terrace. The elevated temperature zone is finished with non-combustible materials, usually ceramic tile. Be sure to install a chimney and pipe to the street.
Complete the design of the terrace furniture. It can be tables and benches made of wood with your own hands. In the store you can buy special wicker furniture made from solid wood or plastic.
It is necessary to approach the decoration of the terrace in a complex way. For the result to bring joy, do not neglect the little things. In the design it is better to use only high-quality materials.
The most important advantage of a country house in the age of urbanization is the ability to breathe clean air full chest. Alas, in overpopulated megacities, many have simply forgotten not only what a real forest looks like, but also a clear sky. Particular envy among the owners of private cottages is caused by houses with open or closed verandas, where you can gather in the morning and evening with the whole family.
The aroma of summer or falling leaves in autumn cannot be compared with anything, and if you still have a cup of hot tea in your hands, then it seems that all wishes in this life have come true. It's nice, admit it, during the first thunderstorm of the year on the open veranda to feel the sweetness of ozone, and also to hear the rustle of green leaves under the rain.
All this is possible only under one condition - the interior of the veranda will not repel her, but rather attract. If you are lucky and have closed version such a room, here you can place a dining room, which, by the way, will be in the summer. However, in order to extend the impression of the view from the window, we need high-quality interior decoration of the veranda.

Choosing materials
Before answering the question - how to decorate the veranda inside, it should be said that they should carry not only an aesthetic, but also a practical orientation. It should be borne in mind that the veranda is usually not heated and has similar elements with a gazebo, which is attached to the main house.
In this situation, the corresponding requirements are imposed on the decor:
- beauty;
- resistance to high humidity;
- are not afraid of temperature changes.
Wood processing and insulation
Most often, in private houses, wood is used to build verandas; probably not a single building material can compare with it. But, because of its naturalness, it can cause a lot of trouble. Therefore, before fine finish it is necessary to treat the wood with antiseptic compounds.
If you have exactly from holding thermal insulation works for walls under windows, as well as ceiling structures. Try not to rush and do everything carefully so that you can use the room until almost frost.

To insulate the ceiling, you can use those materials that are easiest for you to work with, for example, mineral wool, polystyrene foam or polystyrene foam, professional teams can treat the surface with liquid polyurethane foam.
The price of the latter, taking into account the work, is high, it is best to take XPS boards and mats or mineral wool rolls.
- Secure the waterproofing to the walls and ceiling using a waterproof film.
- Glue the joints between the sheets with metallic tape.
- Install a wooden crate. The cross section of the beam must match the height of the insulation, the crate cell must correspond to the width of the heat insulator.
- Insert insulation between the bars.
Tip: before installing mineral wool, it must be wrapped in a waterproof material so that it does not get damp and deteriorate after a few years.
- Install a foil insulation over the insulation (foil inside the veranda). Seal the seams between the sheets with metallic adhesive tape.
- Insulate the ceiling in the same way.
Veranda decoration
The veranda is finished inside with their own hands only after the end of all preparatory work. There are two ways to eat here - trust your feelings and invite professional designer. Usually they choose the first method, since there are plenty of options to transform the inside of the veranda today.
PVC panels
An inexpensive way to decorate, which will help turn an ordinary room into an interesting and cozy one. The material is not afraid of high humidity and does not deform with sudden changes in temperature.
Installation is easy and without any tricks. Thanks to various color design panels and their texture, you can get quite a decent room that you are not ashamed to show to your friends.
Of the shortcomings, the fragility of the material should be noted, although today you can also buy “armored” types, the cost of which is 2 times more expensive than conventional options. Therefore, you should be careful when moving chairs or leaning on it.
Tip: a construction trick will help solve the problem - the 1st plank of the crate is installed at the level of the knee, the second - the pelvis, the 3rd - the shoulder.
The instructions below will tell you how to do everything at minimal cost:
- Prepare for the frame wooden slats with a section of 20x30 or 10x30 mm, you can also use a profile for drywall sheets. Wood material should be pre-treated with an antiseptic.

Tip: use wooden battens on the wall facing the street. Thus, the formation of "cold bridges" can be avoided. For too uneven walls, it is better to use a profile on suspensions.
- Fasten the slats perpendicularly. For example, for vertically installed plastic, they should be placed horizontally in increments of up to 500 mm.
Tip: finish the panels with a pattern from left to right, plain - on either side.
- Attach a starting corner to the finished crate with self-tapping screws if you will finish the wall next to it with other material, or a mounting corner for joining the panels to each other. On the ceiling, install the fixing strip under the plinth.
- Insert the first panel into the guide profile, with the tongue in the installation direction. Screw it to the crate with a self-tapping screw with a press washer.

Tip: do not fasten the plastic tightly so that it does not deform from this.
- Insert the spike of the next panel tightly into the groove of the previous one, secure it and continue to install the rest on the wall and ceiling as well.
Tip: leave a thermal gap for the material at the bottom and top of the wall within 20-30 mm and close it with a plinth.
MDF
An alternative to plastic is MDF panels, which are also popular among DIY enthusiasts. You need to know that, although they are ahead of him in strength, they are very sensitive to moisture. Install them only on closed verandas.
The installation process resembles the previous one, only the fastening takes place with the help of clamps, special metal devices. They can be fixed with a construction stapler or small nails, doing this through a guide so as not to damage the edge of the material.
Wooden lining
The most traditional finishing option for the veranda is considered wooden lining. It is a sheathing board in which special grooves are cut to facilitate installation, the material thickness is up to 22 mm.
It is used for open and closed verandas. Treatment with antiseptic compounds increases the service life up to 20 years. So far, no artificial material can compare with natural wood.
How to choose
There are two types of lining - solid and spliced, when the best pieces are interconnected in a special way. Although the latter looks perfect, it cannot be used to decorate the veranda. An increase in humidity can cause cracks at the gluing points, which will greatly spoil the interior.
There are also 4 classes of material:
- "premium" - the most expensive, but almost always spliced;
- classes "A", "B" and "C" - from solid wood, differ in the number of knots per 1 running meter. and defects. Often they are treated with putty at the production stage.
Tip: When buying material in a pack, be sure to unpack it and inspect it so that you do not come across low-grade or defective planks.
- Drive a galvanized nail into the center of the board, then drown its head with a hammer.
- Self-tapping screws. Pre-drill a hole in the board from the side of the spike to a depth of about 10 mm, and select the diameter of the drill according to the diameter of the screw head. Screw the lining to the crate by inserting a self-tapping screw into the hole, close it with a dowel and sand it.
- Use a mechanical or pneumatic stapler to drive the mounting brackets into the board.
- Cleimer installation. Similar to MDF panels.
On the last step installation, close the joints and corners near windows and doors with a corner and treat the boards with stain or varnish. Start the process from the ceiling and end with the walls.Conclusion
The work on finishing the veranda is not difficult, more like a creative one. Set aside time for yourself on the weekend, prepare the material in advance and update its interior so that everyone feels comfortable and comfortable in it. In the presented video in this article you will find Additional information on this topic.
