Ruberoid or slate. Battle of roofing materials
Slate is a popular material that is inexpensive, but highly reliable and durable. If you paint it, then in terms of decorativeness it can easily compete with modern roofing innovations. Therefore, the scope of application of slate is almost unlimited: asbestos-cement roofs can be found on both modest country houses and luxury cottages.
The spread of the material is also facilitated by the fact that laying slate on a roof is not a difficult job, anyone can do it. But in order for the coating to last, as it should, for at least half a century, you will need to study all the nuances of this simple but important event.
Many people believe that slate is a universal roofing material. This is wrong. To prevent precipitation from seeping under the slate, it is recommended to lay it only on single- or gable roofs with a slope of at least 15°. If you want to use a flatter roof as a base, you will have to construct serious waterproofing under the sheathing from several layers of roofing felt or membrane, and also increase the overlap of adjacent sheets up to 300 mm.
Slate laying methods
To get roof covering, the slate is fixed to the sheathing in horizontal rows, moving from bottom to top (from the cornice). Each subsequent sheet in a row is placed on the previous one by 1-2 waves. Each subsequent row is also shifted to the previous one, as a rule, by 120-200 mm.
There are two ways to lay out slate:
- Running– when slate sheets of one horizontal row are mounted with a shift of 1-4 waves in relation to the sheets of the adjacent row. The joining line is stepped. This technology is recommended for roof slopes that are wide in the transverse direction (horizontally), but narrow in slope.
- No offset– when slate sheets are mounted in identical, even rows, without shifting. The joints of all rows form one line. Since during installation it is not allowed to create a double overlap (that is, combine more than 2 layers of slate at one point), the edges of the sheets are cut at an angle of 30°-60°. This method most rational for covering slopes that are wide in slope but small in diameter.
As a rule, wave slate is laid staggered. This option is less labor intensive as it does not involve a lot of pruning. Installing slate without offset is much more difficult, since almost every sheet has to be cut in the corners. But this technology also has a significant advantage - it saves material.
Let's take a step-by-step look at the process of covering a roof with slate, focusing on the difference in the two layout schemes.
Slate laying technology
The first step to attaching the slate is to prepare the base - the sheathing, which is fixed directly to the rafters. The lathing can be continuous or sparse.
Solid sheathing is a flooring made of OSB, plywood or boards. Such a base is usually used if it is necessary to cover the roof with slate with an unusually small thickness.
For standard slate with a thickness in accordance with GOST, a sparse sheathing is recommended - a structure made of bars installed at a certain pitch on top of the rafters. A suitable cross-section of the lathing is 40-70 mm. Too thin bars are not used, due to their possible damage under external load (for example, under the influence of fallen snow). Too thick bars are also bad. When warped, they can cause rupture of asbestos-cement fibers and the formation of cracks in slate.
It is recommended to use bars of different heights as part of the sheathing frame. Ordinary bars usually have a cross-section of 60x60 mm; they are fixed in odd rows. Even rows are made up of elements whose height is slightly higher - half the thickness of the slate used. For example, if the thickness of the slate is 6 mm, then the height of the “even” bars is 63 mm. The first (cornice) bar also has a different height - 66 mm, which should rise above the ordinary ones by the thickness of the slate sheet. For uniformity, a different scheme is often used: they use slats of the same height - 60x60 mm, but, in even rows and near the eaves, they are built up using linings 3 mm thick.
The sheathing is fixed to the rafters at right angles using nails or self-tapping screws. Since slate is a durable, non-bending material, 3 support bars are sufficient to install each sheet. The pitch of the batten lathing depends on the length of the sheet. The standard length is 1750 mm, respectively, the lathing pitch is 700-750 mm.
1-2 sheathing beams are installed on the ridge (on each slope) for subsequent fastening of the ridge parts to them. The height of the bars is selected on the spot, in fact.
Additionally, lathing is done around chimney. To do this, ordinary bars are fixed along the perimeter of the pipe trunk at a distance of at least 130 mm from it (to ensure fire safety).

Stage #2. Calculation of the amount of slate
Correctly counting the amount of slate is another important step that will save the roofer from having to last moment purchase 1-2 missing sheets and order transport for this.
You need to understand that not the entire surface of the material is used for direct roofing. Part of the area (along the perimeter of the sheet) is lost under the overlap.
Therefore, the calculation of the amount of slate is carried out as follows:
1. Determine the amount of slate in the transverse (horizontal) row (P) using the formula:
P = (L + 2C) / (B 2 – B 1),
- L– width of the slope;
- WITH– removal of the overhang on the gables;
- B 2– sheet width;
- B 1– width of the sheet under the overlap.
2. Determine the amount of slate in the longitudinal row (n) using the formula:
n = (L o + C 1) / (L 2 – L 1),
- L o– slope length;
- C 1– the size of the overhang from the eaves (approximately 100 mm);
- L 2= – sheet length;
- L 1– size of the longitudinal overlap of the sheet.
3. The resulting figures are rounded up to a whole number, multiplied and the total number of sheets per 1 roof slope is obtained. If the roof is gable, then the calculated number of sheets (+10% - for damage and defects) is purchased in double quantity.
Stage #3. Cutting slate sheets
Before lifting slate sheets onto the roof, it is necessary to sort them and, in accordance with the chosen laying pattern, cut them.
You can cut slate with several tools:
- grinder;
- a hacksaw for wood or foam concrete;
- jigsaw;
- using a drill or slate nail and hammer.
The easiest and fastest way to cut slate is with a grinder with a stone (concrete) disc or a diamond disc.
Cutting process:
- a sheet of slate is laid on a walkway made of boards so that the cutting site is raised above the ground;
- mark the cutting line using a flat wooden strip;
- the cutting site is watered with water to avoid overheating of the disc, to make the slate softer and more pliable, and to settle the released asbestos-cement dust;
- perform the cut, constantly wetting the cutting line and the grinder disc (watering them with water from a bottle).
Sheets are cut in the same way with a hacksaw or jigsaw, but when using these tools you need to be extremely careful not to break them.

Cutting methods using a drill or slate nail deserve special attention.
When using a drill, use a 2 mm drill to make through holes along the cutting line in increments of 0.5 cm. After drilling is completed, one edge of the sheet is placed on a support (a table, for example), and pressure is applied to the other edge, after which the slate is split along the intended line.
Instead of a drill bit, you can use a sharpened nail and a hammer to make through holes. To do this, place the nail on the intended line and hit the head with a hammer. The blows should be careful, strong enough, but not sharp. In this way, multiple pinholes are punched at a short distance from each other. After this, the sheet is split into two parts.
The technology for cutting slate sheets with a grinder is shown in the video:
Stage #4. Laying slate sheets
Laying the slate begins on the side opposite to the direction of the prevailing winds. That is, the installation of sheets begins on the left side if strong winds blow from the right, and vice versa. This will prevent rain and snow from blowing into areas where the sheets overlap.
A cord is pulled along the eaves at a distance of the length of the overhang in order to level the rows of slate along it. Instead of a cord, you can use a flat wooden strip.
Sequence of work in a staggered layout:
1. The first horizontal row begins to be made up of whole sheets of slate. Each subsequent sheet overlaps 1-2 waves of the previous one (as a rule, there is 1 wave per overlap). Fastening is carried out using roofing nails or self-tapping screws with soft (rubber) gaskets.
2. In the second row, the first sheet is cut into a certain number of waves, depending on the desired offset amount. Then whole, uncut products are placed. The sheets overlap the underlying row, forming an overlap of 200 mm - with a slope slope of 15-20°, 150 mm - with a slope of more than 20°. That is, the greater the slope, the less permissible overlap.
3. The third and all subsequent rows begin with sheets cut to twice the number of waves cut off from the first sheet of the underlying row. For example, if the first sheet of the second row was shortened by 1 wave, then the first sheet of the third row will have to be cut by 2 waves, then by 3 waves, etc. It is more convenient to offset by 1/2 the width of the slate. In this case, you will only have to cut the sheets in half in each even row. Odd rows are made up of whole sheets.
4. The ridge row is laid last, making it up from sheets cut across.

In a layout without offset:
1. The first sheet is laid whole, uncut. Align it along the cord, secure it with nails or self-tapping screws. For subsequent sheets of the first row, the upper right corner is beveled at an angle (if installation begins with right side stingray).
2. The lower left corner of the first sheet of the second row is cut off, after which it is joined to the cut corner of the second sheet in the first row. Subsequent sheets are beveled in two corners - in the upper right and lower left (located diagonally). For the last sheet of the second row (located on the left), only the upper right corner is cut off.
3. The elements of the top row (under the ridge) are cut according to the lower left corner and according to the height - in fact. The corners of the last sheet are not cut off. Such a scheme for forming corners is reliable only when laying sheets from right to left. If the installation direction goes from left to right, then trimming is performed in opposite corners (instead of left corners - right corners and vice versa).

Stage #5. Installation of additional elements
After covering the roof with slate, it begins final stage– installation of additional elements. To cover the ridge, it is advisable to use special ridge parts made of asbestos cement. Each such element consists of two parts connected on hinges. As an alternative to the factory part, you can use a galvanized sheet, bent on a sheet bending machine or by hand.

Chimney collars, dormer windows and the junctions with the walls are decorated using corner parts made of asbestos-cement or galvanized collars. They are fixed on top slate sheets using self-tapping screws passed through the crests of the waves. The upper edge of the apron is attached to the wall and sealed. The lower edge overlaps at least 1 wave of the row sheet.
The valleys are covered with galvanized or asbestos-cement trays, installing them from bottom to top. In this case, the longitudinal walls of the tray must be overlapped with slate sheets by at least 150 mm.
Once the additional elements have been secured, installation can be considered slate roofing finished.

Features of fastening slate on the roof
An important nuance that should be discussed separately is the selection of fasteners and their use in the process of fastening slate to the roof.
The following can be used as fastening elements:
- Slate (roofing) nails. Made from durable steel, they main feature– enlarged cap, reaching 14 mm in diameter. To prevent the appearance of rust, the caps are made of galvanized or metal coated with an anti-corrosion compound. The length of the slate nails should be directly proportional to the height of the slate wave. That is, the higher the slate waves, the longer the nails driven into them. According to the recommendations of experts, the length of the nails should be 10 mm greater than the total height of the slate wave (where it will be driven in fastener) and the thickness of the sheathing (bar or board). There is no need to bend the excess rod.
- Self-tapping screws for slate. These fasteners are more expensive than nails, but also easier to use. Self-tapping screw heads can have three designs: under spanner(hexagonal shape), for a flat screwdriver (with a straight slot), for a Phillips screwdriver (with a cross-shaped slot). Under the cap there is a sealing washer with a rubber gasket. Some manufacturers paint heads and washers in different colors (most often based on RAL).
Fasteners are mounted in two ways (to choose from):
- Into pre-drilled holes in slate. Their diameter should be 2-3 mm wider than the rods of the fasteners. The resulting gap will protect the slate from cracking during movement. wooden sheathing, but can cause water to leak under the roof. To prevent this from happening, a rubber gasket is put on the fasteners, which seals the slate roof. Slate screws are structurally equipped with such a gasket, unlike roofing nails. Therefore, you will have to buy a waterproofing washer for nails separately or cut it yourself - from rubber, roofing felt or roofing felt. Then it is put on the rod, under the cap.
- No pre-drilled holes(this method is recommended by most “experienced” masters). In this case, only roofing nails without spacers are used to fasten the slate to the roof. The nail is driven into the coating with light blows of a hammer so that the asbestos-cement layer crumbles from the impacts and does not crack. Otherwise the slate may burst. However, even with the correct technology of driving nails directly into slate, cracking often occurs. This is due to the poor quality of the material, which, unfortunately, occurs all the time.
An important feature of fastening: during installation, the nail or self-tapping screw is not pulled to the limit to the slate sheet, but a small gap of 2-3 mm is left - to compensate for temperature expansion. If you ignore this advice, the slate roof will soon begin to crack.
Fastening elements are installed only in the upward protruding parts of the wave (in the crest), where the slate comes into contact with the sheathing (to connect the roofing sheet to the sheathing material). Fastening is carried out at a distance of 80-100 mm from the edges of the sheets.
- for 5-wave slate – fastening in the 2nd and 4th waves;
- for 6-wave slate – fastening in the 2nd and 5th waves;
- for 8-wave slate - fastening in the 2nd and 6th waves.
Since the slate usually rests on 3 sheathing bars, and fastening is done at the points of contact of the 2 waves with the sheathing, the total number of nails (screws) for each sheet is 6 pieces.

Some additional nuances of how to cover a roof with slate can be learned from the video:
Conclusions – is it really possible to do everything yourself?
The technology for installing a slate roof is very simple. She won't demand from you special costs time, labor and money. Despite this, the roof will turn out beautiful (especially if you get acquainted with slate paint!), reliable and durable.
Despite the fact that there are currently quite a lot of roofing coverings on the market, asbestos cement slate is still quite popular. However, many people do not know how to properly lay slate on a roof. This article is dedicated to those who decided to figure out how to lay slate with their own hands.
Types of slate for roofing
First you need to understand what slate is. Today, wavy and flat sheets of asbestos cement slate are sold. Both are intended for use in a specific case. Often, flat slate is installed on roofs that have a slope of at least 35º. This is done because with such a slope less snow will accumulate on the roof, since flat sheets do not have stiffeners and are easier to break, unlike corrugated slate. However, and wavy slate It is also not recommended to install on roofs with a slope of less than 20º, otherwise water will be able to penetrate through the joints.

With a small roof slope, to improve protection from rainfall, before installing the slate, lay a moisture-repellent carpet made of simple roofing felt or any other water-repellent material with similar properties. The sizes of slate sheets also have great value, because the pitch of the sheathing and the cross-section of materials for the manufacture of its components will depend on them.
Preparatory work before laying slate
Before laying slate on the roof, the base for it must be properly prepared. First on installed rafters the sheathing is stuffed. If it is made from a board, then its dimensions in this case will be 15-20 cm wide and 2-2.5 cm thick. The board can be used both edged and unedged. The main thing is not to forget to sand the edges and impregnate the wood with antiseptic and fire retardant agents to prevent it from rotting and possible fire. When using bars, their cross-section should be approximately 5x5 cm.

When purchasing raw materials, pay special attention quality of each board or block, immediately putting aside defective boards and those that have traces of wood-boring beetles, there are many knots and bluish zones (indicating the initial stage of rotting). The wood must be perfectly dried, otherwise it will simply slide on the already installed roof, and it is unlikely that you will be able to lay the slate properly.
The slate laying scheme involves advance reinforcement of the roof overhangs and ridge with the help of boards laid in two rows without gaps. The sheathing bars are laid along the ridge at right angles to the rafters, and the pitch is taken such that the slate sheets are supported and secured at at least three points along the entire length. For asbestos-cement slate of normal dimensions, the gaps between the sheathing bars or the center of the board, as a rule, should be approximately 55-60 cm. If it is not possible to install a multiple number of sheets, and trimming is necessary, then it is permissible to reduce or increase the length of the roof overhang.

After the installation of the sheathing is completed, waterproofing is installed using roofing felt. Sheets of this material are laid both along and across the roof slope. The direction will be determined by the angle of the structure. But in any case, the edges of the roofing material should overlap by approximately 10-15 cm. The lower the slope of the roof, the greater the overlap of the strips of roofing material should be. Do not forget about insulating the roof ridge with roofing felt.
Before installing slate on the roof, it is advisable to lay fasteners for horizontal drainage gutters.
How to lay slate correctly
There are two ways to lay slate on the roof - by moving the sheets, or by cutting off the corners. The first method is simpler and is used, as a rule, when it is necessary to install an asbestos-cement slate roof. Minus this method excessive consumption of material is considered due to the fact that the outer sheets have to be cut to length.
In addition, it is necessary to take into account the horizontality of the laid material in relation to the ridge and the lower overhang of the roof. It is advisable to lay slate with a shift (“staggered”) when the roof has slopes that are large in width. In this case, the sheets are shifted by one wave, and the eaves overhang is not installed.

The second installation method will explain how to correctly lay slate on a roof whose slopes are large in height and small in width. The installation method is considered more complex, but in this case much less roofing material is required. It is worth making sure that the four corners of adjacent sheets do not meet in one place. According to the technology, if slate is laid on the roof from left to right, the left corner of the sheet is trimmed, and if the material is laid in the opposite direction, then the right corner.
To better understand how to lay slate correctly, it is worth studying the basic nuances of working with such material. First, the slate sheets are prepared, that is, they are checked for defects, and holes are made in them for subsequent fixation with nails. It is worth noting that the holes in the material should exceed the cross-section of nails or screws by approximately 2-3 mm.
If the slope has a slope of less than 20º, installation of the slate begins by fixing it in the second wave from the edge. Try not to drive nails into the slate, but thread them through the holes prepared in advance. To trim corners, you can use a regular grinder or a hacksaw.
Use special nails with a metal washer that will prevent water from getting under the slate. If self-tapping screws are used as fastening elements, then they must have thermal washers.

For proper laying of slate, it is advisable to lay a sealing cord at the joints of the sheets, or seal them with silicones or special mastics. Before installing the starting row of slates on the roof overhang, a cord is pulled to simplify construction work. Laying slate sheets begins on the most leeward side in a given region. Since there are currently a huge number of colors of slate sheets on the market, try to match the screws to match.
And finally, in order to fix the question of how to properly lay slate, it is undesirable to fix the slate sheets too tightly to the sheathing - there must be a small gap. The number of nails required per sheet is determined based on the quality of the wood truss structure. A tree that has served for a long time needs more fasteners. Asbestos cement sheets should be attached to the wave at the highest point. If you want to get the strongest possible fastening, it is better to use self-tapping screws. This may be relevant for those areas that are characterized by strong winds.
The roof can be made from flat, and wave slate. Flat slate is recommended for roofs with a large slope.
But anyway geographical location should be taken into account region.
The surface of the slate sheet is different on both sides. On one side it is more corrugated, on the other side it is smooth. When laying slate on a roof, the smooth side should be on top.
This is necessary in order for the snow to winter time rolled off the roof with ease and did not create blockages, which could lead to water leakage through the overlaps.
Calculate the number of sheets of slate required for covering it is necessary to take into account the overlap, both horizontally and vertically.
Start laying slate need to be on the side opposite to the prevailing winds in this region.
With normal installation On each sheet of slate, except for the outer ones, two corners located diagonally are cut off in order to reduce the thickness of the overlap.
When laying offset, when the next horizontal row moves half the width of the slate sheet, this is not necessary.
How to insulate a roof under slate?

The main thing in roof insulation begins with the installation of slate. To do this, waterproofing is laid under the slate, usually roofing felt. But you can use other materials intended for this.
The roof should be insulated from the inside, i.e. from the attic or attic side. For insulation, it uses various materials, such as mineral wool and polystyrene foam.
Using mineral wool in a roll you need to secure it between the rafters in one or two layers using metal staples. It is better to use special blocks made of mineral wool, they are more convenient for installation.
On top mineral wool or blocks, a vapor barrier is laid. This is a special material that allows moisture to pass through in one direction and does not pass in the other, so you need to ensure proper installation.
The side that does not allow moisture to pass through should be on the outside. The vapor barrier is interrupted directly to the rafters. This membrane does not need to be pressed tightly against the insulation; it should knit a little.
Below and above near the ridge there must be holes for ventilation.
On top of this vapor barrier need to do additional sheathing. Stuff the bars lengthwise along the rafters, and slats across them. It will be possible to attach the internal cladding to them: plywood, chipboard, etc.
Insulation with expanded polystyrene occurs according to the same scheme, The seams between the plates must be filled with foam.
Removing a slate roof

For that to dismantle slate you need to have a nail puller, wooden block, ropes with attached hooks, two guide boards or beams for safe lowering of sheets.
The slate roof should be dismantled in the reverse order of installation. The first row to be removed is near the ridge. The nails must be removed with a nail puller, having first placed a wooden block under it so as not to damage the slate sheet.
Also see:
- Interesting information about how to trim slate when laying
- Comparison of slate with metal tiles, ondulin corrugated sheets - expert advice here
- How to replace slate with metal tiles and corrugated sheets - expert advice here
The sheet must be lowered along the guides, hooking it at the bottom with two hooks with ropes. It will be better if you make a special hole in the slate with a nail for the hook.
And also watch a video about waterproofing slate roofing:

Don't know how to cover a roof with slate? The installation process is quite easy, so you can do it yourself. It is advisable to carry out certain types of preparatory work, characteristic specifically for slate roofing. They should provide additional reliability of the structure.
Preparation
From the very beginning, you need to make a solid foundation - the sheathing. Good for this unedged boards, which are installed at right angles to the rafters. Self-tapping screws or nails are used for fastening, and the fastening distance must be maintained - at least 40 cm, up to 75 cm. If there is a chimney pipe on the roof, the sheathing is also done around it.

Unedged boards do not fit together very well; in any case, there remains a distance between their raw edges. Taking this into account, you need to place them freely, not end-to-end. The purpose of such a sheathing is to serve as a base, and not as a continuous surface. The distance between the boards is allowed up to 10-12 cm.
Please also consider that drainpipe should be placed in advance.
Main stages of slate coating
Waterproofing
1. Roofing felt, roofing felt or a number of modern rolled roofing waterproofing materials are usually laid under the slate. bitumen based(“Gidroizol”, “Rubemast” and the like). The rolls are rolled out horizontally, starting from the bottom row. If desired, you can weld the rolled sheets together. In this case, one should be guided by the technology specified for of this material– how much to overlap, which side to lay, how to weld.

The steeper the roof (slope), the less need to weld the waterproofing together.
2. Fastening roofing felt and others like it does not make sense, since the slate sheets are subsequently attached through and through to the sheathing, capturing the waterproofing as well. When laying roofing felt sheets, you need to be guided only by a practical sense: so that before installing the slate, the waterproofing does not fly away from gusts of wind or under the weight of its own weight on a steep roof.
Covering
1. Laying slate is carried out with bottom rows. Installation must begin from the bottom first, usually with three slate sheets. The overlap is made per wave, regardless of the number of waves and their sizes (length). The slate is fastened with special slate nails with a wide head. One sheet of slate is punched in four or six places depending on its length.

Fastening is done in the second wave, but not in the first! In the place of overlap, slate does not penetrate through two sheets! For slate with eight waves, such nails are driven in even numbers - the second and sixth waves, placing them on the crest, and for seven-wave slate - in the 2nd and fifth. Nails should be driven into the top of the wave, not into the bottom.
2. Then two sheets of slate are strengthened in the next row, and another sheet is added to the first row, and then the top one is placed. This ensures easy access to all sheets. Laying slate on the roof is carried out until the entire slope of the roof surface is completely covered.
Add-ons

- For inexperienced people who are laying slate with their own hands for the first time: it is necessary to drill a place for nails before hammering, otherwise you can crack the surface by hitting it with a hammer. The holes should be larger than the diameter of the nail by up to two millimeters, so consideration should be given to sealing them and sealing them from water penetration. In one case, you can use a rubber gasket, a plastic washer or a piece of roofing felt, or in another, after hammering it under the cap, pour a sealant. Do not hammer the nails in so hard; there should be a small gap between the surface and the head. The correct nail is the one whose head ends up lightly touching the slate.
- Nails can be replaced with screws specifically designed for such technologies. Holes, if convenient, can be made with a drill.
- Modern fasteners for slate can be equipped with rubber gaskets under the head - then there is no need to seal the holes.
- The quality of the roof covering is improved by laying a vapor barrier membrane underneath it.
- It is recommended to trim all irregularities in the slate cut with a grinder, the power of which will be sufficient up to one kW, with a disk diameter of up to 1.8 cm and a thickness of up to 1.6 mm - this optimal solution; if you use a thick abrasive disk, then you can get stuck in the slate, but a thin one, on the contrary, will not be able to cut it at all. Carry out the trimming very carefully, smoothly and slowly, so as not to provoke the formation of cracks and chips along the edges. As a result of such pruning, slate dust is formed containing asbestos, which is harmful to health; in this case, it is necessary to treat the freshly cut cut acrylic paint on water based. Carry out work in a respirator.

To extend the service life of the roof, it would be good to treat the surface with an antiseptic - this will protect against swelling and proliferation of moss, and if you apply paint to the laid slate, then you can provide protection from various atmospheric influences and precipitation.
In case of installation flat slate the sheathing must be made continuous, and before its installation it is proposed to draw a grid, along the cells of which such sheets will be laid. Flat sheets can be laid on a surface that has a slope of slightly more than twenty degrees, using the same technology as the wave one.
The installation of a slate roof ends with the installation of gutters, under which roofing material must be laid. Next, make a drainage system, put an iron apron on the chimney and ventilation pipe.

Resume
At self-installation You can save a lot of money without involving professional specialists. And don’t forget to make a supply of slate sheets, although they are heavy and dense, they are fragile, which can lead to accidental and unaccounted for damage to the roofing material.
 Almost every living space needs a vapor barrier. What is it? What type of material is best for a vapor barrier? And which side should it be placed against the insulation? These and other questions regarding vapor barrier and its installation are answered by our specialists in this article.
- What functions does a vapor barrier perform? The fact is that insulation is usually installed on the inside of the room, and when it comes into contact with warm air may become covered with water droplets. Where does moisture come from? The explanation is simple: steam settles on the walls of the room and, when cooled, changes from a vaporous state to a liquid one. To prevent this situation, you need to install a vapor barrier.
 Experts identify several main functions of a vapor barrier:
- increasing the service life of thermal insulation materials;
- protecting the room from excess humidity.
Read also: Insulating the attic door
Vapor barriers must be installed in rooms such as:
- basements of residential buildings;
- first floors of buildings;
- attics.
The vapor barrier is installed mainly on ceilings, where it settles large number pair. Walls not insulated with outside, also need it, but in this case the vapor barrier will be laid outside the building.
- What types vapor barrier materials best to use? Using a specific type of steam insulating material depends on intended purpose vapor barrier - indoors or outdoors. Therefore, experts name the following main types of materials with which vapor barriers are installed:
- painting (bitumen, tar, mixtures of rubber bitumen, etc.) - applied directly to uninsulated surfaces (these can be roofs, ventilation pipes and the like);
- film (films made of polyethylene, polypropylene, diffuse membranes, antioxidant films) - these types of vapor barrier materials are excellent for equipping private houses, both as the main vapor barrier layer and for installing an additional layer that acts as protection against roof leaks.
- Which side should the vapor barrier be laid on? When laying vapor barrier film materials, it is necessary to take into account the basic rule: the smooth side is located directly to the insulation layer, and the rough side should face the inside of the room itself.
 If the vapor barrier material is equipped with an aluminum layer, installation should be carried out as follows:
- the rough side is applied to the insulation;
- the shiny smooth side should face the inside of the room.
On the contrary, they act when laying foam-propylene vapor barrier materials:
- the smooth side must be attached to the insulation;
- turn the rough side inward.
But these material features are taken into account in the presence of a layer of insulation that has already been mounted previously on the insulated surface. If there is no insulation layer on the surface (for example, the outer sides of the walls of buildings), then the vapor barrier is attached directly to the frame:
- the smooth side must be facing the wall;
- The rough side directs the material towards the street.
Read also: How to insulate interfloor covering on wooden beams
It is not difficult to determine the smoothness or roughness of a vapor barrier material: just run your fingertips along its surface. Please note that the plastic film is the same on both sides - smooth. Therefore, installation is simplified; such a film is laid with either side facing the insulation.
- Are there rules for installing vapor barriers? Experts say that such rules really exist. There are several of them:
- the sheet of insulating material must be overlapped;
- the sizing of the canvases is carried out with a special fixer - construction tape (the only condition is to prevent air from entering);
- monitor the integrity of all layers of vapor barrier materials.
Be sure to check for defects - they should be absent from the vapor barrier material in principle. Since any crack, tear or hole can cause moisture condensation, which will constantly accumulate on interior decoration surfaces of the room (especially the ceiling).
 Experts advise that before installing vapor barrier materials, carefully read the instructions that come with them. This instruction necessarily states the main point, which side of the material for the vapor barrier layer should be considered external and which side should be considered internal. Although, as already mentioned, this can be determined by eye and touch by certain signs:
- different colors of the sides (the light side is placed next to the insulation);
- texture (laying depends on the characteristics of the material itself, as discussed above in this article);
- free rolling of the roll (the side of the material facing the floor is usually considered internal and is laid against the insulation);
- the smooth layer is usually considered internal, and the fleecy layer is considered external.
Read also: How to choose insulation for an attic roof
When installing a vapor barrier, the main thing is to correctly lay it against the insulation (if any). This will help keep it thermal insulation properties and extend service life. If a vapor barrier is not installed, then the insulating materials will gradually deteriorate due to constant exposure to moisture, which will lead to rapid wear and tear of the main structural elements of the building itself. This is especially true for private residential buildings: it becomes cold inside the premises, and additional costs will be required for heating or heating them.
Do-it-yourself slate laying is a fairly simple, albeit responsible undertaking that even a beginner in construction work can do.
In order for a roof made of slate to serve as expected (more than 50 years), you should approach roofing work, armed in advance with theoretical knowledge.
The article discusses the technology of the process and provides brief instructions that will tell you how to properly cover a roof with slate.
Material selection
Slate roofs are always popular in the construction of summer houses, cottages, country houses, garages and other buildings.
That's enough inexpensive material: one square meter roofing, taking into account waterproofing and fastening systems, will cost you about 250 - 300 rubles when laying slate yourself.
If you resort to the services of professional installers, the cost of the roof will increase slightly, but will still remain quite acceptable.

Slate service life at correct installation is more than 50 years. At the same time, the material reliably protects the room from moisture penetration, is not afraid of precipitation and sun rays, fire resistant.
The size and thickness of slate sheets are regulated by GOSTs: standard sheet of 6 – 8 waves should be 1.75 m in length.
The width varies from 5.8 mm to 7.5 mm depending on the type of sheet. Asbestos cement, the main material for the production of slate, is gray or light gray in color.
To give the material a different color it is used special technology using pigments, so you can easily choose an option that will harmoniously fit into the architecture of the building.

A pitched roof may have a smaller angle of inclination, but before covering the roof with slate, you should install a denser sheathing and a reliable waterproofing layer.
Sheets on flatter roofs will have to be laid with a strong overlap, up to 30 cm.
Calculation of the required number of sheets
Before you start laying slate yourself, you need to calculate how many sheets you will need for construction work.
You need to accurately measure the dimensions of the roof using a tape measure or use drawings if the roof has not yet been erected.
It is worth buying materials with a small reserve so that at the last moment you do not have to go to the store for additional materials and arrange delivery.
The length of the roof is measured along the eaves overhang, then divided by the width of one sheet.
10% is added to the resulting figure - this is the margin for laying slate sheets overlapping. Round the resulting figure - this is how many full sheets are needed for one horizontal row.
Then measure the length of the roof from the edge of the eaves to the ridge, add 15 - 20% and round again.
Divide the resulting figure by the length of one sheet - this way you will find out how many horizontal rows will be needed to completely cover the roof.
The product of the two results obtained is the total number of sheets that will be required.
When choosing slate in a store, carefully check the integrity of each sheet, as this is a fragile material that easily chips and cracks.
Be sure to make sure that the material is well packaged for transportation: several layers of paper are laid between the sheets so that they are not damaged during transportation.
Before ordering slate from a store, prepare a place to store it: choose a large, flat space and cover it with waterproof film.
Slate is very heavy (the weight of one sheet can reach 30 - 35 kg), so it must be stored in an easily accessible place where it will be convenient for workers to approach.
Preparing the rafter system for installation
Before you start laying slate, you need to prepare a reliable rafter system.
Because slate is heavier than most modern materials, the rafter system must be very strong and withstand heavy physical loads.
The lathing will serve as a good base for installation.

Before covering the roof with slate with your own hands, pay attention to several important details:
- rafter legs should be made of high-quality, well-dried materials. Minimum thickness board sections 60 by 150 mm, optimal – 100 by 150 mm. Give preference to beams without branches or unedged boards;
- The minimum size of beams for sheathing is 6 cm by 6 cm, it is better to give preference coniferous species. The more flat roof you are going to cover it yourself with slate, the stronger the sheathing should be;
- the weight of slate is a large load even for a strong sheathing, so it is important to evenly distribute the load. Optimal support for the sheet can be provided by 3-4 bars located no closer than 15-16 cm from the edge of the sheet;
- to provide more reliable support in the sheathing, it is better to use beams various diameters. In even rows, as a rule, bars are installed standard size, and in odd numbers - 2-3 mm higher. The bar for the cornice should be another 2-3 mm higher. The easiest way to increase the size of the bars is to increase them using special linings.
Installing sheathing near a chimney requires compliance with fire safety regulations. The minimum distance from the pipe to the beams is 13 cm.

Slate cutting technology
To lay slate yourself, you first need to prepare, sort and cut the sheets. For cutting you will need a hacksaw, grinder or jigsaw.
Slate is cut on special wooden walkways so that the cutting line is raised above the ground. The cutting line is marked using a long ruler or straight edge.
If you are going to cut slate yourself using a jigsaw or hacksaw, then moisten the cutting line generously with water - this will soften the material, prevent overheating, and settle asbestos dust.
During the cutting process, constantly water both the slate itself and the tool with water.
You can cut slate using sharpened nails or a drill.
Holes with a diameter of 5 mm are made along the cutting line in increments of approximately half a centimeter.
Then the material must be placed on a table or other reliable support and carefully split.
Asbestos dust can cause serious harm to health, so cutting slate requires wearing a special respiratory mask, generously moistened with water.
Now let's talk about how to lay slate correctly yourself, without involving specialists.
Instructions for laying the material yourself
Laying slate on the roof begins with planning the work. Pay attention to the direction of the wind: start laying the material from the leeward side - even when strong wind or a thunderstorm, the roof will not leak at the joints.
To lay the rows evenly, stretch a rope or cord along the cornice.
There are two types of slate roofing: staggered (horizontal rows are slightly offset relative to each other so that the joints do not coincide) or without offset (at the intersection of the seams, the corners of each sheet are slightly trimmed).
Proper installation of slate is the key to the durability and reliability of the roof. Read the instructions to the end before laying the slate, pay attention to how to nail the slate correctly.
Staggered laying
Before covering the roof with slate, cut all the sheets needed for the job. The sheets are laid with a slight overlap to ensure more reliable waterproofing, in horizontal rows.
The main task: to shift each subsequent row relative to the previous one so that the joints do not coincide. This is exactly how to lay slate with your own hands.
The first row can be laid out from solid sheets so that they slightly overlap each other. The horizontal rows should slightly cover each other.

Fastening is carried out using special nails or self-tapping screws, and be sure to place a soft gasket, for example, made of rubber, under the head.
The first sheet of the second horizontal row needs to be cut slightly lengthwise, by one or two waves, so that the joints of the second row are shifted and do not coincide with the joints of the first. Then, starting from the second, you can lay whole sheets.
Just like the sheets themselves, the horizontal rows should overlap each other slightly. With a slope slope of 20 degrees, slate can be laid with an overlap of 14–17 cm; with a gentler slope, it is necessary to increase the overlap to 20–22 cm to ensure reliable waterproofing.
The first sheet of the third row is cut even further to provide further offset relative to the second row, and so on - each laid row should be slightly offset.
So, if you cut the first sheet of the second row into one wave, then in the third row you will have to cut two or three waves, in the fourth - three or four, etc.
To avoid large wastage of material, use an offset of half the width of the sheet, alternating the arrangement of whole sheets and half sheets in even and odd rows.
Installation of slate should be carried out carefully. Before nailing the slate, make holes of a slightly larger diameter, do not drive the nails in tightly.
A small gap will compensate for various climate changes and roof shifts.
As the temperature changes, the volume of the slate changes, so if you hammer the nails in too tightly, the material may crack or split.
DIY installation technology without displacement
To properly lay slate without displacement, you must first prepare the sheets.
With this installation method, a corner is cut off from the sheets, which overlaps with the already laid sheet.
Laying begins from the right or left lower edge of the roof - a solid sheet is laid first.

If you started work on the right side, then you need to cut off the upper right corner of all other sheets of the first row. If you started laying on the left side, then the upper left corner is cut off.
Sheets for the second and all subsequent rows except the last must be prepared in advance by cutting off the corners at all intersection points.
Since the first sheet of each row only touches the other sheets on one edge, you only need to trim the bottom corner, right or left, depending on which side you started working on.
For the last sheet, you only need to cut off the upper corner on the corresponding side.
For the remaining sheets in the row, the upper and lower corners are cut off at the intersections with the adjacent row. Lastly, another solid sheet is laid.
Now you know how to properly cover a roof with slate with your own hands, how to lay it and how to attach slate to the roof.
Do-it-yourself slate roofing is reliable and inexpensive, and it’s always a pleasure to invest your labor in creating warmth and comfort in your home.
Slate as a roofing material has, of course, recently lost some of its popularity, because many new attractive analogues have appeared on the market: from metal tiles to ondulin. Compared to them, of course, it loses from a visual point of view, but relative to many technical indicators and, most importantly, cost, it has a number of advantages. This article will talk about laying slate with your own hands.
Types of slate
- Slate can be asbestos-cement and fiber-cement. These two types are not particularly different from each other in technical characteristics, but due to the fact that the second does not contain asbestos, it has somewhat less strength, although quite sufficient to easily withstand, for example, the weight of an adult.

Important: slate sheets can be made from pressed and unpressed material. The latter has lower quality indicators than the pressed one, namely:
- lower density (and, accordingly, strength);
- inferior in resistance to temperature changes and weather disasters.
In shape, both types of slate can be flat or wavy. Corrugated sheets are characterized by a thickness from 5.8 to 7.5 mm, and there is also the following gradation:
- size 1125x980 mm has 6 waves;
- size 1130x980 mm - 7 waves;
- size 1750x980 mm - 8 waves.
Advantages and disadvantages of slate over other roofing materials
Benefits more than many people think, namely:
- enviable strength and durability under any weather conditions, which means a long service life;
- excellent fire resistance;
- high resistance to various chemical influences;
- low thermal conductivity;
- large selection color solutions along with affordable prices;
- ease of installation.
Disadvantages of slate
- Fairly high weight. And, if a special engineering approach to the process of laying slate is not needed, then physical effort will have to be made;
- for all its resistance and durability, slate can be called quite fragile material, which must be taken into account during its installation, transportation and storage. Sheets should not be thrown (they may crack), but when putting them in piles, take into account that their number in one should not exceed 165 pieces;
- asbestos-cement slate, as the name implies, contains asbestos, but it is not the most useful substance For human body. Therefore, asbestos-cement is used for the roof of the house option will do quite, but for objects located in close proximity to people, it is worth using cement-fiber material;
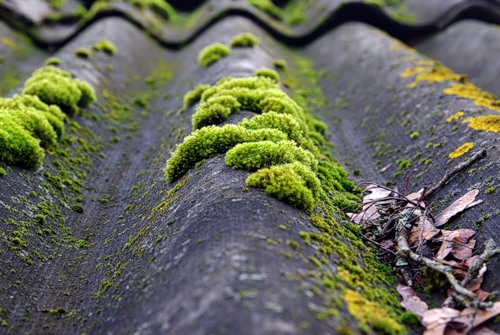
- Over time, moss may appear on any slate, although coating with phosphate and silicate paints solves this problem to some extent, because significantly reduces the degree of moisture absorption.
Dismantling slate
If before laying slate there is a need to dismantle the old one, then the main thing here is the human factor (correct distribution of roles) and handy tool, because the process does not create any particular difficulties.
- Remembering the fragility of slate and the fact that its sheets will always find use in the courtyard of a private house, it must be removed and lowered from the roof carefully, one sheet at a time, in the opposite order to the one in which it was laid.
Laying slate on the roof
Work plan
The slate installation process itself consists of three main stages: preparatory work, creating sheathing and laying sheets in the chosen method.
- Preparation involves choosing the type of coating. If, nevertheless, he fell on slate containing asbestos, then when starting to work with it, all people involved in the process should be protected.
- When deciding between flat sheets and wavy ones, for residential buildings it is still worth choosing the latter, because wavy products are much more conducive to water drainage from the roof.
- Among the wavy types, you will also have to make a choice, depending on the desired slate density. This can be ordinary, unified, medium-wavy and reinforced.

- The quality indicators required for slate lathing also depend on the choice made.
Waterproofing a slate roof
- There are many waterproofing materials for roofs on the market, but if we talk specifically about slate roof, then the best option polypropylene film can be used for it.

- You need to attach the film to the rafters with the glossy side up. The pile located on the inside serves as an additional barrier to moisture, this is especially important if there is a layer of insulation underneath it. If desired, you can lay 2 layers of film.
- Fastening is carried out using construction stapler, to carry out the process you will need at least two pairs of hands (one gradually lays out the roll of film and stretches it, the other secures it to the rafters). The joints must be additionally reinforced with sealant or construction tape in more accessible places.
- Sheathing beams can be attached on top of the insulation layer.
Slate lathing
- Installing the sheathing is a very important step. The main point here is to use only dry wood. If the dampness percentage exceeds 12%, the sheathing will “float” and lose stability, because when drying, the beams will noticeably decrease in size.
- For the frame, wood of 2 and 3 grades is used: spruce, pine, fir, aspen. Before installation, the beams must be treated with an antiseptic, coated with drying oil or resin, and treated with a fire-resistant solution (fire retardant).

- The length of the sheathing beams must be calculated based on the size and number of slate sheets. It can be either 3.5 m or 6.5. Ideally, it should be so that the slate does not have to be cut along the edge of the roof, i.e. Entire sheets must fit on the slope, otherwise the roof will look sloppy.
- The size of bars with square section 60x60 mm, although the most the right decision their selection will depend on the thickness of the slate, and this is from 50 to 75 mm.
The distance between the beams also depends on the quality of the slate:
- for an ordinary person it is 50-55 cm;
- for unified - 60-80 cm;
- for medium and enhanced - 75-80 cm.
It is important that this distance is the same throughout the roof.
If beams of different widths are used (which is also acceptable), then the widest ones should be placed near the ridge and in those places where the sheet joints occur.
- It should also be taken into account that the beam closest to the ridge should be installed edgewise and rise above the others by 1-3.5 cm (i.e. the thickness of the slate), for cornice beams this figure is from 6 to 10 mm (they should also stand edgewise ).
- You should start attaching the sheathing beams to the rafters from the bottom, taking into account the overhang of 30-50 cm; during installation, certain construction subtleties must be taken into account, especially for places near the pipe and on the eaves.
Laying slate sheets
- Slate sheets are attached to the sheathing using galvanized nails.
- To drill holes, use a drill diameter of 2 mm larger diameter nails They must be driven into the crest of the wave (this will protect the roof from leaking) through a rubber gasket and a washer. This must be done quite carefully, and most importantly not very deep, until minimal contact with the slate. Otherwise, the material may crack at the slightest temperature difference.

- Installation of slate begins from the bottom and preferably from the windier side of the roof. The first leaf is very important element, it “sets the tone” for everyone else, so you need to check the evenness of its installation using a plumb line. The overlap of each subsequent row of sheets is made depending on the angle of inclination of the roof (for 20-45 degrees, 10 cm is enough).
There are two main ways to install slate:
- with trimming corners, without displacement, when each sheet of slate requires adjustment of the shape;
- staggered when slate sheets are laid according to the principle of brickwork.
The last option is the most popular, because easier to use.
Laying slate using the “staggered” method
Of course, when purchasing slate in a store you can always get both detailed instructions manufacturer, and consultation with a knowledgeable manager. They all boil down to the following stages of work:
- plan for laying out slate on roofs. It is necessary at the acquisition stage, because allows you to calculate the amount of material (it is better to take it with a reserve, then if you have a receipt, you can return the excess) and understand how many sheets will have to be cut;
- preparing slate for working with it, which involves cutting the sheets using a grinder. Knowledgeable builders advise before doing this to slightly wet the material at the intended location of the cut. And inspection for chips and cracks (such sheets need to be rejected);
- direct installation. As already mentioned, it needs to start from the bottom. The sheet must be attached to the sheathing by one of the upper corners, docked with the edge of the roof and secured with three more nails in different corners (necessarily at the crest of the wave);

- the next sheet is secured horizontally in the same way, with an overlap of 1-2 waves;
- In this way, the bottom row is laid along the entire perimeter of the roof, securing each row with four nails;
- the second row must begin with half of the bottom sheet, and go further, making overlaps as in bottom sheet, and to the previous one in the row. This is exactly how the “runaway” effect is achieved;
- Thus, one roof slope is filled with slate, the last row in front of the ridge should leave a gap for ventilation. Then proceed to the second slope. As a result, a roof covering resembling a chessboard is formed.
Corner cutting method
This method, as already mentioned, is more labor-intensive. But the roof surface laid in this way turns out to be very smooth, without unnecessary gaps and, accordingly, its service life will be longer than that created by the “staggered” method. In addition, material consumption will be noticeably less.

Stages of work
- The first, of course, is the roof plan, the construction of which must be approached no less responsibly than when laying it with an offset. After all, not only the amount of material, but also its correct preparation depends on the correct calculation.
- It is necessary to determine which side of the slope the installation will begin on. There is no single opinion here, some advise from the left, some from the right, there is no fundamental difference. Further examples will be given for the direction from right to left.
- Preparation of slate sheets. The size of the corner that should be cut is 103 mm on top and 120-140 mm on the side. When pruning, the following points are taken into account:
- The first sheet of the bottom row and the last of the top are not cut off ( we're talking about about one slope);
- sheets of the lower (first) row are processed depending on the direction. If slate is laid from right to left, then the upper right corner of all sheets is cut off.
- The second row is laid according to the following scheme:
- first sheet - lower left corner;
- middle sheets - lower left and upper right;
- the last sheet is the top right one.
- The final row follows the same principle as the middle rows, but the last sheet is not cut at all.
The first sheet is secured in the same way as in the “running” method. Next, the sheets are mounted with an overlap equal to the cut size (at least 120 mm). The top row overlaps exactly the same as the bottom row. In this case, the places of cuts of the upper and lower rows of sheets located diagonally should coincide, and the gaps between them should be 3-4 mm.
Laying slate video
Slate roof repair and care
Of course, slate roofing, like any other roof, must be cleaned periodically. It is especially important to ensure that moss does not appear; antiseptics, which in most cases are included in slate paints, are very helpful in this matter.
- In cases of chips and cracks, of course, it may be necessary minor repairs. If the leak is not very large, then treating it with a special putty or installing a patch may be enough.
- In more serious cases The damaged part of the roof needs to be replaced. Slate allows you to do this without extra effort, because... dismantling individual sheets is not difficult.
Don't know how to cover a roof with slate? The installation process is quite easy, so you can do it yourself. Before laying, it is advisable to carry out certain types of preparatory work that are specific to slate roofing. They should provide additional reliability of the structure.
Preparation
From the very beginning, you need to make a solid foundation - the sheathing. Unedged boards that are installed at right angles to the rafters are well suited for this. Self-tapping screws or nails are used for fastening, and the fastening distance must be maintained - at least 40 cm, up to 75 cm. If there is a chimney pipe on the roof, the sheathing is also done around it.

Unedged boards do not fit together very well; in any case, there remains a distance between their raw edges. Taking this into account, you need to place them freely, not end-to-end. The purpose of such a sheathing is to serve as a base, and not as a continuous surface. The distance between the boards is allowed up to 10-12 cm.
Also keep in mind that the drainpipe should be installed in advance.
Main stages of slate coating
Waterproofing
1. Roofing felt, roofing felt or a number of modern roll roofing waterproofing materials based on bitumen (“Gidroizol”, “Rubemast” and the like) are usually laid under the slate. The rolls are rolled out horizontally, starting from the bottom row. If desired, you can weld the rolled sheets together. In this case, you should be guided by the technology specified for this material - how much to overlap, which side to lay, how to weld.

The steeper the roof (slope), the less need to weld the waterproofing together.
2. Fastening roofing felt and others like it does not make sense, since the slate sheets are subsequently attached through and through to the sheathing, capturing the waterproofing as well. When laying roofing felt sheets, you need to be guided only by a practical sense: so that before installing the slate, the waterproofing does not fly away from gusts of wind or under the weight of its own weight on a steep roof.
Covering
1. Laying slate is carried out from the bottom rows. Installation must begin from the bottom first, usually with three slate sheets. The overlap is made per wave, regardless of the number of waves and their sizes (length). The slate is fastened with special slate nails with a wide head. One sheet of slate is punched in four or six places depending on its length.

Fastening is done in the second wave, but not in the first! In the place of overlap, slate does not penetrate through two sheets! For slate with eight waves, such nails are driven in even numbers - the second and sixth waves, placing them on the crest, and for seven-wave slate - in the 2nd and fifth. Nails should be driven into the top of the wave, not into the bottom.
2. Then two sheets of slate are strengthened in the next row, and another sheet is added to the first row, and then the top one is placed. This ensures easy access to all sheets. Laying slate on the roof is carried out until the entire slope of the roof surface is completely covered.
Add-ons

- For inexperienced people who are laying slate with their own hands for the first time: it is necessary to drill a place for nails before hammering, otherwise you can crack the surface by hitting it with a hammer. The holes should be larger than the diameter of the nail by up to two millimeters, so consideration should be given to sealing them and sealing them from water penetration. In one case, you can use a rubber gasket, a plastic washer or a piece of roofing felt, or in another, after hammering it under the cap, pour a sealant. Do not hammer the nails in so hard; there should be a small gap between the surface and the head. The correct nail is the one whose head ends up lightly touching the slate.
- Nails can be replaced with screws specifically designed for such technologies. Holes, if convenient, can be made with a drill.
- Modern fasteners for slate can be equipped with rubber gaskets under the head - then there is no need to seal the holes.
- The quality of the roof covering is improved by laying a vapor barrier membrane underneath it.
- It is recommended to trim all irregularities in the slate cut with a grinder, the power of which will be sufficient up to one kW, with a disk diameter of up to 1.8 cm and a thickness of up to 1.6 mm - this is the optimal solution; if you use a thick abrasive disk, then you can get stuck in the slate, but a thin one, on the contrary, will not be able to cut it at all. Carry out the trimming very carefully, smoothly and slowly, so as not to provoke the formation of cracks and chips along the edges. As a result of such pruning, slate dust is formed containing asbestos, which is harmful to health; in this case, it is necessary to treat the freshly cut cut with water-based acrylic paint. Carry out work in a respirator.

To extend the service life of the roof, it would be good to treat the surface with an antiseptic - this will protect against swelling and proliferation of moss, and if you apply paint to the laid slate, then you can provide protection from various atmospheric influences and precipitation.
In the case of laying flat slate, the sheathing must be made continuous, and before its installation it is proposed to draw a grid, along the cells of which such sheets will be laid. Flat sheets can be laid on a surface that has a slope of slightly more than twenty degrees, using the same technology as the wave one.
The installation of a slate roof ends with the installation of gutters, under which roofing material must be laid. Next, make a drainage system, put an iron apron on the chimney and ventilation pipe.

Resume
When installing it yourself, you can save a lot of money without involving professional specialists in the work. And don’t forget to make a supply of slate sheets, although they are heavy and dense, they are fragile, which can lead to accidental and unaccounted for damage to the roofing material.