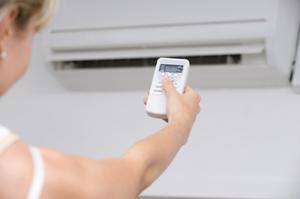
The design of the internal unit of a split system: how to disassemble the equipment for cleaning and repair. How to remove the indoor and outdoor units of an air conditioner from the wall, video instructions Disassemble a wall-mounted air conditioner
Regular maintenance of the air conditioner requires disassembling its internal and external units. This is necessary when replacing parts of the split system and completely cleaning it. It is worth understanding the features of the process and the consequences of incorrect disassembly.
How to remove the indoor unit
To remove indoor unit any type of air conditioner requires the lower clips to be snapped off. For most devices, they are located at the bottom and are indicated by arrows or serifs. Types of clips:
- The hook to the wall plate is made from above. In these cases, the clips are pressed upward.
- Bottom hook on the plate. In such devices there are additional holes at the bottom. The fasteners are pulled down from the block.
- Clips located under the decorative cover. First remove the cover and then press out the fasteners.
The removed internal air conditioner module is easier to disassemble.
Disassembling the indoor unit of the air conditioner
You can disassemble the internal unit of the split system after disconnecting the device from the network. Then open the housing cover and take out the filters. The next step is to remove the housing:
- Any air conditioner has screws on the bottom that are easy to find under the plugs. They need to be unscrewed.
- There may also be screws or latches under the cover behind which the filters are located. After unscrewing them, you can slightly open the lower element of the housing.
- The next task is to release the latches located on the top of the case. They are quite rigid; to disconnect them you need to know the fastening features. Most often, they can be unlocked by pulling the bottom of the case toward you and up.
- All that remains is to disconnect all the wires, if any.
- Unscrew and release left side radiator from the device body.
- Unscrew the fastening on the right in the shaft itself a few turns. This screw is often over-tightened, so it is important to be careful not to damage the head of the fastener or break the blades.
- Remove the shaft from the bottom of the housing, ensuring the safety of the parts. Since the fan is often installed quite tightly, to remove it you need great experience. The screw can be held with a screwdriver while pushing the shaft.
- Remove the control unit from the housing. This will require disconnecting all wires and sensors. Then disconnect the latches and unscrew the screws securing the control unit.
- Unscrew all motor mounts. Disconnect the casing with the shaft.
- Carefully study how the shaft is disconnected from the motor. Carefully bend back copper tubes, suitable for the radiator.
Having opened the blinds slightly, it is easy to remove the body by pulling it towards you.
The next step is to remove the drainage container. Some models are made monolithic, so it is impossible to separate the tray from the body. It is important to understand the features of its installation in order to install it correctly during assembly.
It is recommended to prepare a container for condensation from the tray. To disassemble the container, simply unscrew one screw and then disconnect the clips at the bottom. The blind motor must be disconnected from the tray. After removing the container, separate the “tail” of the drainage hose.

Air conditioner indoor unit fan (impeller)
The next task is to remove the fan (shaft). This procedure is the most responsible and complex. A simple option for removing the shaft is applicable when it is removed to the left without affecting the control unit and engine:
When installing the shaft into the device body, the screw must be exactly in its original position. Otherwise the fan will touch the walls.
There are more difficult option removing the fan. If the shaft is pulled out from right side, you will have to remove the electric motor and control unit.
Sequence of actions:
Disassembling the external module
Dismantling a mobile or window air conditioner does not take much time - just remove the device from the window or remove the air duct. When disassembling a full-fledged split system, it is necessary to preserve all the refrigerant.
 The connecting tubes through which freon is transported have different diameters. A thin channel serves to transport liquid refrigerant. The large tube is designed to pump freon gas. When disassembling the air conditioner, it is necessary to “drive” the refrigerant into outdoor module. Then you can turn off the main channels. To pump the refrigerant, while the device is running, it is necessary to screw in the pipe with liquid freon, which flows from the outdoor unit into the room. The device will pump a gaseous substance into the outdoor unit. After this, you should immediately turn off the device.
It takes two people to disassemble the outdoor unit of the air conditioner. This way you can eliminate unnecessary risk and reduce work time.
After disconnecting the device from the power supply, disconnect the cables by marking the terminals.
The copper ducts that carry the refrigerant can be straightened yourself with care. He goes into the room with them electrical cable. It is screwed to the end of the tube. Then you need to unscrew the nuts that hold the outdoor module. It takes two people to remove the block. Lastly, the brackets are removed from the wall.
The removed outdoor unit requires vertical storage and transportation. To avoid possible damage, it is placed in a box with foam plastic.
Removing the compressor
In some cases, only dismantling the outdoor unit is required, for example, when it is necessary to adjust the operation of the compressor. In this case, the indoor unit remains in place. The main task is to remove the compressor correctly:
- remove the cover of the outdoor unit;
- disconnect the discharge and suction pipes;
- disconnect the electrical wires;
- unscrew the fastening elements of the fan and condenser;
- remove the capacitor from the housing;
- dismantle the compressor mounts and the part itself.
By performing this sequence of actions, you can reduce the risk of damage to pipelines and gain access to other elements located in the housing.
Consequences of improper dismantling
 If dismantled incorrectly, it is easy to damage the air conditioner. Possible unpleasant consequences.
Knowledge of how to remove an air conditioner from a wall with your own hands may be needed in several cases:
- if you are planning to move;
- if it is necessary to carry out repair and restoration work;
- if you plan to replace the air conditioner with a new one and do not want to pay for dismantling the old one.
To begin with, when changing the location, you should deal with disconnecting the air conditioner from the wall completely, that is, both units. In this case, it is important not only to carry out high-quality dismantling, but also to follow the rules for transporting split system modules.
How to remove the outdoor unit from the wall
First of all, they provide for the availability of the necessary tools. To remove the air conditioner yourself you will need:
- adjustable or gas wrench;
- hexagons;
- open-end and socket wrenches;
- indicator screwdriver;
- pipe cutter;
- pressure gauge or pressure gauge station.
Instead of a pipe cutter, you cannot use wire cutters and similar tools, as they will spoil the quality of the copper pipeline.

First, the external module is dismantled - the compressor-condensing unit or KKB.
Step 1. Divorceable or wrench On the end side of the KKB, open the valve plugs.
Step 2. Close the liquid valve of the external unit. Use a hex wrench.
Step 3. To ensure that all the freon passes to the external module, start the air conditioner in cooling mode for 30-40 seconds. As soon as the compressor began to work only on suction, the valve from gas pipeline connect the pressure gauge station and wait for the readings to reset to zero. Immediately close the freon return valve.
Step 4. The system is completely de-energized. Before proceeding to the next stage of removing the air conditioner from the wall, use an indicator screwdriver to check the absence of current by inserting it into the phase terminal.
Step 5. Now the freon line is cut with a pipe cutter, since it is a non-removable structural element. The remaining ends must be insulated from moisture and debris. You can use electrical tape for this.
Cut off the connecting tubes at a distance of 15-20 cm from the fittings. If the dismantling of the capacitor module is carried out for the purpose of repair and restoration work, then there is no need to cut the copper tubes.

Step 6. Carefully disconnect the drainage pipeline and interconnection wires. It is also advisable to wrap the ends of the electrical wires and the drainage tube with protective material.
Step 7. Now we begin to dismantle the device itself. How to properly remove the external air conditioner unit from the brackets? To remove it from the nuts and bolts, use an open-end or socket wrench. Since the KKB usually has considerable weight, it is advisable to take a second person as an assistant.
Step 8. The brackets are removed from the surface of the building or balcony by unscrewing shut-off valves socket head.
After the air conditioner has already been removed from the wall, they begin to pack it. To do this, you will need a multilayer cardboard box, polystyrene foam and soft packaging film in a roll.
The KKB can only be transported in a vertical position to avoid water hammer during subsequent work. Before installing the unit in a new location, you should let it stand for 2-3 hours.
If transportation is planned for winter time, you need to remove the air conditioner from the wall so that all the freon does not leak out. For this purpose, a pressure gauge station must be used. But most experts advise draining the refrigerant and then completely recharging the circuit.
How to remove the air conditioning compressor

The most serious malfunction of a split system can be a breakdown of the compressor. It occurs when:
- poor-quality installation - lack of evacuation, violation of the rules for laying the freon pipeline;
- using a split system in an unacceptable temperature range;
- factory defect.
In this case, you will also have to remove the air conditioner control unit yourself and disassemble it. Some climate control equipment can do without complete dismantling, but it is problematic for a non-specialist to do this, since in this case access to many elements is severely limited.
The outdoor module has been dismantled, how now to remove the air conditioning compressor? In fact, there is nothing supernatural here:
- Remove the protective cover from the external unit housing;
- Disconnect the lines going to discharge and suction, as well as electrical wires, suitable for fan and compressor;
- Unscrew the fastenings with a carob or socket wrench and remove the compressor from the vibration dampers.
It is worth considering that before removing the air conditioning compressor, it is necessary to check the degree of oil deterioration. If it has bad smell and changes color when tested for oxidation, then replacement + flushing of the KKB will be required. If the properties are normal and the oil oxidation test is negative, a simple replacement will be sufficient.
How to remove the indoor unit from the mounting plate

Everything is clear about how to remove the air conditioner compressor and the outdoor unit itself from the wall with your own hands. All that remains is to figure out how to dismantle the internal module. This process also takes place in several stages:
- Remove the protective cover from the housing;
- Unscrew the fasteners;
- Disconnect all connecting communications: freon line, electrical interconnect cables, drainage pipeline. First turn off the power;
- The block is removed from the plate by opening the fastening latches;
- Unscrew mounting plate and dismantle plastic wire with the remaining copper pipes.
When removing the indoor unit of the air conditioner from the wall, extreme care must be taken not to damage the mounting latches that hold the unit to the mounting plate.
Be sure to caulk the ends of the copper freon tubes in the same way as for the external unit.
Pack the indoor unit in a thick cardboard box, line it with foam and wrap it in soft bubble wrap. The evaporation unit can be transported in any position, unlike the KKB.
If any element of the indoor unit of the air conditioner needs to be replaced or cleaned, it may also require its removal from the wall or partial disassembly into its components. It looks like this:
- Remove the front panel and wash its back side with a stream of water and detergent or soap;
- Remove the guide plates air flow, removing them carefully from the grooves. Some models have special latches for this;
- Unscrew the screws, carefully pull the lower protective part towards you and slightly lift its top, then remove it from the latches;
- Disconnect the supply wire and drainage;
- Disconnect the interconnect wires from the corresponding terminals, having previously recorded their location;
- Remove the tray with the hose. For some models it may be stationary, then it is lowered a little;
- Now remove the tangential fan by lifting the evaporative heat exchanger up.

All elements are washed with water and a cleaning agent. You can use a steam generator for more thorough cleaning. When the parts have dried, they are fixed in reverse order in place.
If you need to dismantle the control board, first remove the protective cover from the electronic unit and disconnect all wires (connectors for indicator panel sensors, air damper drive). Then unscrew the board from the fastening elements using a screwdriver or simply disconnect it from the latches.
When the indoor unit is not dismantled, but disassembled, there is no need to cut the freon line.
Monoblock systems can be dismantled in almost the same way. The only difference is slightly different fundamental electrical diagram and pipes with working fluid.
When independent dismantling is undesirable
You should not remove the air conditioner yourself in the following cases:
- if there is a split system of column, duct or cassette type;
- if the user does not have the necessary tools, materials and instructions for the device;
- when a person lacks confidence in his own abilities.
In these situations, it is better to contact professional installers.
Before you start independent actions, you can watch a video on how to remove the air conditioner yourself:
If you notice that the cold air coming out of the split system has an unpleasant sweetish smell of rot, this means that the unit urgently needs preventive cleaning
In addition to the unpleasant odor, clogging of the internal components of the air conditioner leads to faster wear of the power system of the device, increased energy consumption and, most unpleasantly, can cause a number of allergic respiratory diseases.
Of course, you can have a service technician perform this procedure, especially if the air conditioner is still running. warranty service. But if you have been using a split system for a long time and do not intend to pay a lot of money for something that you can easily handle on your own, then you should know the procedure for disassembling the air conditioner for its preventative cleaning.
In fact, today there are quite a lot of companies producing split systems, but they all assume a more or less unified system for constructing indoor units. Therefore, even if you encounter some design differences, the basic disassembly technique will remain the same.
How to disassemble the indoor unit of a split system for maintenance
The first thing you should do is prepare a set of screwdrivers various sizes and workspace configurations. Also, do not forget to put boxes next to you for collecting fasteners, as well as a functional and electrical diagram of the air conditioner (in some models, the electrical diagram is printed on inner side top cover of the unit). For cleaning internal elements Split systems will need a vacuum cleaner, detergents and clean rags.
- Turn off the power to the air conditioner . This is the first thing to do in order to comply with electrical safety rules. Do not turn off the air conditioner using the remote control button, but simply remove the plug from the socket.
- Remove the top cover of the unit . Unscrew several bolts (two or three) covered with decorative plugs and remove the top cover of the indoor unit of the air conditioner. The lid, which is coated on the inside with a layer of dirt and mold, should be washed in the bathroom using a brush and detergent.
- Remove air filters . Remove plastic coarse air filters. They can be mounted both on the block cover and inside it. We also wash the filters under a strong stream of water, helping ourselves with a brush.
- Remove the airflow guides . Bending slightly, remove the special blinds from the grooves that direct the flow of cold air into the room. They, too, most likely need intensive washing.
- Disconnect the bottom cover of the indoor unit, drain pipe and power cord of the split system . Carefully press out the three latches, and then disconnect the drain pan along with the outlet hose from the internal block of the split system.
- Disconnect the wiring terminal blocks, remove the electronic control unit and transformer . To remove the control unit from the split system, carefully squeeze side mounts, then pull the device towards you. Don't forget to unscrew the ground wires before doing this.
- Remove the fan motor. We unscrew the bolts securing the electric motor to the chassis, lift the evaporator and remove the motor together with the rotary fan.
- Separate the motor from the fan . First, you will have to carefully heat the head of the bolt with a soldering iron to unlock the thermal lock on the engine pulley. Once the fan blades are removed from the pulley, they can be thoroughly washed in the bathtub.
Assembling the indoor unit of the split system should be done in the reverse order.
For dismantling the most popular type of air conditioners - split systems - specialists charge a fee of 1 rub. for every kilowatt of power. Many owners of cooling devices who have to move, in order to save their money, undertake to dismantle the air conditioner themselves. A number of useful recommendations will help you get the job done cleanly and avoid fatal mistakes.
Possible problems with self-removal
The story about how to dismantle an air conditioner with your own hands should begin with a warning about the pitfalls that await an untrained technician. Here's what can happen:
- Refrigerant leak: freon escaping into the atmosphere will not cause an environmental disaster, there is no need to be afraid of it. But such an event will not be in vain: when installing an air conditioner in a new place, you will have to pay for its refilling. Therefore, it is highly advisable to dismantle the device so that all the existing refrigerant remains inside it.
- If water or dust gets into the internal circuit: such an “additive” to the refrigerant quickly renders the compressor unusable. Perhaps, at first glance, water may seem like a completely harmless substance, but you need to take into account that in the evaporator it will freeze, turning into ice. And these are solid particles, the presence of which is “incompatible with the life” of the compressor. To minimize the risk of moisture entering the internal circuit, you should avoid dismantling the air conditioner during rain or snowfall.
- Falling of the outdoor unit: even if the outdoor unit hangs next to a balcony or window, it is extremely inconvenient to work with it. Moreover, this unit is quite heavy, so that without calculating your strength, it can easily be dropped. Professionals are insured against such accidents, since when working above the first floor they use an aerial platform or equipment for industrial mountaineering. To be on the safe side, the average person should invite an assistant.
- Damage to device elements: the most noticeable damage is damage that causes depressurization of the circuit. The crack may be completely invisible, but it is quite sufficient for freon to leak or dirt and water to get inside. To avoid such troubles, first of all you should be careful.
When performing such a complex operation with your own hands as disconnecting the evaporator of the indoor unit, it is highly advisable to use not improvised tools - a screwdriver and pliers, but professional ones designed specifically for it.
 A set of necessary tools and materials for dismantling
 Users at this stage often use whatever they have to, resulting in damage to the evaporator tubes located close to the fastenings. The problem is that a professional tool is quite expensive and even renting it can cost an amount quite commensurate with the cost of the services of a qualified craftsman.
Preparing the air conditioner: “packing” freon
So, first of all, it is necessary to ensure the safety of the refrigerant. To understand how this is done, you need to remember the design of the split system. It is a closed circuit filled with freon, which consists of a compressor, two relatively speaking chambers (evaporator and condenser) and freon pipes connecting these elements (copper tubes).
 Split system design diagram
 The refrigerant flows from the condenser to the evaporator in liquid form, so the tube through which it flows has a smaller diameter.
Along the second freon line - from the evaporator to the compressor - freon follows already in gaseous state, so the diameter of this branch is increased.
To carry out dismantling without loss of gas, it is necessary to collect it in a condenser:
- while the air conditioner is operating, the valve between the condenser and the thin tube is closed for cooling;
- when all the refrigerant, thanks to the operation of the compressor, “moves” into the condenser, you will also need to close the valve between the thick tube and the compressor.
 Shut off the refrigerant
 Important point: After what time should the second valve be closed? It is best to monitor gas pressure using a vacuum pressure gauge. But for this you will have to borrow from the masters special tool- pressure manifold.
Those who do not have such an opportunity simply wait about a minute: as experience shows, during this time household air conditioner usually manages to pump almost all the freon into the condenser.
 Pressure gauges for monitoring pressure when pumping freon
 Let's move from theory to practice:
- If you managed to get a manifold, attach it to the nipple (schredder valve) on the fitting to which the “gas” freon line is connected. If such a tool is not available, we simply skip this point.
- We turn on the air conditioner and enter the settings from the remote control: cooling operation, turbo mode, temperature as low as possible (the permissible minimum must be specified in the passport). So the device should work for 10 minutes.
- On the external unit, find the valve to the fitting of which the liquid freon line is connected (remember that it is thin). Under the protective cap, which must be removed, you will find hexagon slots. After inserting the key, the valve must be closed.
- Now you should watch the pressure gauge or, if there is none, the clock. In the first case, we wait until the device shows the presence of vacuum; in the second, we time it for 1 minute.
- Next, you need to remove the protective cap from the second valve on the outdoor unit, to which the thick “gas” line is connected, and also close it using a hexagon. After this, turn off the air conditioner immediately. We return the protective caps to their places.
That's it, now the freon is trapped and the system can be safely disassembled and dismantled.
Instructions for dismantling the air conditioner yourself
Let's proceed directly to uninstallation.
Outdoor unit
Disconnect the freon lines. This can be done by unscrewing the nuts with which the lines are screwed to the fittings of the outdoor unit. This method is used if the length of the tubes allows them to be used in a new location. Open fittings must be securely sealed with electrical tape or tape - this will prevent them from clogging.
 Dismantling the outdoor unit
 But in most cases, freon pipes are not reused, especially since their extension is not allowed. Then the tubes are simply cut with a pipe cutter at a distance of 150–200 mm from the fittings, immediately caulking their ends with a bench vice.
 Caulked highways
 Advice. If it is known that the air conditioner will be stored unassembled for a long time, the tubes can be filled with nitrogen and sealed tightly. Unlike air, or more precisely, the oxygen contained in it, nitrogen does not lead to oxidation of the material.
After all manipulations, it is necessary to remove the thermal insulation from the outer part of the freon pipes.
After making sure that the device is disconnected from the network, remove the protective cover over the electrical cable connection point. Its terminals must be marked in some way to avoid confusion when connecting in a new location. After this, you need to unscrew the clamps with which the cores are screwed to the contacts of the outdoor unit. The freed end of the cable is screwed to the freon pipes, which are then manually straightened in order to be able to pull them out through the hole in the wall.
Now we unscrew the nuts holding the outdoor unit to the brackets, and together with an assistant, remove it, and then the brackets themselves.
Pay attention! The outdoor unit must be in an upright position during storage and transportation. When transporting, it is very important to avoid shaking and shock - for this it is better to place the unit in a box with foam plastic pre-laid in it.
Disconnecting the compressor
If the air conditioner is dismantled to repair the compressor, the latter must be properly disconnected. This is done like this:
- The covers are removed from the outdoor unit.
- After this, you can disconnect the suction and discharge pipes from the compressor.
- Disconnect the wires supplying the compressor and fan.
- We unscrew the fastenings holding the valves and the capacitor.
- We remove the condenser, gaining access to the compressor mounts.
- We remove the compressor.
By doing this, you will eliminate the risk of damage to the piping pipelines. Another plus: it becomes possible to repair several elements of the outdoor unit at the same time, which will allow you to cope with the task faster.
In order to be able to operate the compressor, you need to pour out the oil in it.
In the case of the piston model, it drains without problems through the suction pipe. For spiral and rotary models, you have to drill the bottom (hole diameter is 5–6 mm). You cannot drill through, otherwise chips will get inside. A thin septum is left, which is then pierced with a punch.
How to remove the indoor unit
To gain access to the latches of the indoor unit, you need to remove the front panel from it. Then disconnect the freon lines and electrical wires, snap off the latches and remove the block from the guides.
 Dismantling the indoor unit
 Pay attention! At this stage, the average person faces some difficulties: careless actions can easily damage the evaporator latches.
The manufacturer usually closes this element with a lid, the latches of which are pressed against the wall. They were made difficult to access on purpose: this precaution, according to the developers, is a guarantee that only specialists will dismantle the device. To get to the fasteners, use two thin screwdrivers. In this case, it is necessary for someone to hold the block.
You should also be careful when unlatching the latches that hold the block on the guides. If they are damaged, the device cannot be firmly fixed in a new place and it will quickly fail due to vibrations.
 Be careful with latches!
 Having removed the indoor unit, unscrew the mounting plate, remove the freon pipes with the power cable from the wall and unscrew decorative box, laid along the outer wall.
Features of work in winter
At low temperatures there is no way to pump freon into the condenser: the oil in the compressor becomes thick and an attempt to turn on the air conditioner in such conditions will lead to damage to the supercharger. This danger does not occur only in models equipped with a so-called winter kit, which contains a heated compressor crankcase and drainage, as well as a fan speed retarder.
 Pressure gauge station for refrigerant collection
 Those who do not have such a system can remove the refrigerant using a pressure gauge station to collect freon. It is connected, like the pressure manifold, to the shredder valve.
Video: dismantling the air conditioner and then installing it in a new location
The procedure for dismantling the air conditioner is technically quite simple. The difficulty, from the point of view of the average user, is that some operations are difficult to perform without professional tool. If you still firmly decide not to turn to specialists, we recommend inviting another person to help - then even without special tools the task will be quite feasible.
Sooner or later, every owner of a home air conditioner has encountered the problem of air conditioning and unpleasant odors. Accordingly, before fixing this problem, he had a question about how to disassemble the indoor unit of the air conditioner.
In order to get an answer to this question, it is worth understanding what constitutes internal system air conditioner
How does an air conditioner work and what does it consist of?
There are several types of air conditioners on the market. At first glance, it seems that they are all completely different. But this is not entirely true. The principle of operation is similar for all of them. The simplest and budget options Window and mobile air conditioners are considered. Both options consist of only one block.
A window air conditioner is mounted in a window opening, and a mobile air conditioner can operate in any place where there is an open window or a slightly open door to route the hose outside.
A more complex unit is a split system. Installing them requires certain knowledge and skills. It consists of two blocks: internal and external.
Composition of the outdoor unit:
- A compressor designed to maintain the flow of compressed gas - freon.
- A four-way valve is responsible for distributing freon during cooling or heating.
- Fan.
- Blowing condenser.
- Radiator. It cools and condenses freon gas
- Freon system filters, whose task is to protect the entry of foreign particles into the compressor
- Fitting connection to which copper tubes are connected for the roof with the indoor unit
Indoor unit composition:
- Front panel.
- Deep cleaning filter.
- Radiator.
- Evaporating and heating freon.
- Horizontal blinds.
- Indicator panel.
- Fine filter.
- Fan.
- Vertical blinds designed to adjust the direction of air flow masses.
- Condensate tray. From there, condensate is discharged through a drain hose.
- Control board.
- Union connection.

How to disassemble an air conditioner
If, when you turn on the air conditioning system, the flow of cooling air carries with it a sour, stagnant, moldy smell, then you should think about cleaning it. To do this, you need to rinse the outdoor and indoor units of the split system.
In order to solve such a problem, you can use two methods: attract a specialist, but this is a very expensive method, or disassemble the internal unit of the air conditioner with your own hands to perform cleaning work.
The latter method is more preferable, since it will save a significant amount of money, and the purchased useful experience will come in handy in the future.
Guide to self-disassembly of the air conditioner
This method of disassembling a home air conditioner is universal; it is also suitable for disassembling the vast majority of brands that exist today.
In order to begin disassembling the block, you should stock up necessary tools. To work you will need:
- “Minus” and “plus” screwdrivers of different diameters.
- Hexagon set.
- Thin soldering iron.
- Special disinfectant for air conditioning systems.
- Brush with elongated bristles
You need to know that in order to disassemble and clean the unit, you do not need to dismantle the unit from the wall, drain the freon and open the copper route.
First you need to disconnect the device from the power supply. After this, the protective filtration located in the block is removed. How to remove it correctly can be found in the instruction manual that came with the air conditioner. The whole process is described there in very detail and clearly.
After which it is removed external panel from the block. And then two bolts are unscrewed, which are closed with fuses, and the frame pulls in its direction. It is secured on the top side with two latches.
The entire panel that was on the top side will be covered in mold and dirt. It needs to be sent to the wash immediately.
Using a little force, a blade is pulled out of the grooves, which is responsible for directing the air masses.
Then the lower area of the indoor unit of the unit is removed from the valve mounts, where the drainage hose and the wire supplying the air conditioner are disconnected.
If you have basic knowledge of electronics and radio engineering, then you don’t have to write it down, but when reassembling it, refer to the one drawn on the back side of the block, to detailed diagram connections.
Next, the fastening brackets are pressed out, and the housing of the electrical unit and transformer is removed. To dismantle the drain and outlet hose, you should very carefully and slowly squeeze out the three supporting fasteners. The opening, which serves to blow air masses out of the block, will also, like the blade part, be covered with mold, which causes the spread of such a nasty aroma.
After that, you should unscrew the supporting bolts of the electronic motor of the split system and lift the radiator with great care, after which you can remove the motor support. Next, the blades and the engine located in the cell are removed. In order to eliminate the possibility of the radiator accidentally falling, it can be placed back.
Then it is necessary to remove the thermal lock located on the mounting bolt of the friction wheel with the rim of the electric motor. But you need to keep in mind that it will be difficult to disassemble these things yourself. In order to avoid accidental combustion of the rubber part that transmits energy, it is necessary to very carefully heat the bolt head using a thin soldering iron, and during the soldering process you need to try to unscrew it. After successfully separating the blades from the motor part, all moldy and dusty parts are placed in the sink.
In order to rinse thoroughly, remove all foreign odors and disinfect all removed elements, it is worth purchasing special remedy for air conditioners. It does an excellent job of removing fungi, mustiness, mold and germs.
When starting cleansing, you first need to shake the can. The product is sprayed over the entire surface that requires cleaning. Wait twenty minutes. Then use a long-haired brush to scrub through the contaminated areas. And washed with water. The air conditioner is assembled in the reverse order.
How often does the air conditioner need to be cleaned?
Everyone understands that the time for complete filtration greatly depends on the cleanliness of the room. If the room environment is polluted, then the air conditioner will require frequent cleaning. In order to understand whether the air conditioner needs cleaning work, you can carry out an experiment. To do this, you should disassemble the device; if the filter is already completely clogged, then next time you need to do this a little earlier, and if the filter is still clean, then the procedure can be postponed until later. Also on some modern models, you can determine the level of filter contamination using an indicator that provides information about the current level of contamination.
In some residential areas where there is perfect order, daily wet cleaning– filters are changed only once a year. But this, of course, is an exceptional moment.
Ideally, the air conditioner requires cleaning every two weeks. Proper and regular maintenance of the device will ensure a pleasant and comfortable atmosphere in the house.
Conclusion
Thus, it is clear how to disassemble the indoor unit of the air conditioner, and there is absolutely nothing complicated about it.
You just need to stock up on a little patience, some free time and no distractions.
Disassembling on your own will help in preserving family budget and will give new experience, which will be very useful in the future. Air conditioners need to be cleaned periodically and calling a technician every time is not only expensive, but also not always convenient. As a rule, you have to wait for specialists and adjust to their arrival time.
And the ability to tinker and understand technology also brings moral satisfaction.