Panel for kitchen with their own hands - 4 master class
The panel for the kitchen on the wall with their own hands is perhaps the most budget and easy way to bring a highlight and style to the interior. Today you will learn about the four simple ways to create an interesting panel - you will only follow the proposed instructions and enjoy the result.
Homemade panel - one of the most budget and at the same time stylish kitchen decoration options
Panel in different interior styles
To create a truly organic and stylish decor, it is not enough just to draw a cup of coffee on a skidder and call it a "picture". Pole must match the overall style and the topics of the kitchen.
Installation must comply with the existing interior
Especially for you, we picked up a few win-win combinations.
- For classic and country style. In this case, the most successful option will be images with fruits, vegetables and plots from rustic life. Very effectfully, panels made from croup, dried fruits, spices or dried colors will look.
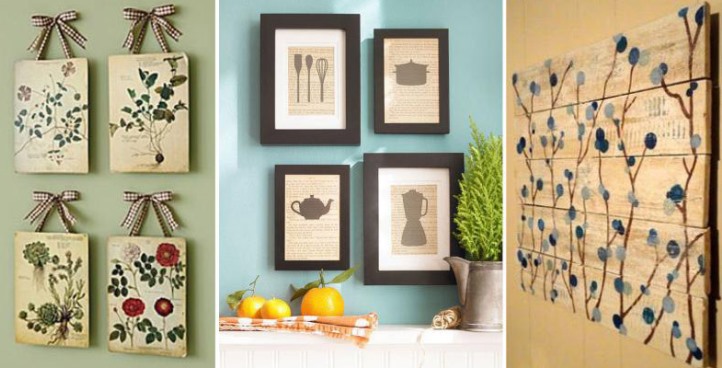
Images of plants or kitchen utensils - the best decor for the country of the interior
- Modern style. It will great, graphic images with unusual color combinations will be perfect.
Panel from tiles perfectly fit into the kitchen in Modern style
- Loft. Decorate the cuisine in the Loft style is quite simple - in the process you can use many remedies. You can create combinations and mosaics from wine plugs, newspapers, wallpaper or specially aged book pages.
When decorating the cuisine, Loft into the course can go the most unexpected items: newspapers, rolling, buttons or wine tubes
- Scandinavian. Images are suitable with geometric shapes decorated with bright threads, rhinestones, sparkles or buttons.
Bright geometric patterns will dilute the monochromicity of the Scandinavian decor
Four master class on creating homemade panels
In this section, we will tell you in detail how to create stylish accessories with the help of pride. Today you will learn how to create an original panel with a decoupage technique, from newspapers, seasonings and even wine plugs.
Create panel with your own hands much easier than you could seem
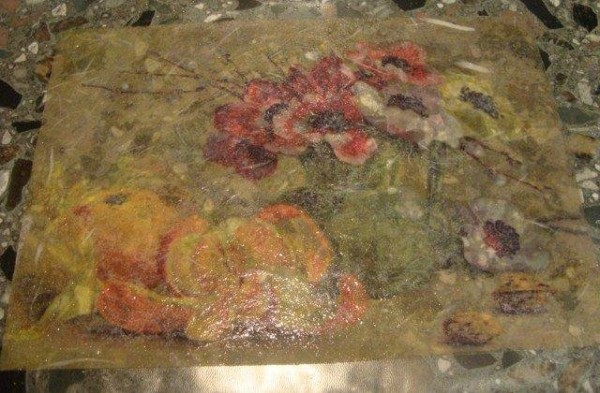
Master Class 1. Panel in Decoupage Technique
First of all, you need to prepare all the necessary materials, tools and choose a drawing of the future masterpiece.
Drawing for decoupage can be absolutely any
To work, you will need:
- organite - 2 pcs;
- pVA and brushes glue;
- rice paper with a selected pattern and acrylic soil;
- file and sponge;
- acrylic paints.
Film is better to shoot immediately after the egg broke. So she will be separated much better. But if you forgot, then enough to soak the shell in water, however, the film in this case will be more difficult to remove.
When everything is finished at hand, you can move to the creation of panels.
| Illustration | Instructions for action |
| Basic primer. To begin with, it is ground with a smooth side of an organity. Then the sponge is applied white acrylic soil, it dries almost instantly. | |
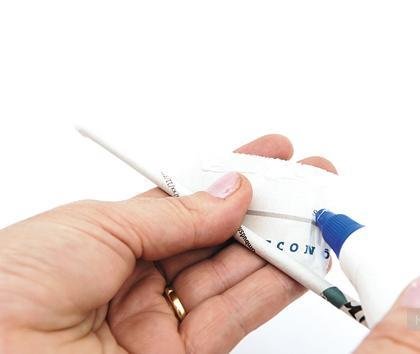
| Applying Krakla. On a small plot we apply glue PVA. We put a small piece of egg shell. Take the toothpick and click on the shell in those places where we want it to burst | |
| Creating a main coating. After sharing the shell on the necessary pieces, we stretch their toothpick for the desired distance. If there is a green stamp on the shell, such pieces are best not to take, as they will appeal through the paint. | |
| Bonding and primer. When all the organic is covered, applied over the shell glue PVA - for the reliability of gluing. Leave to dry, best for the night. After the glue is dry, we take a sponge and apply acrylic soil. Then by the hairdryer or waiting for the complete drying of the soil. |
|
 | Application of drawing. Gently take the file and apply to the workpiece with rice paper so that it lay exactly, spread the roller or hands, look so that there are no bubbles. |
| Finishing stage. Remove the file, wait for the paper to completely dry and cover it with a layer of glue for decoupage or plow glue. With the help of acrylic paints, try some places at will. |
Master class 2. Panel from newspaper tubes
Similar decorative panel in the kitchen with your own handsit is perfect for creating a kitchen in Scandinavian or loft style.
Adding numbers and clock mechanism, you will get unique kitchen clock
It will take some things to create it:
- newspaper sheets;
- a hammer;
- paints and brushes;
- napkins and PVA glue;
It is necessary to act according to the following scheme.
| Illustration | Instructions for action |
 | Preparation of newspaper sheets. Separate them from each other, turn into a dense tube, and the end will fasten with the help of PVA glue. |
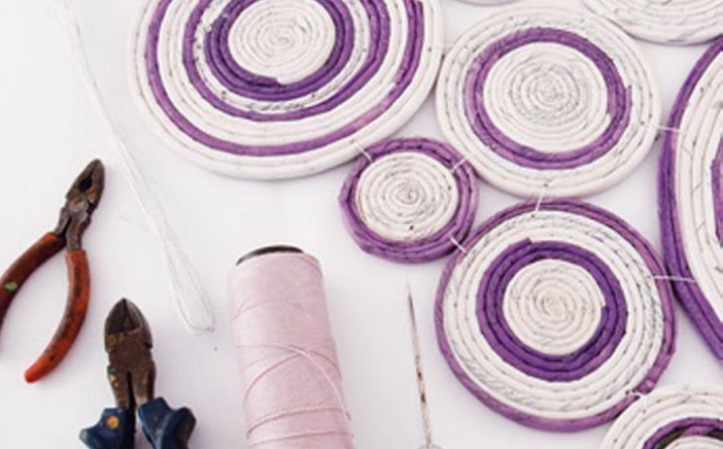
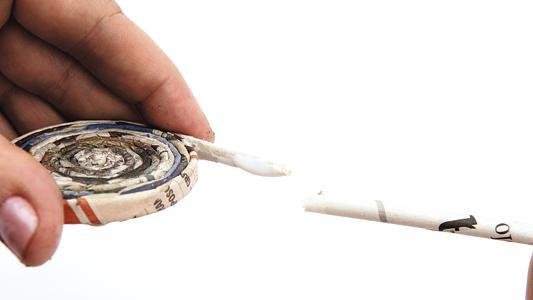 | Twisting tubes. Grilled dense tubes roll into a ring and glue with the end of another tube. Continue until you get a round basis. |
| Surface leveling. After they twisted all our tubes and obtained the basis, they beat it with a hammer, which will allow us to align the surface. | |
| Painting. Poss the resulting base into a monophonic color (best white). The edges of the panel paint paint, which will be darker than the middle. This will allow us to make the basis more expressive. | |
| Application pattern. We take the prepared and carved napkin for swimming, glue it to the panel and fix the result of varnish. |
That's all - ready-made kitchen panels. You can safely decorate your kitchen.
Here is another example of how you can decorate the wall with newspapers
Master class 3. Collage of spices
One of the simplest and at the same time stylish options for decorating the kitchen.
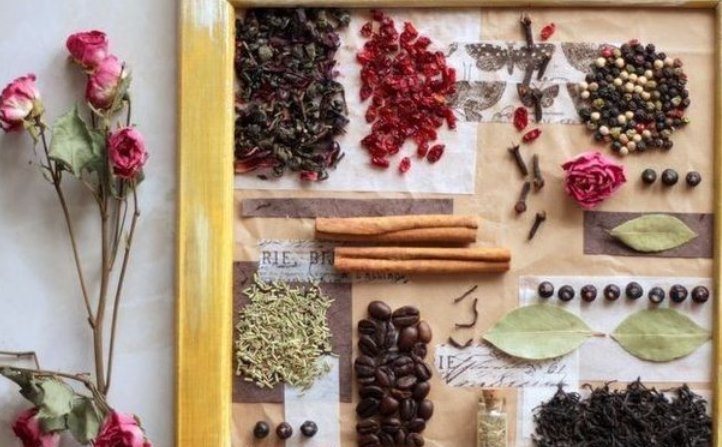
To create a panel, you can use everything that is in the kitchen: seasonings, tea, coffee, spices, etc.
To create it, you can use:
- decorative frame;
- tea leaves, herbs, seasonings, coffee;
- pVA glue and tassel;
- acrylic paint for frame;
- decorative tape, scrapbooking paper and kraft paper.
Creating a collage is carried out according to the following scheme.
| Illustration | Instructions for action |
| Preparation of the frame. Poss the decorative frame with a gold or bronze acrylic frame. | |
| Grinding. When the paint on the frame will finally dry, polish it with a nail file. So you will have an interesting structure. | |
| Creation of composition. At a piece of dense cardboard, glue kraft paper, combine it with paper for baking and handmade paper. | |
| Application of spices. Apply PVA glue on the selected pieces, then sprinkle suitable cereals or spices on it. | |
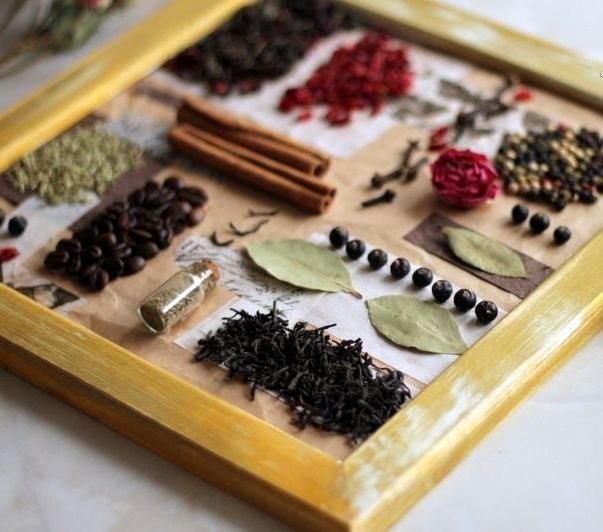 | Final stroke. Krepim cardboard to the frame and enjoy the result of a stylish panel, the price of which is minimal. |
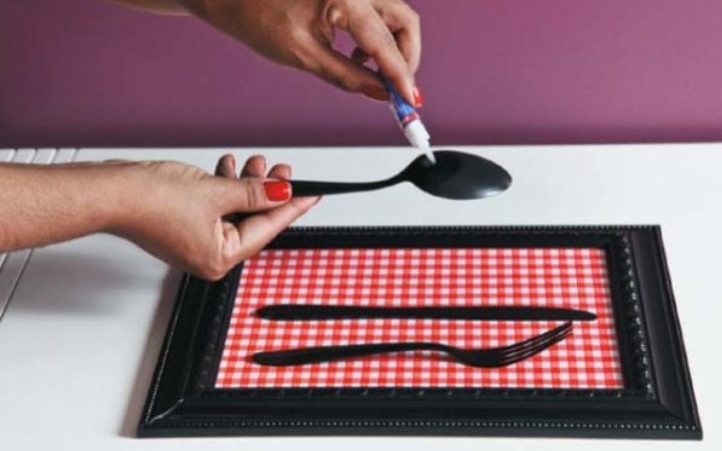
Master class 4. Applique from wine traffic jams
If you have "fenced" in your house, posters in high frames that have already fed up, they can be easily and fairly and quickly updated.
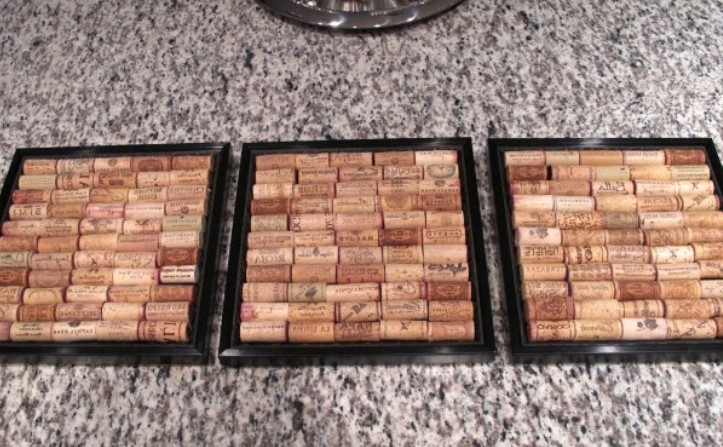
Laconic and stylish design will decorate a minimalist interior
To do this, you will need:
- dark paint;
- adhesive gun or glue "moment";
- wine plugs.
| Illustration | Instructions for action |
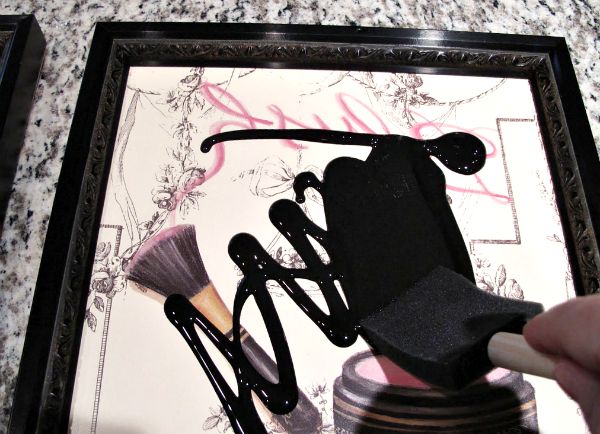 | Painting Basics. Remove the photo from the frame, and the substrate is cut into the selected color. |
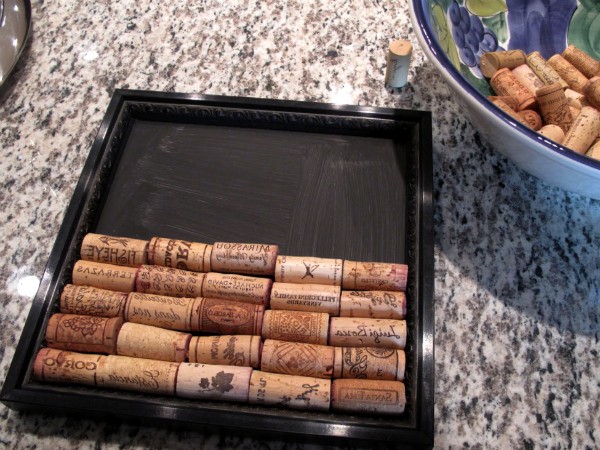 | Marking. Place the plugs (until they should be glued). You need to choose materials that will be combined in size and can take the entire plane frame. |
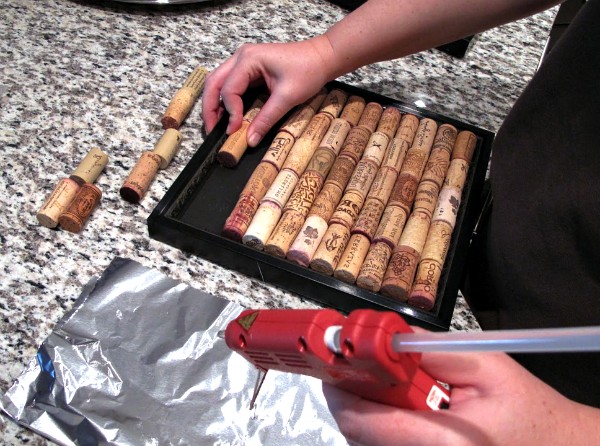 | Stowing. Now one start glue the plugs to the base. In the process, you can use both a glue gun and the glue "moment". |
Conclusion
Today we reviewed the features of the creation of four types of panels for the kitchen. Apply the knowledge gained in practice and get a stylish decorative thing in your home. An even more entertaining information can be found on the video.