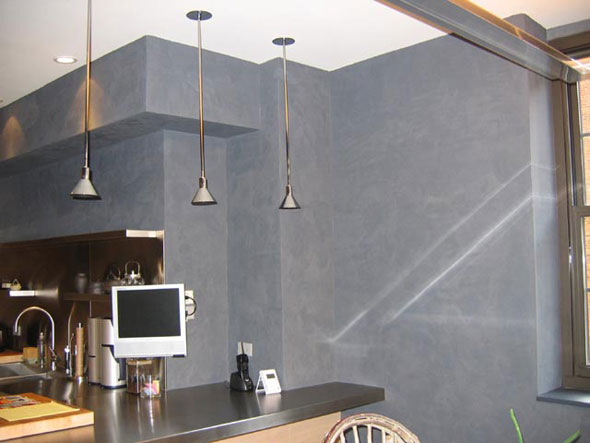
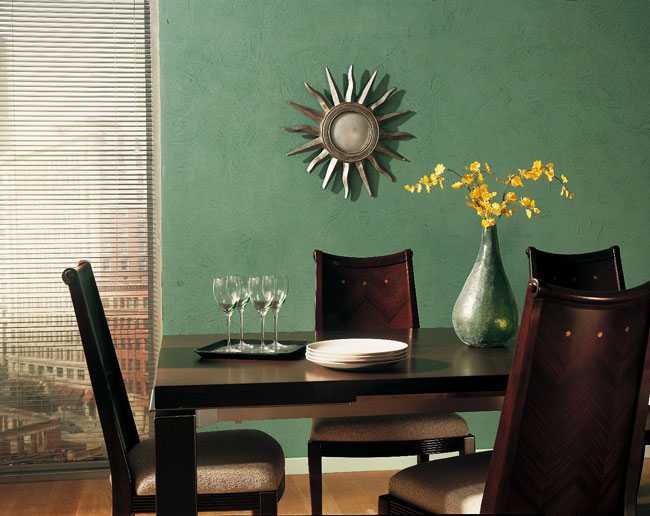
Venetian plaster in the kitchen interior: applying technology with their own hands, photos of finished works
Venetian plaster - Popular finishing material with a centuries-old history. It is used not only in the process of repairing living room or bedrooms, but also in the kitchen. This unique coating makes the room more cozy, so family gatherings become even more pleasant.
This article will help the novice master on its own decorative decoration on the walls in the desired room. It also presents a list of all the necessary tools that will be required during the work. Detailed photos and video lessons will show the process technology, will reveal all the details and secrets of experienced masters.
Decorative finish has a large amount of advantages that have made it popular among the population. These include:
- durability;
- practicality;
- moisture resistance;
- resistance to ignition;
- ecology.
To fulfill the walls of the walls of Venetian plaster, you do not need to be a professional master, it is enough to know:
- technology work with material;
- features of its use in practice;
- principles of application during repair.
What is Venetian plaster
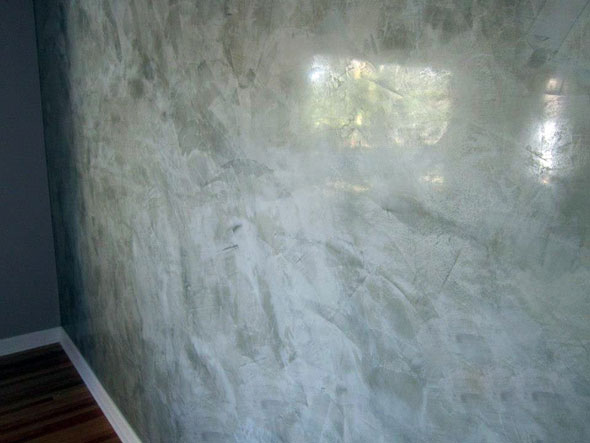
This is a versatile material. It is made from marble dust and acrylic polymer. With the help of Venetian plaster, stylish and fine coatings for walls of both matte and glossy textures are created. The finish is obtained so natural that it is practically impossible to distinguish from the surface of the stone, marble, travertine, etc.
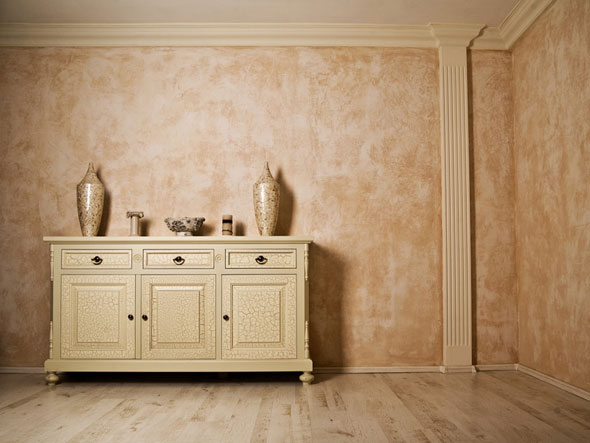
Important! Venetian plaster is used for kitchens equipped in a classic format, as well as in the stele minimalism, Ar Deco and Modern.
Disadvantages of material
Although the Venetian plaster has a lot of advantages, it also has significant disadvantages. These include:
- cost (this is a very significant factor, since not every person is able to afford such expensive material);
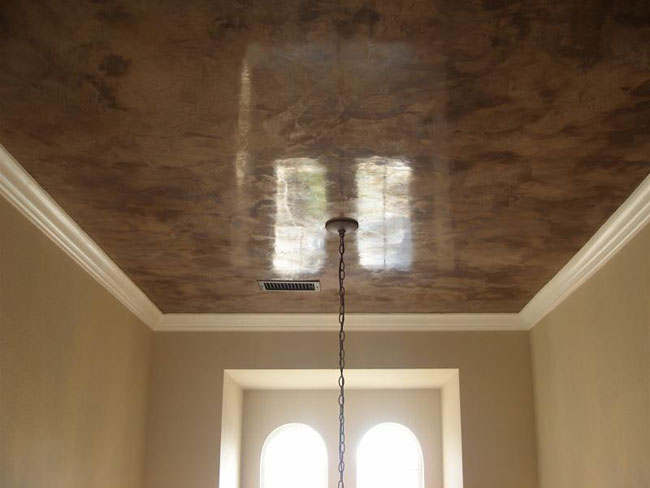
Venetian plaster - Very durable material
- high strength, which is very interferes while disassembling finishing (in the process of new repair work).
Council. In order not to spend the forces on the removal of the old layer of finishing (this is a very laborious process), experts recommend to apply a new coating on top of it.
Technological process of working with plaster and applying it on the walls of the kitchen
The process itself is quite laborious, as it includes several consecutive stages. So that work turned out to be effective, it is necessary to take very seriously and responsibly to each of them.
Decorative finishing technology consists of:
- Preparation of all necessary tools.
- Preparation of the wall surface.
- Preparation of material for work.
- Apply plaster.
- Applying special decorative wax on the entire surface of the Venetian finish.
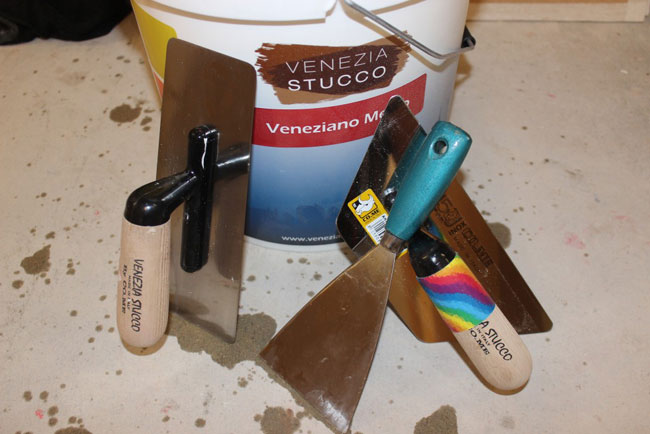
Preparation of tools for work
By this time, it is necessary to take it particularly carefully, so that it is not to run towards a neighbor for the missing tool. For work it will be necessary:
- buckets or thase (for the preparation of material);
- drill with a special nozzle mixer;
- special construction spatulas;
- trowel;
- roller;
- special polishing machine;
- sponges and pieces of cotton fabric;
- building level;
- master OK;
- topor.
Preparation of the wall of the wall
Important! From the correctness of the execution of this item will depend on the final result of the wizard.
Before proceeding to applying Venetian plaster to the surface, it must be prepared.
- The first stage of work is the level alignment. It is performed by plasterboard sheets, plaster or special latex putty.
- The second stage is the processing of the primer mixture (deep penetration). It reliably protects the surface from the appearance of malicious fungi and mold.
- Third stage - applying a shelter primer. It will provide improved fastening of plaster with a treated surface.
- Fourth (final) stage of preparatory work - removal of irregularities on the treated surface. For these purposes, a grinding machine or sandpaper is used.
Important! The wall before applying the decorative finish should be dry, smooth, smooth and without cracks.
Preparation of material for work
This is the easiest stage, it includes only the preparation of decorative plaster to applying the wall. In order for the color of the finishes to fit the desired, it is necessary to add a special dye into a container with a finished mixture (it is recommended to use a drill with a nozzle-mixer for uniform mixing).
Application of decorative decoration on the prepared wall
Important! Before proceeding to apply plaster on the prepared surface, you must make sure that the primer is completely dry.
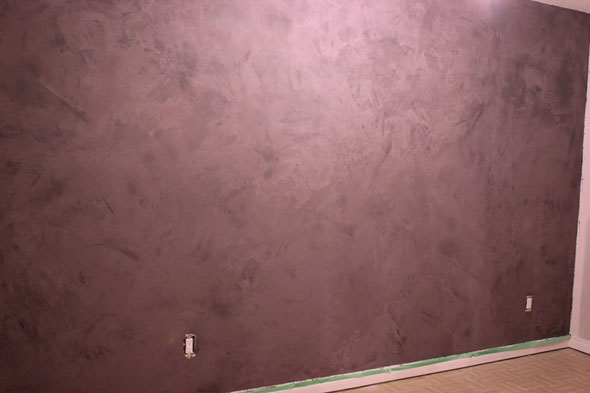
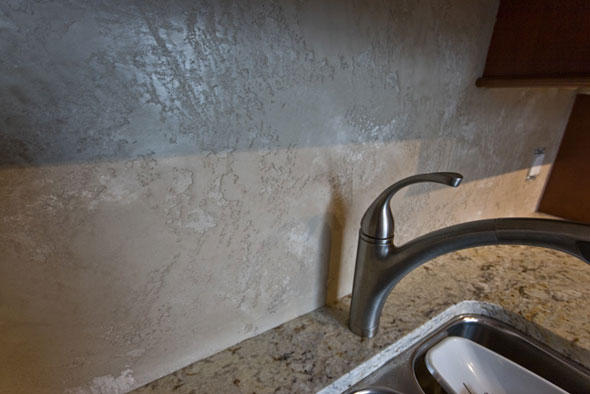
To form a beautiful and stylish decorative finish on the wall, they are consistently applied from 3-4 layers and up to 10. Before each new layer of plaster, be sure to determine the previous on the irregularities or protrusions, as shown in the photo.

Layer application technology:
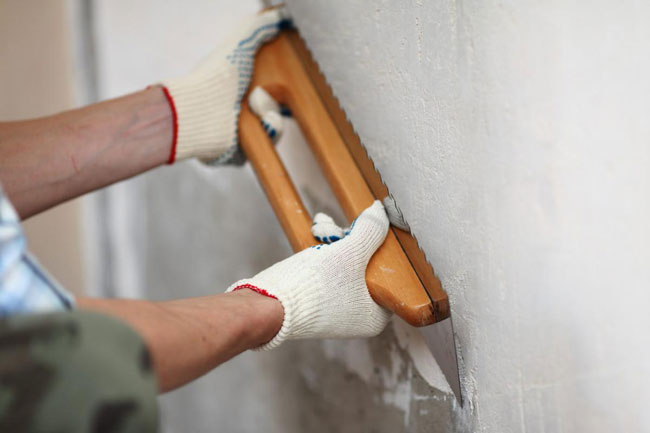
- The first layer serves as the basis for decorative decoration. It is applied using a spatula or a special Venetian Kelma (a layer must be even and neat).
- The second and subsequent layers (how much will decide to make a master) - they are applied with spots, with the help of a special spatula, until the moment, the beautiful picture does not start on the wall. Each of the coatings are allowed to dry completely (sandpaper, grinding is used to remove the irregularities, grinding with light circular motions or use a special grinding machine).
- After the last layer is driving, proceed to the processing of the wall surface to show the drawing of Venetian plaster. For polishing, a spatula or Venetian Kelmma is used (you need to work carefully so as not to damage the finish).
Important! The stains of each of the layers should not be superimposed on each other.
Application of decorative wax
This is the final stage of work. The substance is applied to protect the decorative decoration from moisture, which is relevant for kitchen premises. Wax is sold in construction stores, so that his acquisition will not deliver unnecessary trouble.
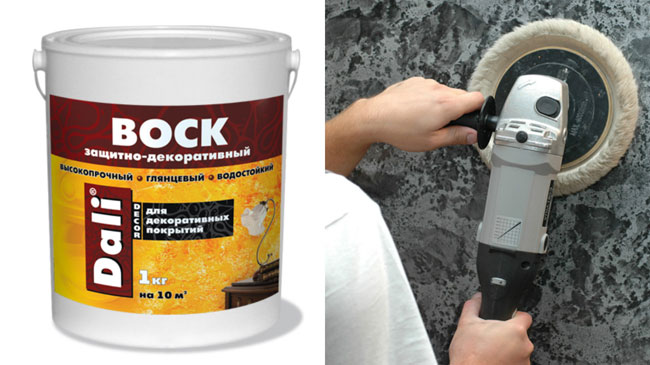
The technology of applying wax on the surface of Venetian plaster:
- A decorative wax with a special spatula is applied to the dried surface of the Venetian plaster (after one). The layer makes thin to prevent its cracking and squeezing.
- After 1 hour, it is started to grind the wax surface. For these purposes, a special nozzle is applied (it will work out, without damaging the finishing itself).
- The treated surface is allowed to dry completely, this will take 2-3 weeks.
In this work there is nothing terrible, dangerous or heavy. The main condition for obtaining a good result is the observance of the technology of applying decorative finishing on the prepared surface. Try, try, everything will be necessary!
Applying Venetian Plaster: Video
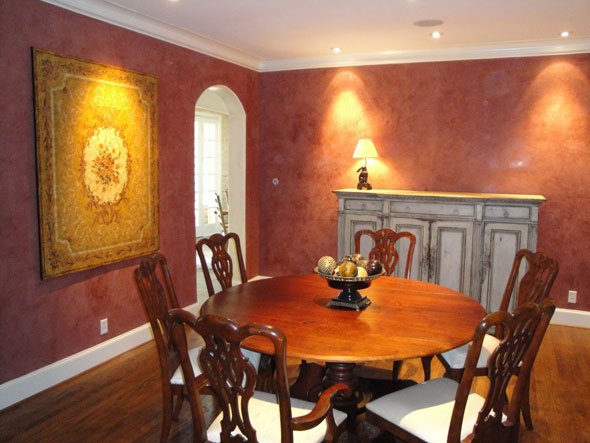
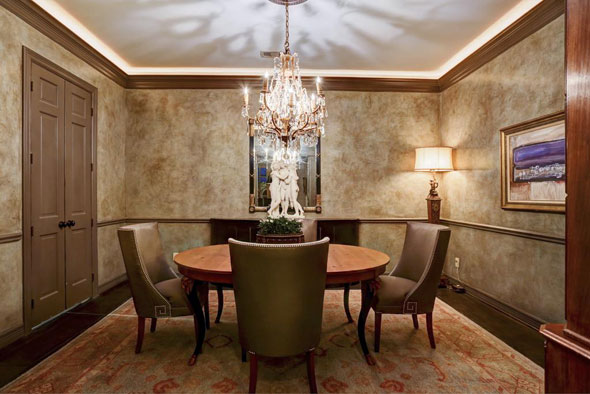
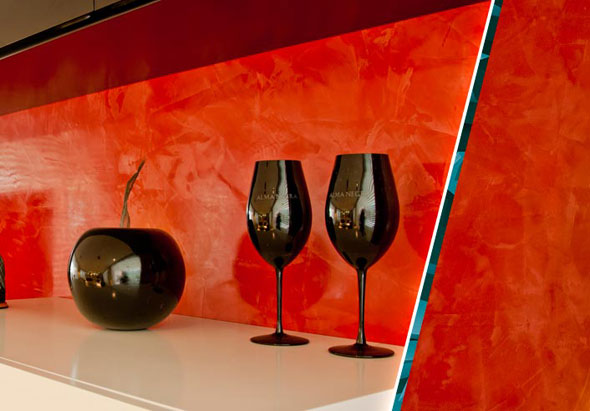
Venetian plaster in the kitchen: photo