Decorating walls in the kitchen with MDF panels: quickly, beautifully, inexpensively
Sooner or later, every person needs to decorate kitchen walls: someone becomes the happy owner of a new apartment, and someone just decides to update the interior. This can be done in dozens of different ways, ranging from simple painting with water emulsion and ending with laying out complex patterns from mosaic tiles. Often, the more beautiful and practical the finishing material, the more expensive it is, the more knowledge, experience and time is needed for its installation. But what if you want to spend a minimum of time and money, while getting an eye-pleasing result? Decorating the walls in the kitchen with MDF panels is a great way out!
With their help, you can arrange a kitchen "apron" or other sections of the walls without much effort, because to install MDF panels you do not need to be a professional builder or have a huge set of tools. What are these panels?
MDF panels: production technology and properties
Such panels are produced from finely dispersed wood dust, which is pressed into sheets under high pressure and at temperatures up to 2100 degrees Celsius. In order to obtain a homogeneous plate, a special substance (lignin) is used, which binds particles of the fine fraction of the shavings and turns it into a monolith. As a result, the density of MDF is much higher than that of fiberboard, and outwardly it turns out much closer to the solid wood. The thickness of the panels can be up to 16 millimeters.
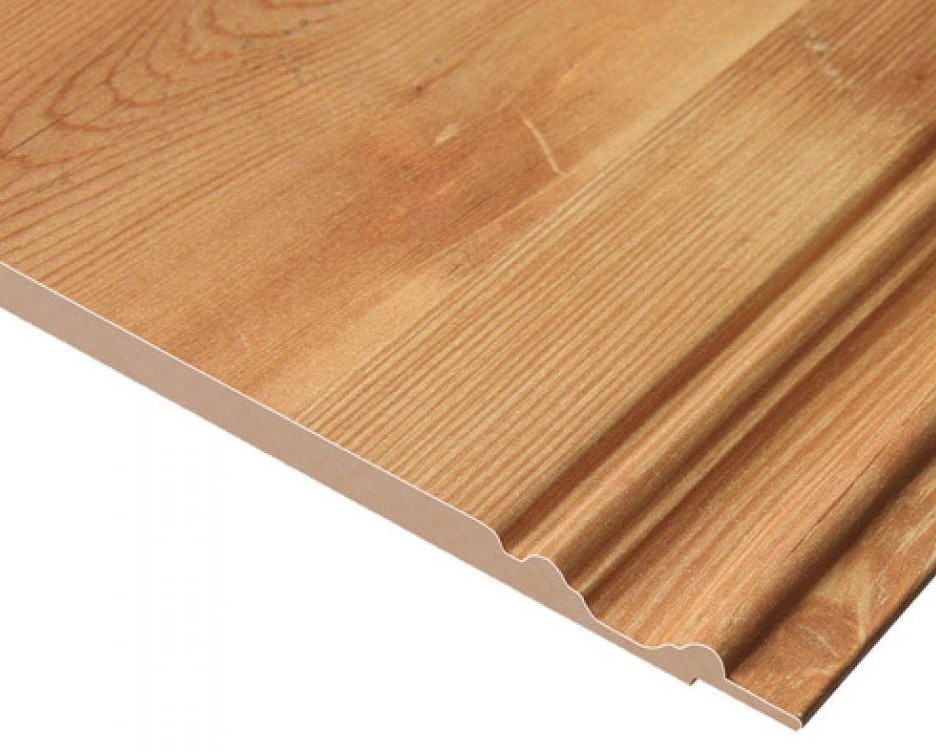
Another difference from fiberboard - panels are much easier to cut without chipping and crumbling... The material turns out to be sufficiently moisture resistant (the level of moisture resistance is indicated on the package), practically does not change size during temperature changes and provides excellent insulating characteristics. Manufacturers even offer fire-resistant MDF sheets, in the production process of which special additives are added to the composition - fire retardants, which provide fire-resistant properties.
Kitchen decoration with MDF panels is increasingly found in the interior of apartments and private houses. Why are consumers so fond of these panels?
Advantages of MDF panels

- The most important advantage is that it is easy and convenient to mount MDF, even a novice "home craftsman" can handle it. Complex equipment is also not required: panels are sawn with a jigsaw or a conventional hacksaw. During the installation process, you do not have to worry about dust, debris and dirt.
- The material provides excellent sound and heat insulation, and to increase the level of the latter, you can additionally place insulation in the free space of the frame. You can also hide wires there.
- The coating is quickly repaired: if any of the panels is damaged, it can be effortlessly detached from the base and replaced with a new one.
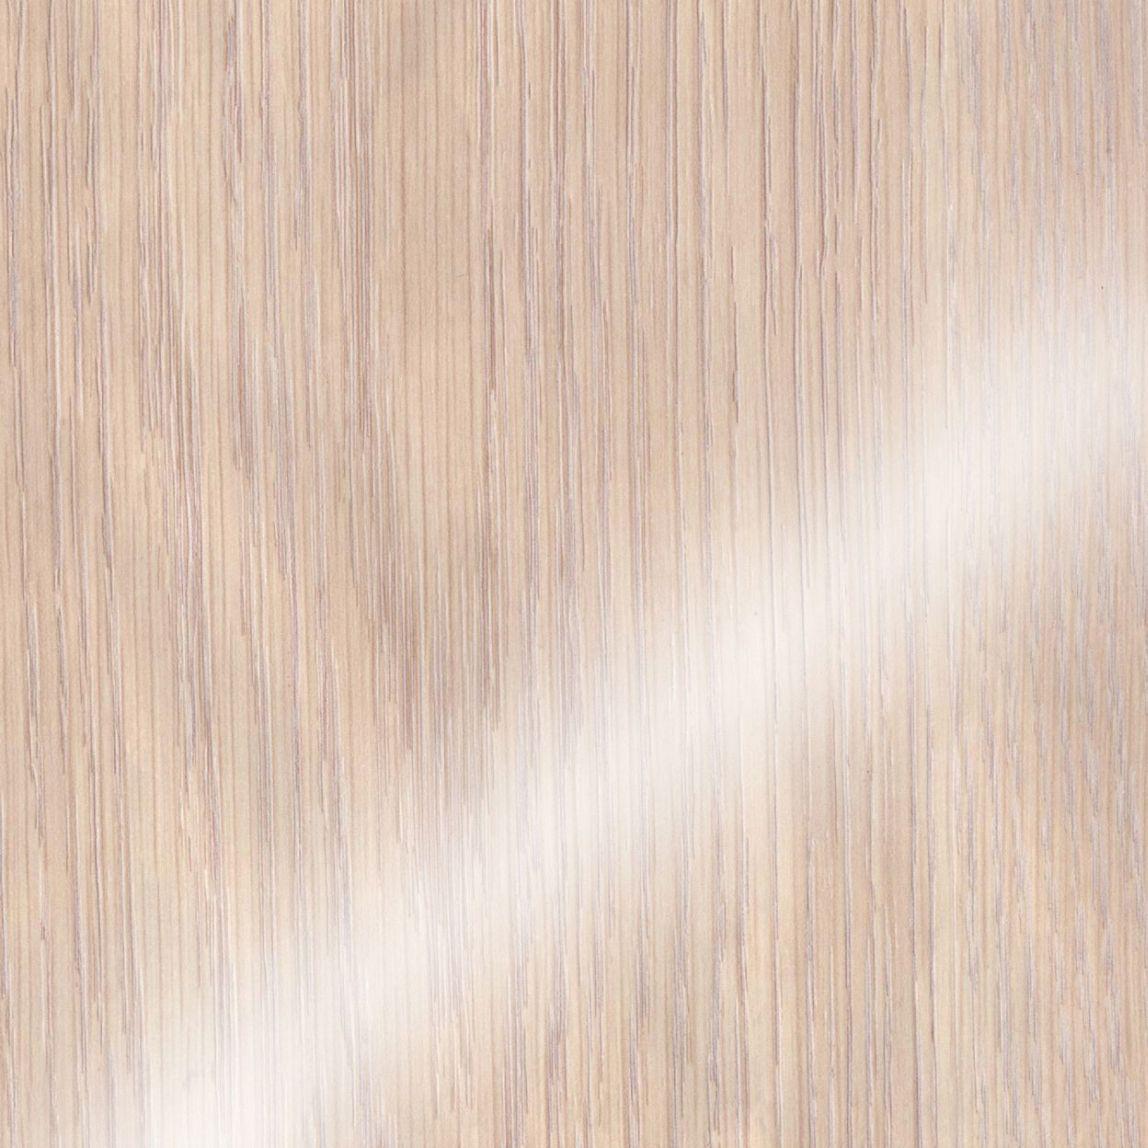
- MDF will easily fit into any interior. There are hundreds of color options and a wide variety of textures on sale, so choosing a color that fully matches your sense of beauty is not difficult.
- A very important advantage for the kitchen is that the panels are easy to clean, and in the absence of contamination as routine maintenance, it is enough to wipe them from time to time with a damp cloth with a non-abrasive cleaning agent.
- And finally, MDF is an inexpensive material that even retirees or families with a very modest budget can afford.
Correct installation of MDF panels
Although decorating the walls of the kitchen with MDF panels is not so difficult, for its correct implementation, you must follow a certain sequence of actions that you will find in this article. First of all, you need to prepare all the necessary tools and materials. Here are the main ones:
- Panels to match your kitchen finish.
- Kleimers.
- Finishing corners.
- For metal frames - hangers and UD profiles.
- For wooden - slats 40x20.
- Screwdriver.
- Impact drill or hammer drill.
- Roulette and pencil.
- Jigsaw or hacksaw.
- Level.
Decorating the walls in the kitchen with MDF panels is preceded by a complete measurement of the room or the required part of it. After you take measurements, you need to calculate the required number of panels, which will be enough for you to cover the entire area. If you need to form a corner, for this, special finishing corners are used, which are two separate strips, fastened with a decorative film. Their number must also be calculated in advance.
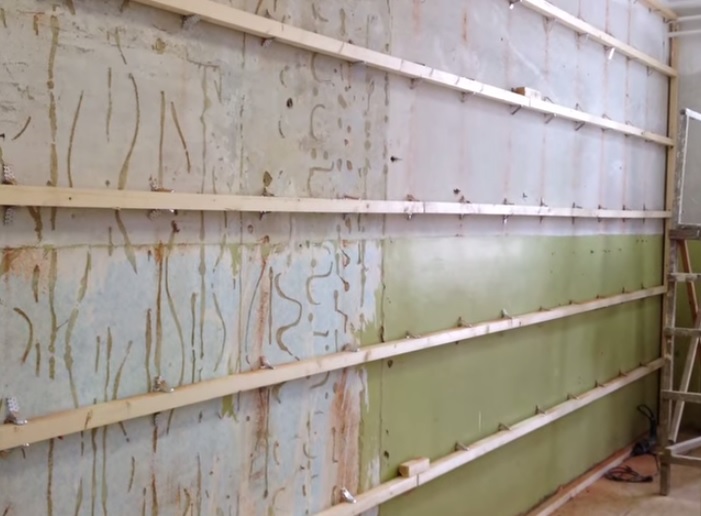
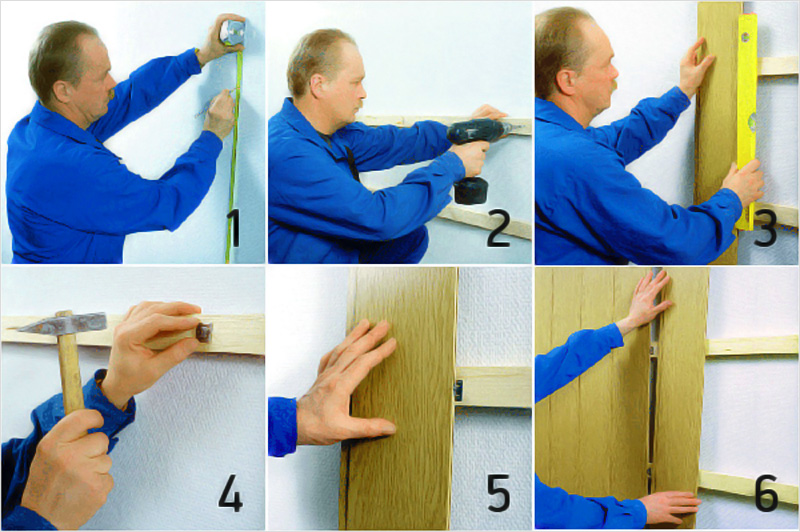
The panels are mounted on a special frame, usually it is made of wooden slats with a section of 40x20 millimeters - this will be the easiest installation to do. They are attached to the wall using dowel-nails or self-tapping screws and plastic filler. Pay attention to the fact that the lathing is even both vertically and horizontally, for this you will need an ordinary building level.
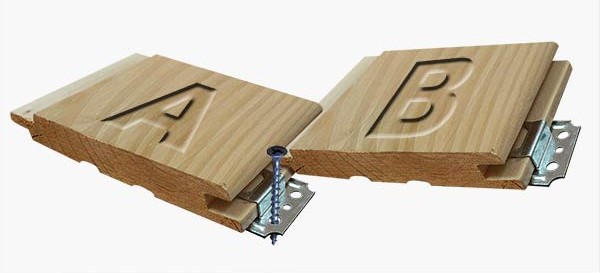
The panels themselves are attached to the base using special brackets (clamps) and small carnations. The design of the cleats allows them to be fixed in the grooves of the MDF sheets intended for this, after which they can simply be nailed to the crate. Finishing corners are fixed with liquid nails
Installation of MDF panels: subtleties and secrets
Decorating the kitchen with MDF panels is a process that is quite accessible to every "home craftsman", but in order to produce it efficiently, you need to pay attention to the following:
- The nicest point. You do not need to pre-clean the surface (be it wood, concrete or brick), even if it contains old paint, various types of wallpaper or decorative plaster. You do not have to bother yourself with surface preparation by leveling, as well as applying putty and plaster. But you may need to do some things. The first is the dismantling of old skirting boards, and the second is the treatment with a special deeply penetrating disinfectant protective agent in places where mold and mildew may form.
- The point from which you should start installing the battens is the most protruding part of the wall. It is worth starting the installation with it, fixing the thinnest rail there. In places where depressions are observed relative to the common surface, thicker slats should be fastened. As a result, you should get a more or less uniform frame for the panels, but if somewhere it deviates from the horizontal or vertical by 0.5-1 millimeters, this is not so scary.
- It is imperative to observe a step of at least 400 millimeters. If it is larger, the panels may bend.
- Laying the planks should start from the corners, with the very last piece being laid in its entirety. To comply with this rule, once again check all preliminary calculations, attach the strips to the wall and see how they will be installed.
- There should be a thorn of the part in the corner, after which it is necessary to insert a pre-prepared kleimer into the groove (along the entire length, they will need to be used on average from four to six). The kleimer is screwed to the wooden crate with a screwdriver. The opposite edge is easier to attach - for this it is enough to use ordinary self-tapping screws for drywall. To prevent the hats from sticking out, use a drill (8-10 millimeters in diameter), making grooves under them.
- Subsequent strips are simply inserted into the groove of the previous element. Thus, the entire canvas is typed. If you need to form joints or side edges, this is done using corners that are glued to liquid nails.
- The bottom joints are closed with decorative skirting boards. Most often, they are attached with ordinary nails or self-tapping screws, but you can also do this with a glue-sealant. The ceiling joint is best done with a corner.
- If you need to place a switch or an electrical outlet in the panel, you can make a hole for this using a drill with a special crown. In addition, you will need a socket box (special mounting box), similar to that used when working with drywall.
Decorating the walls of the kitchen with MDF panels can be done not only over the wooden lathing.